


TLOR - The Little One Reloaded
This is a little robot I started building over the easter holidays just for fun. It has no special purpose nor any functionality that would be considered "cool". Just move around and avoid bumping into things.
Maybe I'll add an RGB Led to the table tennis ball so it can display it's status.
The code can be found on GitHub: TLOR
TODO:
1. Add Sharp GP2D12
2. Remove ugly sticker from front :P
3. Replace 7805 by LM2940 low drop out voltage regulator
4. add RGB LED to the table tennis ball to display status
The robot uses two hacked servos to drive and the front "wheel" is actually just a table tennis ball cut in half and glued to the bottom of the ol' lab drawer (that's what the grey thing was originally 'bout 15 years ago XD).
Ok so now here are some pictures:
This is the board which basically is just a small ATmega8 board that I had left over from my other bot (which I have changed completely now) . The small board with the 7805 voltage reg. and the servo connections I added afterwards, because originally the board was powered over the I2C-Bus by the master.
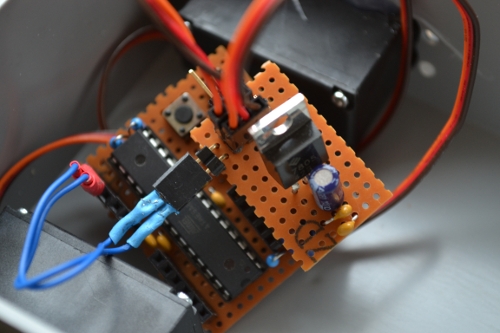
This is the MCU board from the side. Here you can see the little addon board with the 7805 and the servo and battery connectors.The two blue wires are used to get the servo signals from the MCU to the servo connectors on the addon board.
It's a little messy on the bottom side of the board ;)

========== Update 09th of April 2012 ==========
Added the Sharp GP2D12 IR sensor to give TLOR "eyesight".
========== Update 12th of April 2012 ==========
So today the missing parts arrived (battery holder, LM2940) and of course I immediateley continued with the build :)
So the first thing to test was the stability of the LM2940 because the ESR of the output capacitor is crucial, but everything was fine there.
Next was to connect all the electronics to the voltage regulator board. Everything ok until - you guessed it - I connected the battery. And we all have faced this problem already, poof and the magic blue smoke appears.
Immediateley disconnected the battery to nearly burn my fingers on the left hand servo -.-
After opening up the servo a realy bad smell filled the room (ok maybe not the whole room :P ) and I found this (the board in the back):
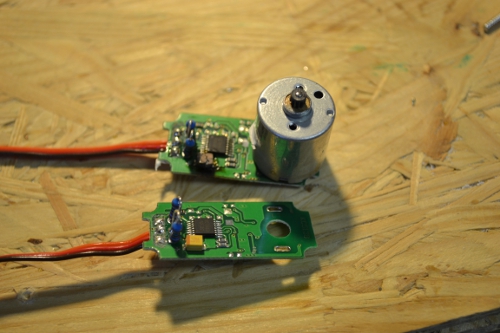
You can clearly see that something must have gone wrong, right?
The board in the front I luckily had left over and the black thing on the board in the back is the input capacitor of the broken servo.
If you haven't yet seen how a disassembled servo, it looks something like this:
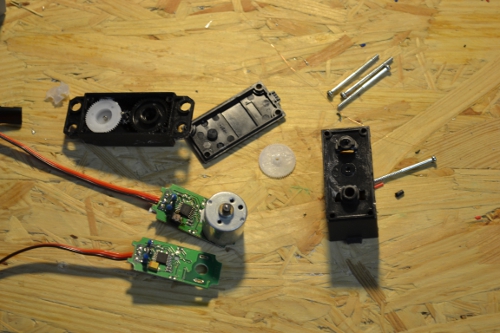
So I went and desoldered the motor from the fried board and soldered it to the new board, assembled the servo put it back in.
The broken servo dropped the voltage from my batteries from nearly 6.5V to 5.5V.
I have also added a diode to protect it from the battery being connected in reverse polarity, also because of the 0.7V voltage drop across the diode, this solved the problem of frying a servo due to overvoltage.
========== Update 13th of April 2012 ==========
Turned the whole bot around. The sharp sensor is now on the other side so now the wheels are in the front and the table tennis ball is in the back which makes transitions from wood to carpet / going over bumps easier.
Video will follow soon.
- Actuators / output devices: 2 hacked Servos
- CPU: atMega8
- Sensors / input devices: Sharp GP2D120 IR sensor