


The "Luna Rose"
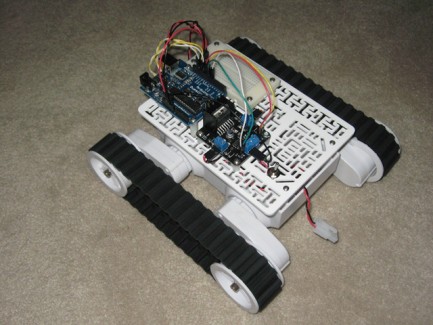
The "Luna-Rose" is my third robot, but my first robot on LMR. It is my attempt to compare for myself the strength of the Arduino Duemilanove versus the FEZ Panda. In that regard the Dagu Rover 5 seems like the perfect platform for that, due to it's unique design and the fact that it has encoders for both motors all in one package.
Eventually it my goal is to have the Luna Rose be a Semi-Autonous mapping robot.
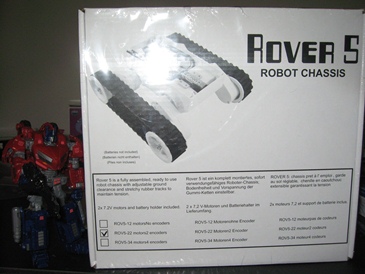
The Rover 5 version I'm using for the Luna Rose is the two motor/two encoder variation from Dagu.
For both the Arduino and Fez attempts only the MCU will be changed. Currently thee "Luna Rose" named in honor of my sister's cat that recently passed, use a DFRobot L298 Motor Controller, I had specifically chosen that controller due to it only using one digital pin per motor direction.
However I had noticed on the FEZ Panda while it boots up the motors will spin until the boot up cycle is complete, which unfortunately takes a few moments, long enough for the Luna-Rose to make a close to acomplete rotation and be aggrivating. So the original attempt to save digital pins may have backfired for the FEZ, this problem is not apparent on the Arduino. I will most likely replace my current L298 with a more conventional L298 controller that uses two digital pins for motor direction.
Currently I use Digital Pins 7-13 for the Luna. Pins 6 to 9 for the motor (6 & 9 for PWM and 7&8 for digital control), and Pins 10-13 for the two encoders.
To make code transition as painless as possible most of the grunt work has been writing code for Arduino's "Library" to use C++ classes, something that should help speed conversion to C# on the FEZ. Ironically I find I'm spending more time using Visual C++ than the Arduino IDE for programming the Arduino.
Currently work is almost completed for programming basic Arduino operations. When that is done I can focus in earnest on the FEZ Panda.
As soon as I add overloadable constructors to my libraries I will post them here. The same applies (in terms of completeness) to the .NET Micro Framework code for the FEZ Panda.
Thought On Dagu Rover 5 And Modifications
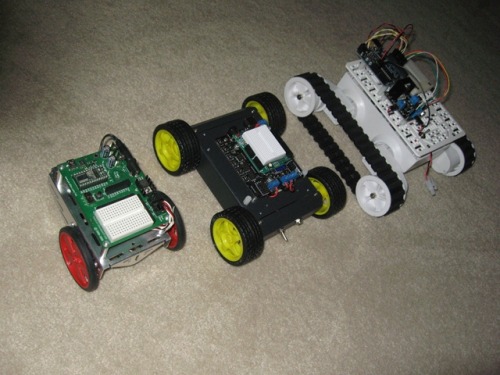
As a platform it was surprising larger that I had expect, as you can see in the above picture of it relative to the Parallax Boe-Bot and the DFRobot A4WD. Though it is made entirely of plastic it has significant heft and feels very sturdy. However the only thing that did cause some distress was the Pololu Wide Expansion Plate I had purchased seperately, which was supposed to be compatible did not fully align with the mounting holes on the Rover 5, but after a few moments with a drill the problem was alivated.
To mount the Pololu Plate I found it was more expedient to use 4-40 3/8" Nylon Standoff, which makes removal of the plate tool-less and less tramatic to Chassis than the self tapering screws to dismount; all I have to do is just pull the plate off! Which makes access to the battery much easier.
I have opted not to use the default 6 AA battery holder to go instead with a 7.2V 3800mAh battery pack, to provide more "play time"
For the encoders I changed the individual crimp housing for each wire to a single 3x2 crimp housing for each encoder, to reduce stress on wires since they seem to be 26 or 28 or less in gauge.
Battery placement:
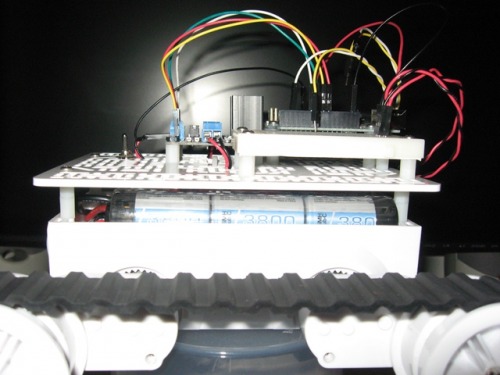
Originally I had intended to use a Velcro wire tie and have the battery hanging under the Pololu Expansion plate, but that became cumbersome and also lifted the center of gravity of the Rover something I didn't want. So I just let the battery sit parallel to the Rover's base.
Modified Wiring "Harness"
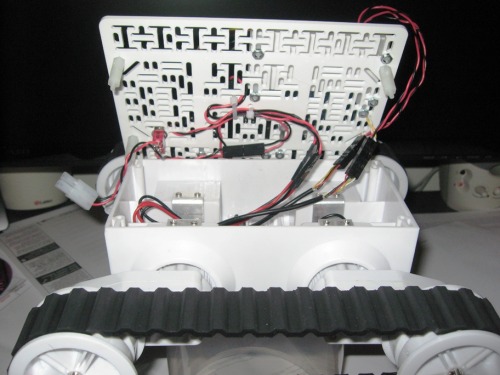
As you can see in the above picture I also changed the Crimp housing of the Motor wires, this was done since I didn't have anything that mated properly with the OEM Crimp housing and wires would disconnect if I removed the plate. The configuration at present is very stable for my purposes; plus it helps having a crimping tool for such situations!
- Control method: At first non-autonomous, but eventually semi-autonomous.
- CPU: Arduino Duemilanove (present), FEZ Panda (eventual)
- Power source: 7.2V Tamiya-style racing pack 3800mAH Battery
- Programming language: C/C++ (Arduino), C# FEZ Panda
- Sensors / input devices: GP2Y0A21YK (eventual)
- Target environment: Indoors - Carpet