


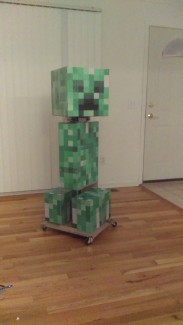
The CREEPER (aka Curt)
Hi,
I am a new member to LetsMakeRobots and so far I am very impressed with the site, the people, and the projects. I hope to learn and share with you all in the facinating and rapidly developing field of robotics and AI.
I am new to electronics as of several months ago after getting the Arduino starter kit. After working through the examples and trying several small projects I had the opportunity and idea to make animatronic figures for Halloween at my house. As a fan of minecraft I was inspired by the simple form of the characters (rectangular of course!) and thought they would be an easy way to start simple.
I will post results here for anyone interested in the project - I'll put info on build process and more details in the blog. I have a long list of possible features I'd like to try to implement I am really interested to discuss. I'd like Curt to be highly interactive and a test bed for ongoing development of novel, fun and interesting features.
Immediate next steps for the next month include animating and lighting the feet, adding ground lighting, upgrading to 10W leds, adding sound output, adding motion sensing via PIR sensor, implementing capacitive touch and vibration sensing, adding several operating modes and programmed routines.
And if I don't say individually - Nice to meet you!
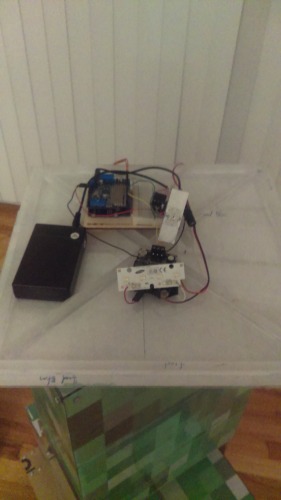
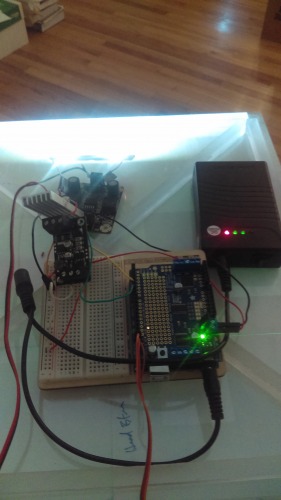
Current Equipment:
Structure:
1/16" thick clear polycarbonate figure w/ acrylic rod angle bracing.
1/4" thick clear acrylic base
Laminated inkjet printer paper skin
Control/Processing:
Arduino Uno R3 SMD programmed through Arduino IDE
Adafruit MotorShield v2
Code:
Current code for demonstration of simple head movement and lights explosion feature:
https://drive.google.com/open?id=0B-jN2Adg-YnuQ09kWkRTS2RBdHc
Power:
12V 3A-hr battery from Talentcell
Outputs/Actuation:
Std. Servo for head rotation
2W white led board and driver board w/pwm dimming
3W red led and driver board w/pwm dimming
sn400 tank chassis from Sinoning
Inputs/Sensing:
Bluetooth input from smartphone using HC-05 receiver
Currently: Programmed locomotion, head movement, and illumination patterns selected via BT/smartphone.
- Control method: Semi-Controlled
- Operating system: Arduino /AVR
- Sensors / input devices: HC-05 Bluetooth
- Target environment: indoor