


Terrestrial Explorer V2.0
This is Version 2of the Terestrial robot. it features lower power consuption motors with planetary gearboxes. This rover is meant to drive via a programmable wireless control (XBEE and arduino), log data from an array of sensors it has and log that data and send telemetry to my remote on which i will be able to view data on my 2.4 inch LCD screen. The robot will also have a probing arm to measure soil moisture. The sensors will measure
Methane Gas levels,
Hydrogen Gas Levels,
Carbon Monoxide Levels,
Temperature and Humididty Levels,
Light Intensity levels
UV, Levels
Soil humidity levels
Parts list:
Sensors
*******************************************************
Gas
MQ4 Methane Gas sensor X1
Mq7 Carbon Monoxide Gas Sensor X1
MQ8 Hydrogen Gas sensor X1
Temperature
DHT11 temperature and humidity X1
TMP36 temperature sensors X2
Light
Generic brand light sensor
ML8511-UV Sensor
Pressure/Altitude
BMP180 pressure/altitude/Temperature sensor
********************************************************
Communication:
Xbee Series 1 1mw X2
Xbee Explorer USB X1
Xbee Explorer Regulated X2
Drive:
22mm coreless dc motor x6
320 Amp Brushed esc X2
130mm diameter wheels X6
12mm HEX, 4mm bore X6
MCU
Arduino MEGA X2
Arduino UNO X1
Datalogging
SD Card module x1
LCD screen
2.4 Inch lcd screen (SPFD5408)
Chassis:
3mm 400 x 400 sheet X2
Standoffs
Batteries:
2X Dow Kokam 31AH lithium polymer cells(Yes, 31AH)!!!Control:
2X generic ps2 Joystics
4X toggle switches
6x 10k potentiometers
I will be updating as much as i can so please keep an eye out.
Stay tuned for more updates
Update #1: (Making the controller)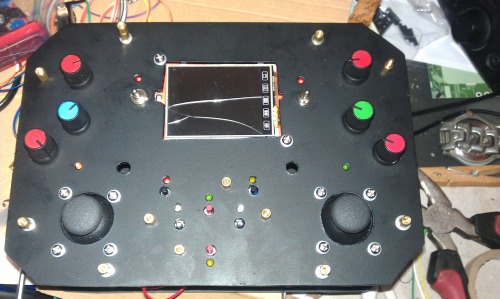
The tutorial to make this controller is HERE
The LCD Screen.
I purchased this lcd screen on eBay and for $15, its very good for graphics, displaying bitmaps, visuals e.t.c but finding libraries for it was quite a challenge. The lcd driver is called "SPFD5408" To find out how to get libraries for the lcd an getting it to work with arduino mega/uno, please watch this tutorial i made: HERE:
Update #2 (Batteries)
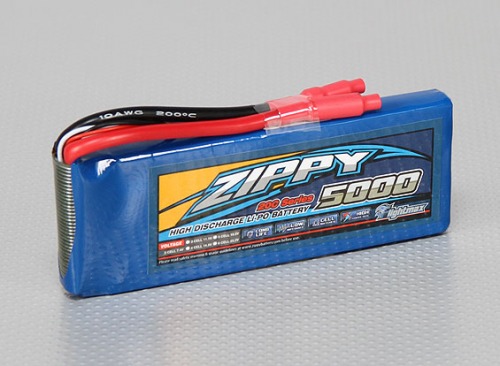
The battery i intended to use was a 7.4v Zipply 5000mah lipo battery which has a discharge of 20c.
I then switched to second hand KOKAM 31AH cells from my University's SAE team. cost was about the same at $20. These cells are huge and i will pretty much have nothing to worry about in terms of power consumption. The cells each weigh 800grams, dimensions are 220 x 250mm and can discharge up to 155A. i only need ~ 10A at most when the bot it running under normal conditions
Picture showing how i conncected the 12AWG cable to the terminals. I used Nylon screws as they came with the batteries. I am using 3 in series to make 11.1v 31AH
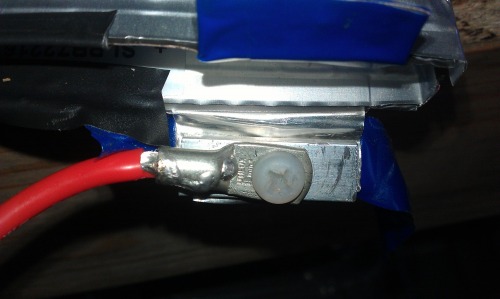
Image of the cable and lug and an aluminium bar i used ton the connections.

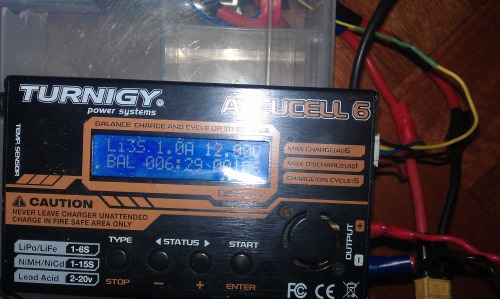
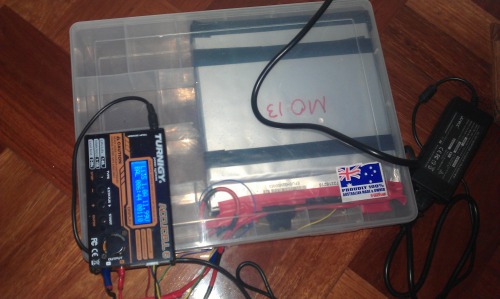
Because the batteries are big, finding a suitable case was tricky. I would up buying a 270 x 250mm case, as this was the only size that i could find in stock locally. This leaves me with space for putting my arduino. Raspberry pi and possibly my motor controllers in the same box. The image below shows the cells charging. i charge them at a 4 Amp rate, and my charger can only restore 5000ma at a time so i have to keep resetting the charger. which is not an issue.
That being said, i changed my battery voltage from 8.4 to 12.6v. so my battery specs are 12.6v 31Ah. I bet i can run this rover for days on end! here is the build process for my batteries.
Inserting balance leads!

Wiring all done. Added a fuse as a safety measure!

Busy balancing away!

Stay tuned!
*********************************************VERSION 1 **************************************************************
Update #3 The Chassis.
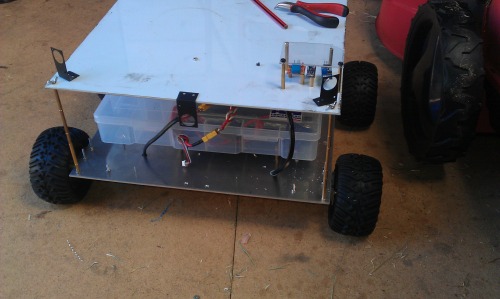
Sticking to my previous projects, i prefer using sheets of 3mm-4mm thick aluminium instead of welding a chassis, it saves me time and and money. In this project i had 2 3mm 400 x400mm aluminium sheets laying around so i decided to use them. The bottom plate will support the weight of the whole robot and the top will house the sensor array, a robotic arm and a pan-tilt camera system.. There will be standoffs between the two plates.
The chassis as assembled. One of the motor mounts needs a little tweaking.

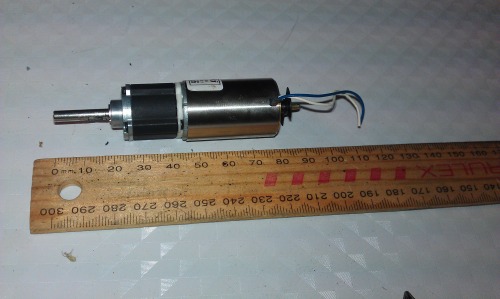
NEW MOTORS!!!
The drill motors that i had on previously were too powerful to "trust it" to drive itself autonomously, and it was too twitchy to be driven in tight spaces. I then found better motors suiting my robot.. The ones that i have now are Japanese Namiki motors. 22mm in diameter but they produce 5kgcm continuous torque and stall of 16kgcm each, making them very suitable for the robot should it get heavier.

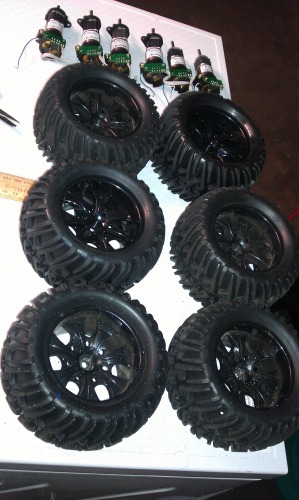
Extra Wheels
Update #4 Mounting sensors on roof
I decided to mount my sensors in 2 groups, the ones dependent on light, e.g UV, Light sensor will go on the top and the ones like gas sensors and bumper sensors will be mounted on the chassis. The ones going on the top will be shieled by a perspex panel to protect from rain and such.
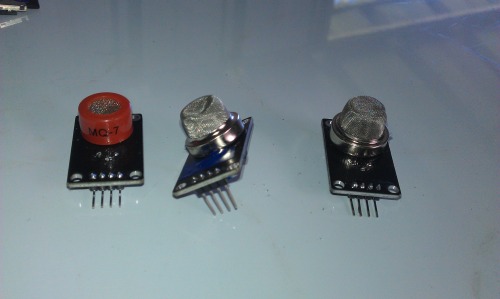
I made the gas sensor mounts using a sheet of aluminium, i then cut a hole with a holesaw. Unfortunately, my holesaw is 19mm in diamerter while my sensors are about 21mm in diameter, however it did not take much to expand the hole diameter with a curved metal file.
Pics of sensors:
Temp, UV, Pressure and light sensors mounted

Gas sensors before mounting
Making the brackets

And now painted

Update #5
Its been a while since i updated my project as i had been busy with some work.
The roof mounted on the rover:
Update #7
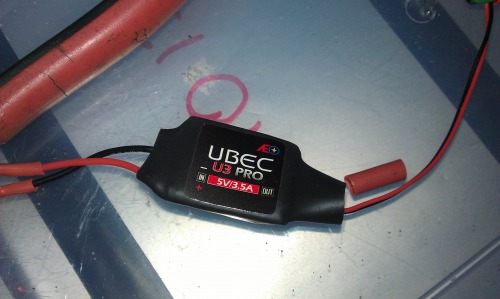
I will be using a 3.5A voltage regulator to power my gas sensors and other 5v tolerant sensors. It barely got warm while running on 12v, a huge improvement over the LM7805 regulators which prefer regulating at a lower voltage (temperature wise). This one is a switching regulator so its way more efficient and loses less power, hence the less heat.
Update #10
I decided to put my motor controllers, Arduino, datalogging module, servo and sensor power supplies in the main battery box as there was room to spare, this eliminates the need of having the grey ABS box and reduces the the height of the rover. As you can see here, its a tight fit for the motor controllers but there is enough room for everything else. 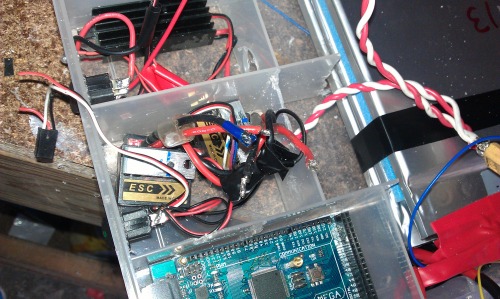
I used a 19mm hole saw to cut holes for the switches. These are LED Iuminated to indicate the unit is powered up in not so good lighting conditions. I have also cut holes for the the arduino USB connection for ease of programing, and i have also drilled a hole if i need to power the arduino via the main jack. The other hole is for the
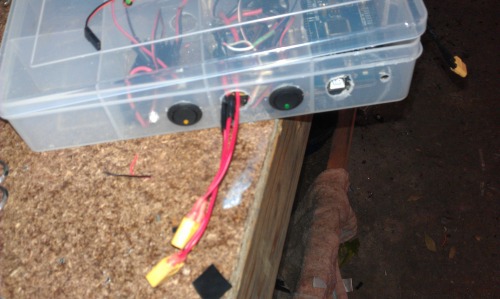
I will put a rubber grommet on that later. I then connected the cables that provide power to the motors. The 3 motors on each side will be connected in parallel to a male XT60 connector with will be connected to a female xt60 conenctor coming from the motor controllers.

stay tuned!
Update #11
Robot arm completed! Please view Tutorial here:
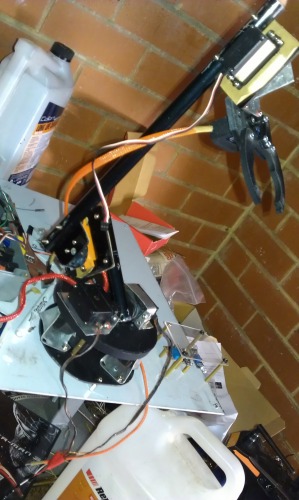
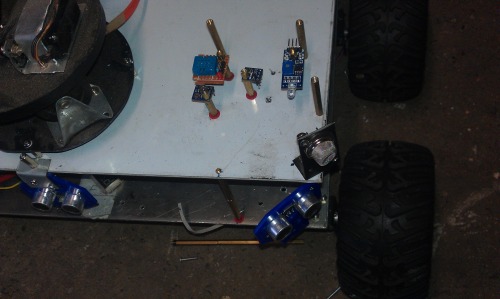
Update #12.
Some pics showing the test-fitting of my sensor array. The ones with the blue mounts are Ultrasonic sensors (HCSR04). Two sitting on the roof with black mounts are gas sensors, methane and carbon monoxide sensors. The ones on the right of the arm are: Atmospheric pressure, temperature &Humidity, light and a U.V sensor.
full picture:
Drives around, Scans the environment, gets data, logs it and transmits it wirelessly