


Survivor Bot 08M (Tank Based Robot)
I give you "Survivor Bot 08M"... if your wondering about the name, well my sister (a full grown adult) picked the robot up and thew it across the room, smashing it on hard tiles. So you could say its had a bit of a rough development / early life :)
This robot is as simple as they come, you don't even really need to know much about electronics at all - no special circuits, everything is connected to the picaxe starter kit/board... These are the components that you need:
- 1 x PICAXE 08M Starter Kit
- 1 x SRF05 Ultrasonic Range Finder (can only be connected to an ADC pinout on Picaxe 08m)
- 2 x Continuous Rotation Servo Motors
- 1 x Standard Servo Motor
- 1 x Tamiya Tank Tred and Wheel Set
- Jumper pins, wires, prototype board, wood and screws
- Some patience :)
Ideally the servo's should be powered by their own power source, however I didn't have the components lying around the house to make one. I also manage to stop the continuous rotation servo's by telling the pins to go low (e.g. low 2,4). This means that the head can turn and get accurate distance measurements. After that I set the pins high (e.g. high 2,4).
Most of my time was spent constucting the robot base, design, cutting, drilling, modifying the tank wheels, mounting of the servo's etc. The original design used a PBT plastic case/enclosure, however these plastic boxes are not "straight" they are all slightly trapezoid (why aren't boxes square anymore!?!?!?).
I was originally inspired to do something similar by Mr. Russell "Oddbot" - respect!
https://www.robotshop.com/letsmakerobots/node/4120 - This is his robot based on the picaxe 08m
Mounting of the Tamiya tank wheels to the servo horn: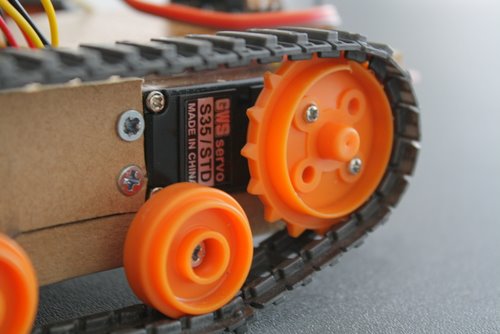
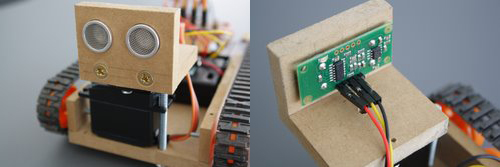
Mounting of the SRF05 Ultrasonic Sensor (perfectly measured and drilled - dont even need to bolt it in!!!)
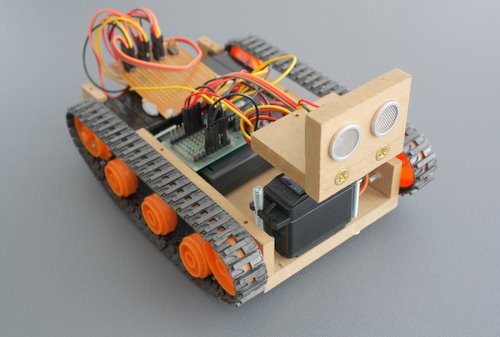
Just another general picture of the robot - this shows the use of jumper pins to connect up everything
I'll post some more information on the robot soon including additional pictures and the program source code.
P.S. I'm not the best when it comes to electronics and circuitry - in high school I completed a level 3 & 4 certificate in basic electronics (about 15 years ago), so apologies for being a little rusty and if I mess up on any questions!!!
wanders about trying to avoid stuff
- Actuators / output devices: 2 x GWS Continuous Rotation Servos, 1 x PowerHD 3001B Standard Servo
- Control method: autonomous
- CPU: picaxe 08M
- Power source: 3xAA cells
- Programming language: Picaxe basic
- Sensors / input devices: SRF05 Ultrasonic
- Target environment: Indoors - carpet and tiles