


Steven X
Hi I am Steven X I am a modified line follower chassis and serve as a test platform.
Now I will let my builder talk since i do not have any idea what he is doing with me.
Tests are the following:
- check distance in front, if distance is < than 20cm stop both motors
- execute a sensor sweep left and right and keep the left and the right distance in a variable
- compare left and right distance
- go to the direction where is more clear space
This is my second project and i used a line follower chassis to mount all the parts i need.
As you see i used the chassis to mount the gear motors, battery and sweep servo.
The leftover of the DVD case (see my Insect Robot) was used to attach the ulra sound sensor to the sweep servo (micro servo...very cheap but have to do the job)
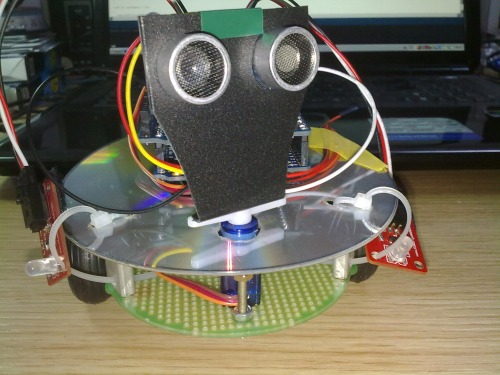
Don't wonder...i will explain the LED's hanging around later ;-)
I put an old DVD (not old but ...let's say not worth to keep) above the motors and the servo to velcro the Arduino on it.
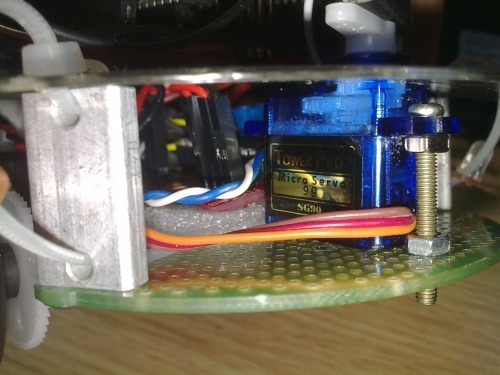
I used two distance pieces and the sweep servo is just mounted with one screw on the base chassis.
Behind the servo is the H bridge for the motors, the space for the Arduino was not enough, but maybe later if I like this little guy I will replace the current Duemilanove with a Nano...but i lost the thread....ok...DVD...
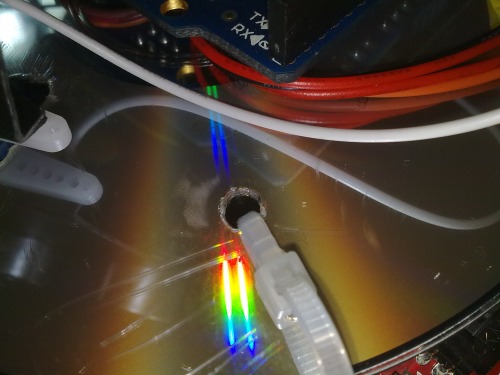
How to attach the DVD on the distance pieces if there is no hole in the top. I will tell you. Burn two holes in the DVD (probably you can not watch it anymore after this action but hey...robots are much cooler than boring movies), pull a cable binder (learned you guys call it cable tie)through the two holes and the one hole on the distance piece...done (see two pics above).
That's it. Nothing else done in terms of mechanics or moving. Right now i am trying to get the programming done. I am a little bit rusty in programming since i did nothing serious in the last couple of years. I could just search for code which is already done by others but that's no fun, i wanna solve this by myself... at least till a certain point.
For testing my code it's not good when this guy is running around, right?
So I put two LED's on the left and the right side to tell me when the motor should run. I am still in the sensor reading and checking the distance left and right after came to an obstacle. Now the sweep servo turns from 90° to 180° then to 0° and then back to 90°
By 180° it's executing a distance measuring and also by 0° Then it compares this two values and will turn to the side with the bigger value of distance. (ok not exactly...right now it just light up the LED on the side where he will go). This is also the reason why no video exists. As soon as he moves the video will follow.
UPDATE April 22 1:18am:
I got the first rough programming done. Steven X is now moving towards until a obstacle is closer than 20cm. If that happens he will do a sensor sweep left and right and compare the values. He will go to the direction where is more clear space ahead.
Please also see the (low quality) video. I built a trap that I can take the video without to chase him through the whole apartment.
Problems:
1. Any smaller angel than 30° to a wall will not let him stop
2. The turns are just 200ms motor power on...will see if i can change this to a smarter solution
Questions:
1. Can i do a continous sensor sweep and check the values in each loop?
2. How to get the turns smarter without wheel decoder encoders?
UPDATE April 25, 10:49am:
After 15 hours in the plane (yeah we was waiting 3 hours to fix a mechanical problem and then for take off clearance in Shanghai. Now 10,000km away from home i will improve the program and post the code in my description.
UPDATE April 25, 11:23am:
Test code is attached now. Please feel free to check it and feedback me if you see that i was totally wrong ;-)
UPDATE May 18, 10:27am:
Did a test run with the Sharp IR sensor and it went well. Now I consider it done and will further use it as a test patform for other sensors, attachments etc.
...oh yeah...about the name...will tell you later ;-)
Ok, now the thing with the name. I got this idea from the DVD i used. It was/ is the movie "Driven to Kill" with Steven Seagal :-) Not a good movie so the DVD did a good job afterwards....
Actually serving as a test platform to get some programming done and check out all the components I got what to do with them. First cntact with a H bridge since I am using gear motors and no servos.
- CPU: atmega168
- Operating system: Arduino IDE
- Power source: 4x 1.2V Eneloop + 1x 9V block battery
- Programming language: Arduino ide
- Sensors / input devices: SRF04
- Target environment: Indoor and Outdoor (not offroad)