


start here robot...(spaghetti head)
So this is my start here robot.I put him together just to see that all the basics worked,so he will be in a constant state of development.
The plan with this one is to make a good mainboard with the Pic 16f690 and try to add different sensors/modules/bits using my own shield's. The main reason for doing it this way, is because i want it to be user friendly,easy to add/remove functions and to make a good development platform of it.
I'm trying to programm it in a way with so it will be more "fuzzy" and not so jerky.i want him to feel and behave more "analog" than "digital".
I havent decided in what language he will be programmed, for now it's PicBasic Pro.
so a look at the specs so far:
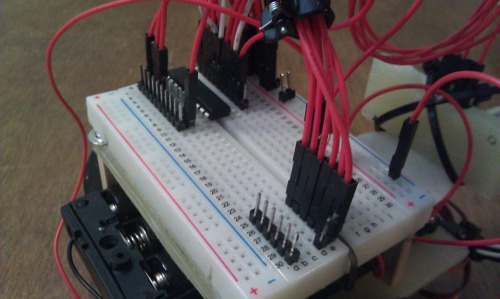
Pic 16f690-uC currently on a solderless breadboard
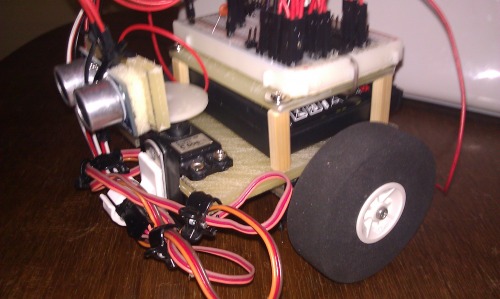
Srf-05 mounted on a servo for pan
2 modded servos with wheels from an r/c plane
body made from an old cuttingboard and some sticks and screws.
things that will be added in a near future:
-temperature and humidity sensor-
-ir proximity detectors-
it will be one on each corner of the bot
-camera from robosapiens v2-
-casio em500-
just to display a map of its surroundings and/or whatever data the user want displayed.
------------
i have mostly been working on the code this last week and trying to make smart subroutines of everything so it can be easily upgraded and maintained.
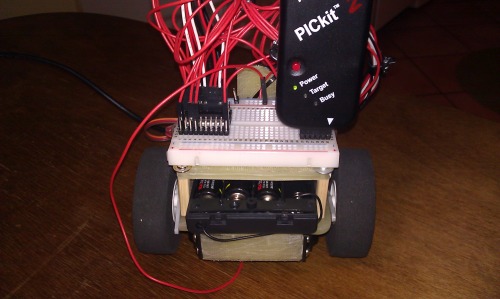
i have also made some changes to the chassis of the robot and while i was at it i fixed his "hair".now you could actually see the pic down there.
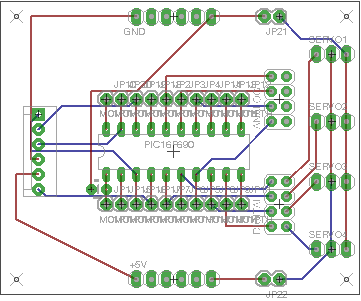
I have tried to make a useful pcb for this project.
i wanted all the pins from the pickit "extractable" so i could stack my modules ontop of the mainboard.
i never used eagle before (or any cad program actually) but im pretty satisfied with how it looks.
any inputs are appreciated
this is the pcb
and here's the schematics.
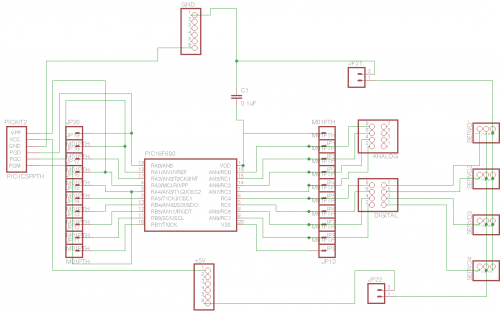
suggestions and advices are welcome!
Navigate around using Ultrasound