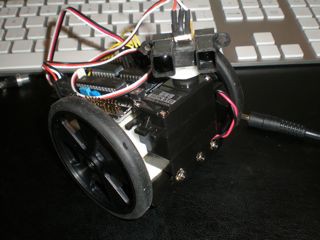
Start Here Robot #344
Done. That was great. Nice kit. A few hiccups, but overall it was done pretty quickly and painlessly.
<!--break--> A few problems I stumbled across on my way to completion:
<!--break--> 1. Before I purchased I asked Solarbotics if the correct adaptor for the sharp sensor was included, however they shipped a general three wire harness, but don't include directions on how to solder it to the infrared sensor. I thought that was a little sly and decieving, but figured I could figure it out.
<!--break--> 2. I was able to find instructions on how to solder the sensor and wires on solarbotics flickr website, but the wires are reversed to Fritsl's photos in the instructions. I combined the two using solarbotics soldering techniques with Fritsl's layout. Results were good. no fried sharp sensor.http://www.flickr.com/photos/solarbotics/5414555926/in/photostream
<!--break--> 3. Assembly was smooth.
<!--break--> 4. Programming was a little bumpy, but I am a complete noob so I expected problems in my least competent area.
<!--break--> Programming issues - Make sure your batteries are charged, if not it will not program correctly
<!--break--> - If you are using a Mac and having issues loading the program onto your PicAxe check out this function. interrupt:return I found it on MnGeeky's post and it saved me a lot of time.
<!--break--> https://www.robotshop.com/letsmakerobots/node/26152
Now its time to modify the settings and play with it a bit.
Obstacle Avoidance
- Operating system: Mac
- Power source: 1.25 x 4 rechargables
- Programming language: Picaxe basic
- Sensors / input devices: SHARP IR sensor
- Target environment: inside


