


Speak2me
*** Update April 17, 2011 ***
Speak2Me is able to water a flower just controlled by spoken comments (see first video)!
*** Update April 16, 2011 ***
Made some progress. The robot is able to perform spoken commands (see second video). A lot of improvements still need to be done. The HM2007 board draw 160mA @ 9V. I'll try to connect the HM2007 board directly to the main power supply and use the 9V battery only for the OPAMP (runs not with 5V). Will also add a Speakjet chip, so the robot is able to response to spoken commands. Made a test with Skype. It is possible to control the robot via Skype, just put the robot nearby the laptop loudspeaker.
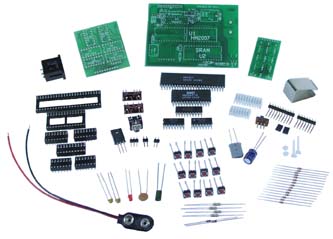
1. SR-06 Speech Recognition Kit
I bought the SR-06 speech recognition kit from Images Scientific Instruments. This kit requires assembly, but is 65 USD cheaper than the already assembled board.
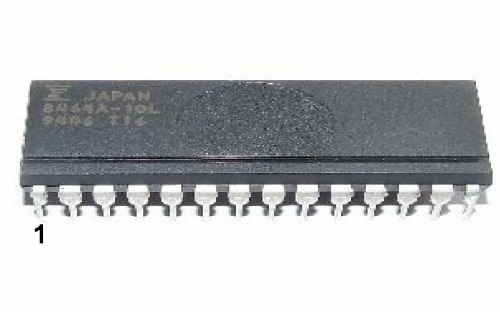
Two things were a little bit tricky. You need to solder a jumper on the display board which is easily to read over. Without the jumper the display board will not work. The second thing was the marking on the SRAM chip. Usually IC chips have a half circle cutout on the top, but the SRAM chip has a slot from one end to the other end of its housing. Finally I found the data sheet and the pin configuration is as follows:
Finished speech recognition board:
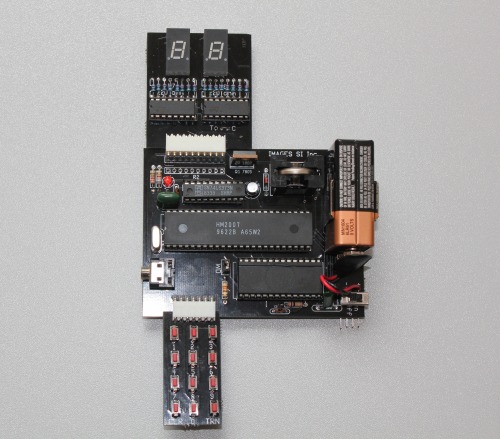
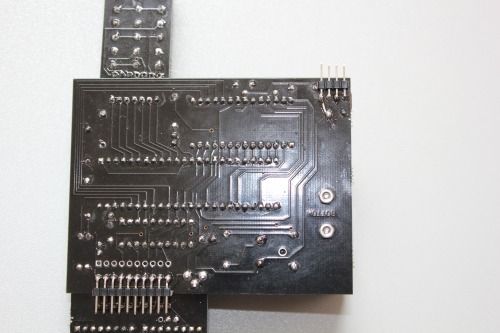
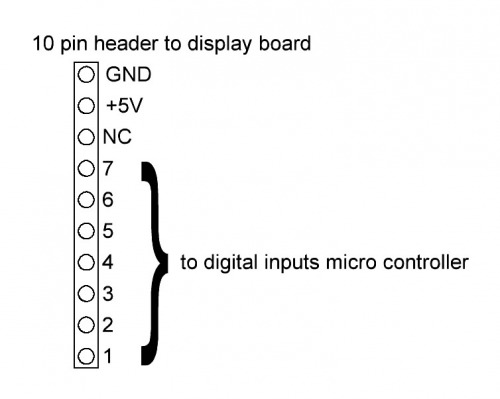
The HM2007 speech recognition chip has a CPU mode to be used when connected to a host computer system or microcontroller. To interface the HM2007 to a host computer requires the writing of driver software as well as designing and building the hardware interface to the computer data buss. An easier way is to connect the according display board interface pins directly with the digital inputs of a MCU. I soldered a header on the backside of the main board to have access to these pins:
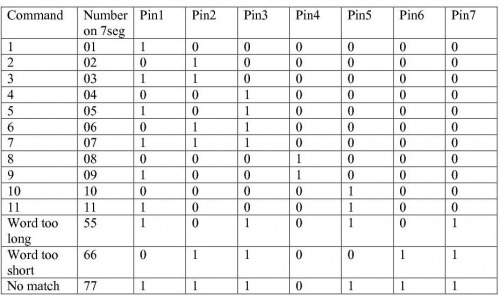
The truth table for the first 11 commands and 3 error codes is as follow:
2. Improved SR-06 Speech Recognition Kit
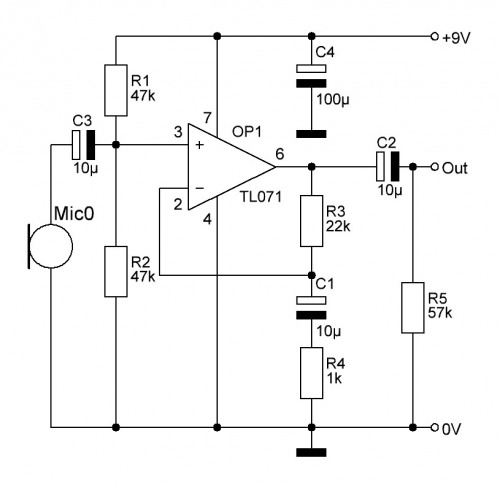
The HM2007 has a built-in microphone pre-amplifier, but this pre-amplifier is not suitable for robot applications as the mouth should be not more than one inch away from the microphone. The following schematic shows a low noise microphone amplifier, using a TL071 low noise and low harmonic distortion OPAMP:
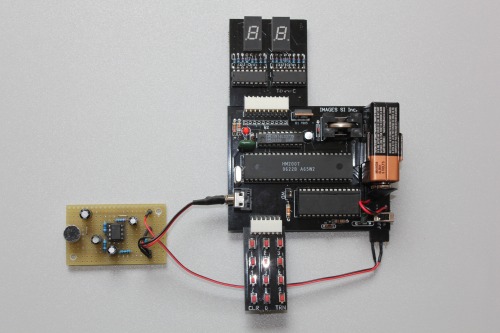
Speech Recognition board with low noise microphone pre-amplifier:
The mouth can now be more than 2m away from the microphone and still works fine (see video).
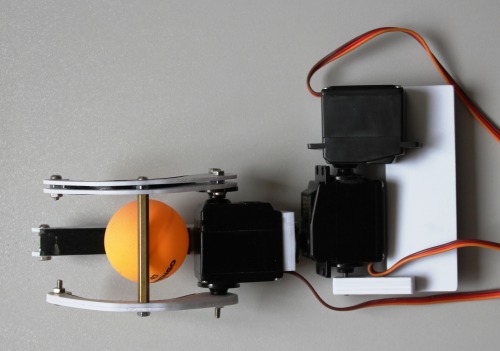
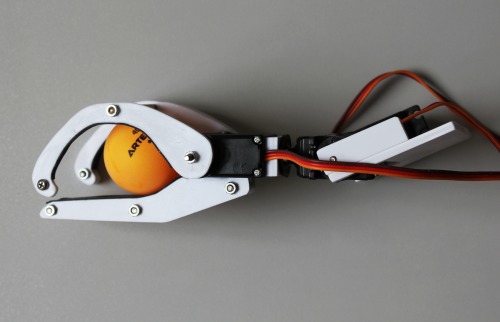
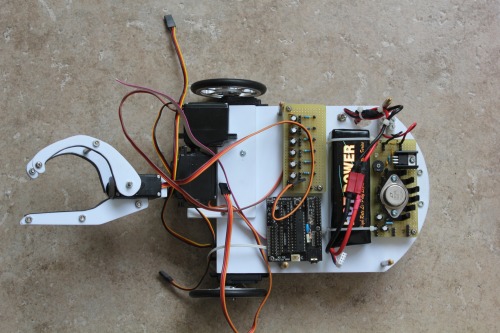
3. Claw construction
The claw is made from 2mm ABS sheets and coated with black silicon for better grip. This claw is able to hold bigger things like a drinking glass or ball and smaller things like a screw driver or pencil.
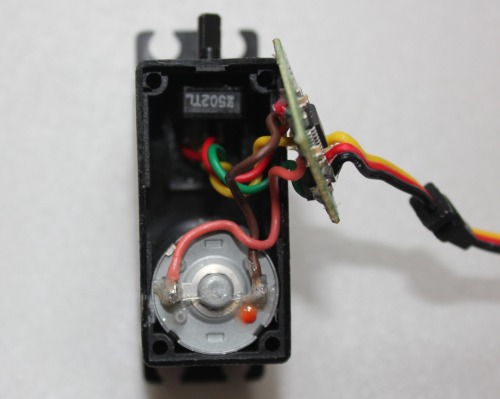
4. Servo modification for continuous rotation
As every modified servo rotates with a different speed (and torque) at the same pulse rate, it is better to keep the potentiometer instead of replacing it by two resistors. The pot shaft can be put outwards like shown on the picture below and the pot fixed with epoxy glue on its new position. Now the modified servos can be adjusted to run simultaneously.
5. Platform
The platform is alos made from ABS sheet and has 3 layers. The second layer is reserved for the speakjet chip and the audio amplifier. Power source is a 11.1V Li-Po battery with 2200 mAh, as I am also planning to add a wireless camera later.
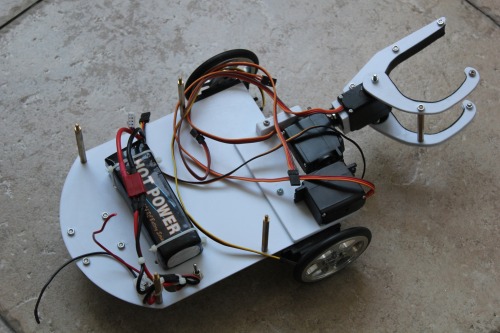
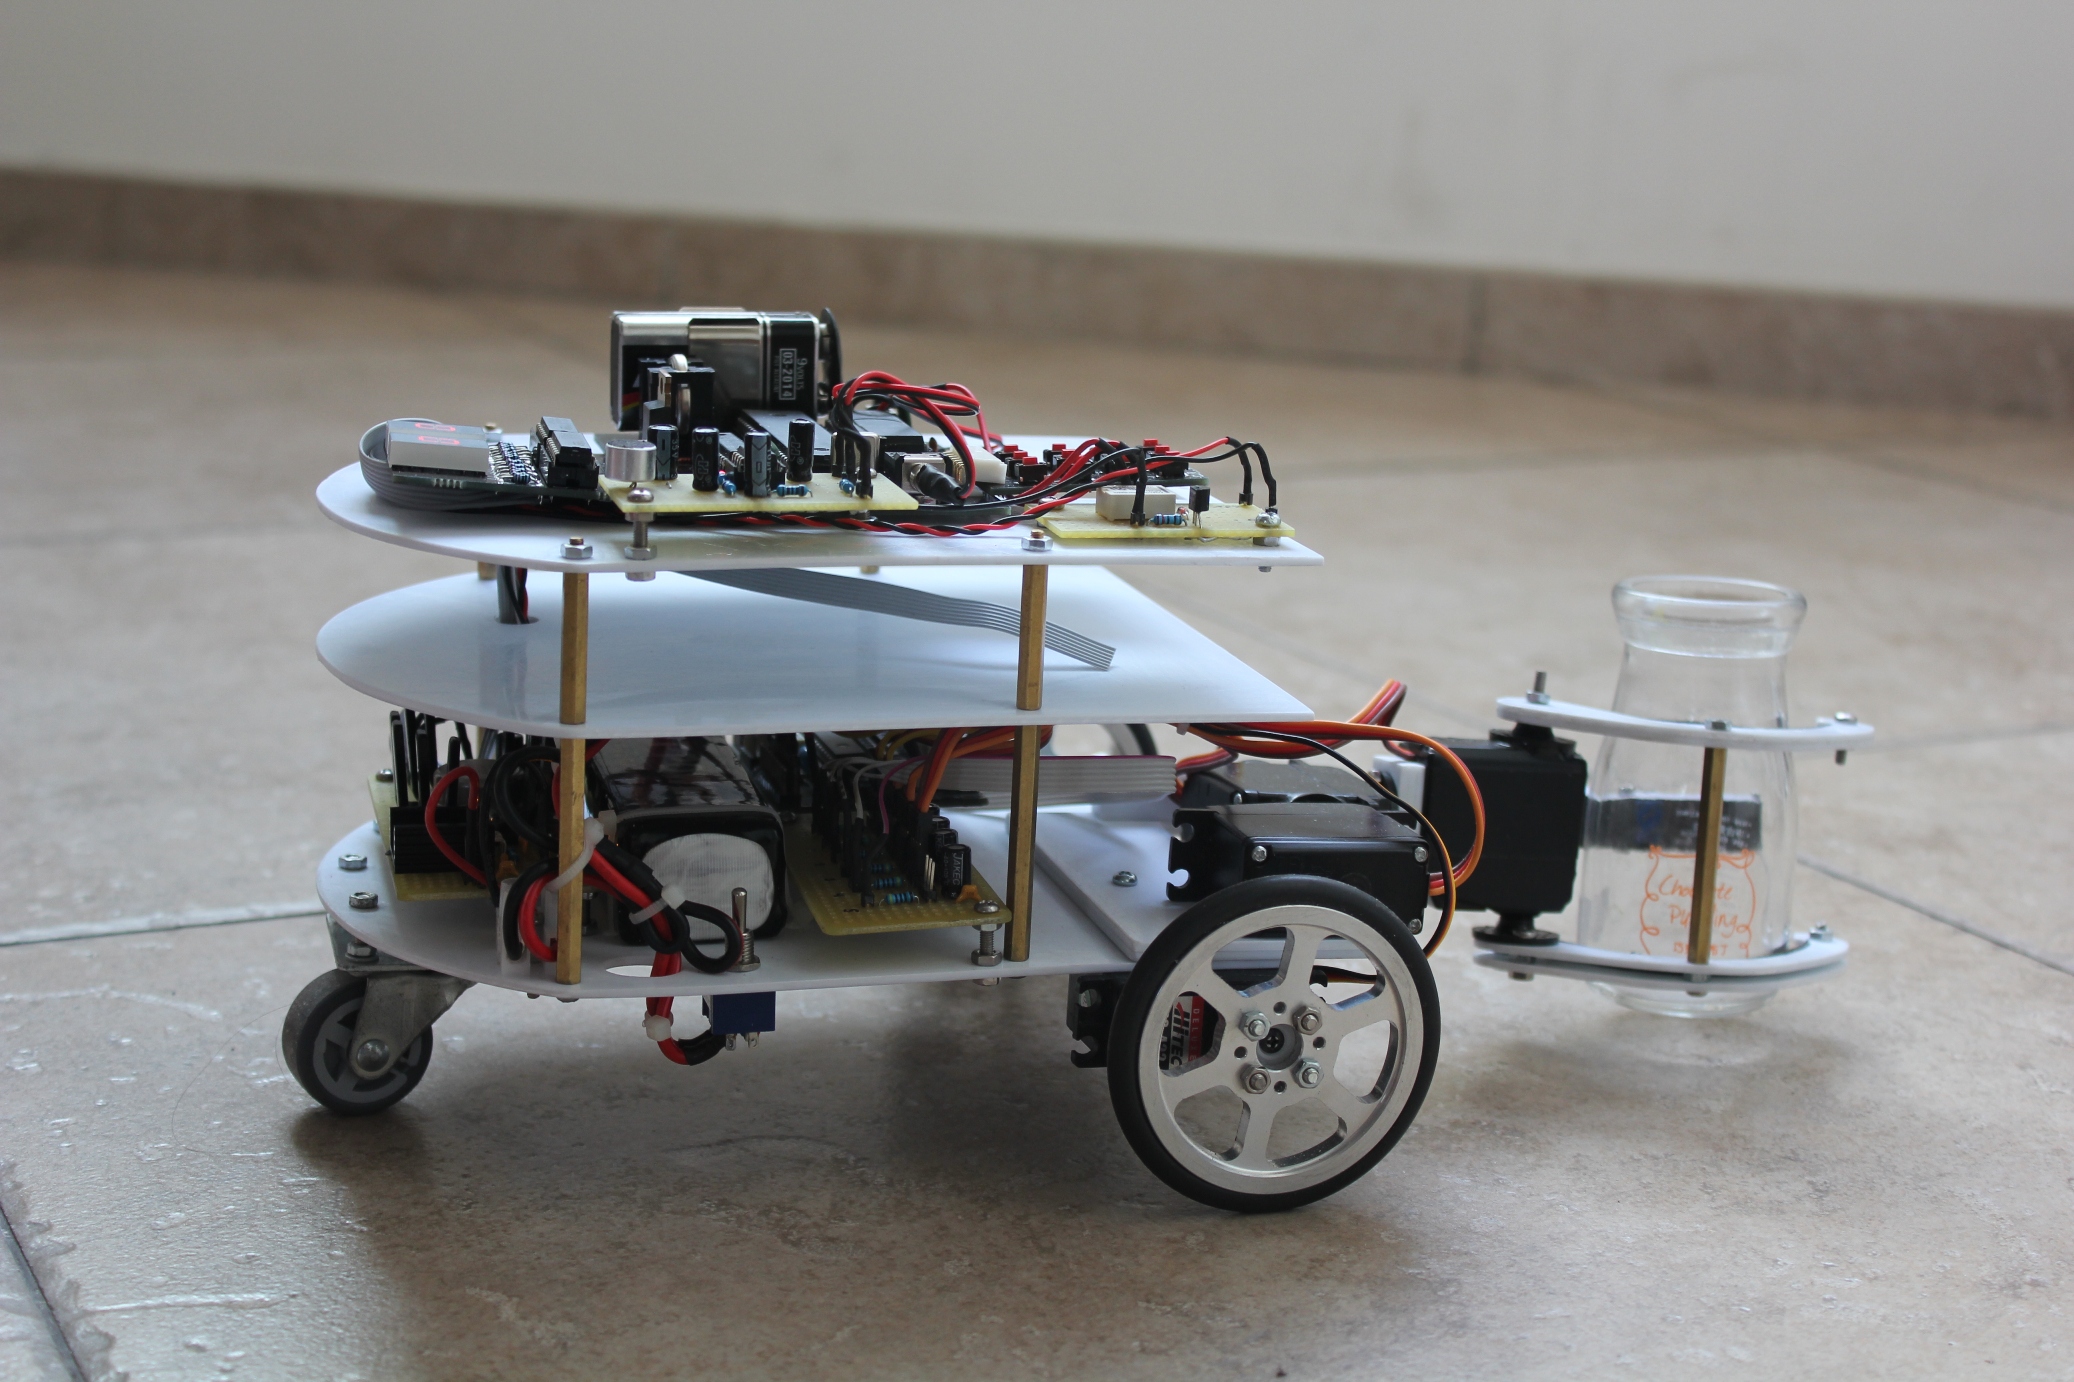
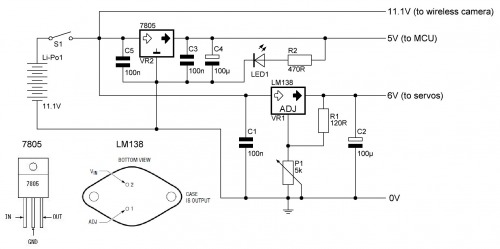
6. Power supply
The robot is powered by a 11.1V Li-Po battery with 2200mAh. Two voltage regulators converting the battery voltage to 5V for the micro controller and 6V for the servos. Next to the micro controller board is the servo board with all the anti-interference capacitors.
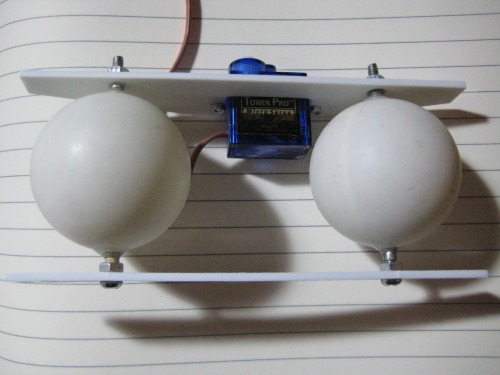
7. Bare bones animated head
Speak2Me will have a kind of bare bones animated head. Started with the construction yesterday. The eyes are ping pong balls. The head will be animated by two SG90 servos (eye movement) and one SG 5010 (head movement).
moves according spoken commands and comment it
- Actuators / output devices: loudspeaker, 2 x 7seg displays, 1 x LED, 7 x Tower Pro SG-5010, 2 x Tower Pro SG-90
- Control method: Semi-Controlled
- CPU: 2 x Picaxe 28X1
- Power source: 9v battery, 11.1V Li-Po battery 2200mAh
- Programming language: Basic
- Sensors / input devices: SHARP IR sensor, SR-06 speech recognition kit
- Target environment: indoors