


"Sparky Luke" - my *mildly updated* SH Robot
Update - 23 May 2015
It's been a while since I first posted my SH robot, but in the meantime I've been tinkering about with it in my sparetime, mainly playing around with the code but also tacking on some odds and sods stolen from toys my kids have discarded. (As an aside, does anyone else around here find themselves eying off their kids' toys for parts?? Surely I can't be the only deadbead dad stealing bits from last year's annoying "Walking Talking Pooping Parent-Infurating Dora Doll" ^-^).
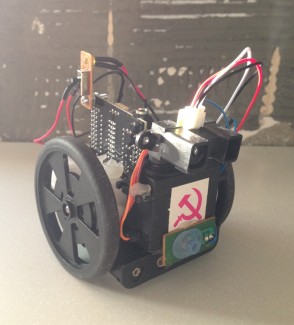
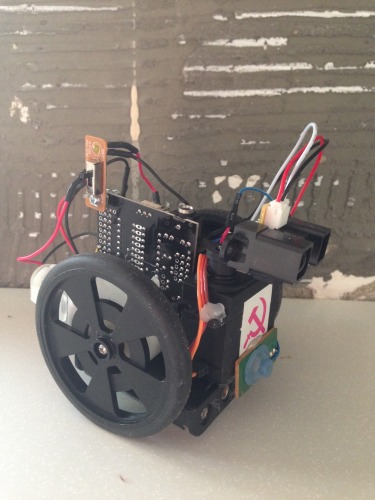
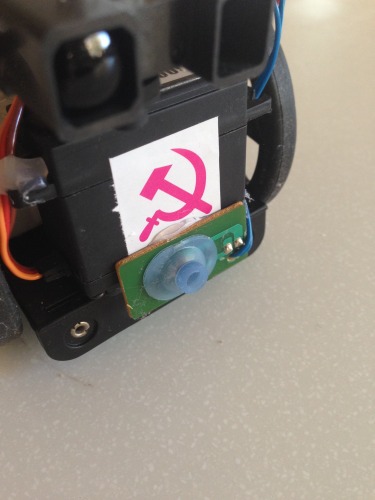
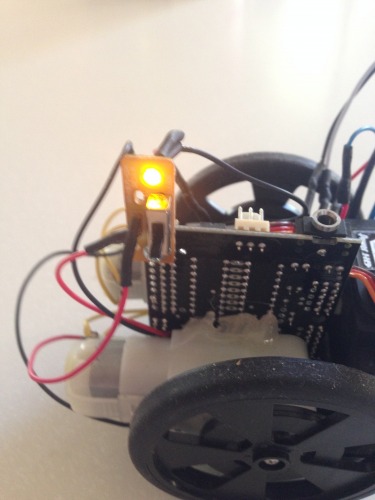
My kids have also christened the robot "Sparky Luke" (don't ask me where the hell that came from), and decked it out with sweet stickers (well, one wierd pink hammer and sickle sticker). Other modifications from the standard Start Here bot are as follows:
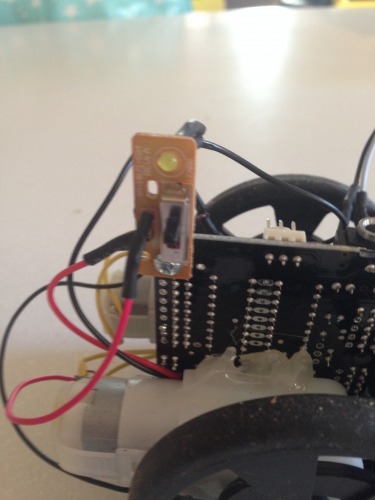
- on/off switch
- bump switch (coded to an interrupt)
- LED
- Weird guard mode code (I've posted the code if anyone is interested, but it's pretty rough as I don't have much experience with coding... the main thing that I found fun was to try and program some way to distinguish between and remember objects)
I actually did most of these additions a few months ago, but I decided to make a video and post here as a record of where it got to, because I about to pull it apart completely and use my picaxe to play around with a laser, seven segment display and other random stuff I picked up from an electronic store a while back!
Hope you enjoy the video, and apologies for the gratuitous use of Flight of the Conchords' Robot song ^o^
Original Post
Well, after lurking around the LMR site for quite a few months I have finally gotten around to building my first robot!
This was a pretty daunting project for me at first - I have zero electronics experience, and only minimal experience with coding etc so it was a bit outside my usual comfort zone (I've done a bit of statistical scripting using R, and some GIS stuff but nothing like this). But I'm a little bit of a robot tragic (case in point - I've got a small collection of wind-up robot toys that I don't let my 3 kids play with) so once I stumbled across this website I just couldn't get the idea of building a real robot out of my head!
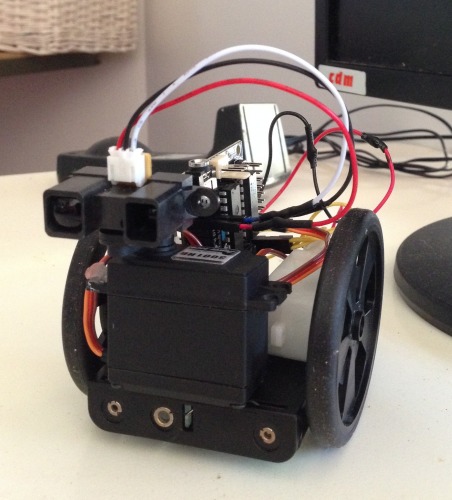
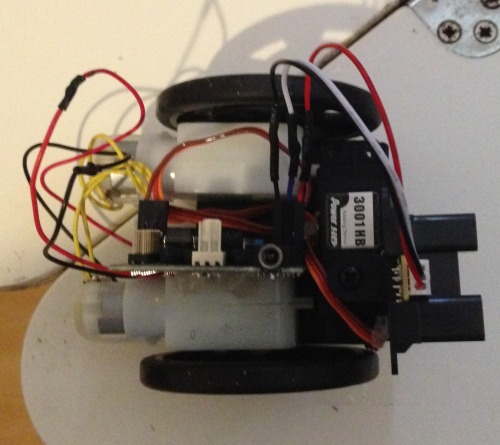
Anyways, after reading Fritsl's excellent tutorial about 300 times, watching a million 'How to Solder' YouTube videos, scouring electronics stores (both online and here in Perth), and generally obsessing over everything I could, I finally built my very own Start Here Robot. As you can see, I stuck to Fritsl's instructions very carefully because I wasn't confident enough to go 'off-piste'... the only minor differences between mine and his is that I used hotglue in place of tape, and I positioned the PCB upright (purely because my wires to the motors were too short).
I was very surprised when I put the batteries in at the end - voila, it works perfectly! Thanks Fritsl, and everyone else here at LMR!!!
Also, now that I've made it this far I'm already thinking "hmm - what next"... some of the next steps I've got planned (in no particular order) are:
- tweak the code to "personalise" the behaviour a bit;
- add an on/off switch (the little sucker squirms like crazy in my hands while I try to pull a battery out - I've already dropped it a couple of times);
- add some LEDs (because it's just not a proper beginner's electronics project without LEDs);
- add some tracks (no reason, they just look cool)
- modify the code more heavily to add some different functions - maybe navigating a maze, or scanning for "danger"
- build another robot - maybe a walker, a little beam style bot, or one of those cool wall racers!
I'm not quite sure what else I should do... perhaps add some other sensors, or add a remote control function. Looks like I'll be lurking around here some more to get some ideas :)

Drives around inside, avoiding obstacles. Uses PICAXE 28, Sharp IR distance sensor, Bump Switch