"Slunk"
UPDATE: This project is closed. I'm using the (working) parts for a new bot. But I had a battery question (below).
..................................................
So, I created my own first robot following the Start Here instructions. I was only able to get one picture:

I decided to upgrade the robot itself to look more presentable when i tried to show it off on my favorite website. I would also document this build, step by step.
Materials:
1 Picaxe 28 project board
1 4 AA battery case from RadioShack
1 futaba s3003 servo
1 sharp ir sensor, attached to servo wheel
2 piece-of-crab DC motors from SolarBotics
1+ Red Stribe Jamaican Lager
To each piece-of-crap DC motors from Solarbotics, I've soldered a female jumper. I've also soldered header pins to my project board, for easy hookup/unhookup of motors and sensors.

Sensor hot-glued onto the servo wheel:

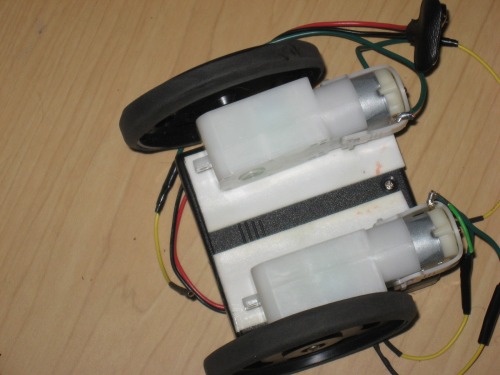
I chose the RadioShack battery case because it had a handy on/off switch. I attached the piece-of-crap DC motors to the removable lid so I don't have to disassemble it to change batteries.

Attach a piece of paint-mixer stick on which to place the servo. A 25-cent plastic toy bubble works as the front wheel.
This leaves some "trunk space" under the power box, where i can tuck away all the extra the wires.

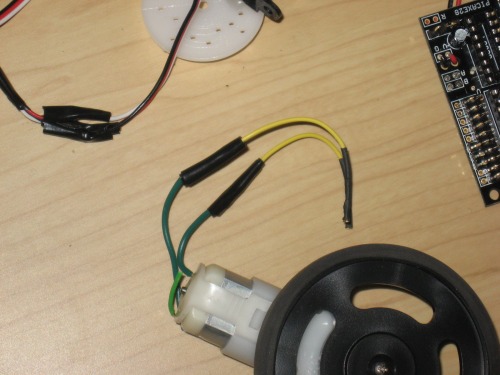
While tucking connecting the sensor and tucking the wires underneath, disaster struck. the terminal on one of the piece-of-crap Solarbotics DC motor broke. Off. All the way inside the housing:

.... which pretty much puts that motor out of commision until I can get a replacement.
...To be continued ...
-----------------------------------------------------
UPDATE
okay, so I haven't found new motors for these gears. Instead, I got a Tamiya twin gearbox. It looks so much different that it will end up being a new robot entirely. So this one is finished. Done for.
However, this project brought up a concern:
BATTERIES!!!
The 4 AA battery pack in the picture does not power my 28x project board. I've tested it; 5.25V. But when I connect it to the project board, nothing happens. At all. The first time I connected it, my picaxe got REALLY hot, really quick. So I disconnected it until I could figure out what was going on. I tried monkeying around with it again, and now it doesn't power the board. Any ideas why this would be?
Follows FSHPC (Fritz' Start Here Posted Code), assists in product placement
- Actuators / output devices: 1 Servo, 2x Solarbotics Crap DC motors
- Control method: automomous
- CPU: Picaxe 28x1
- Operating system: Windows
- Power source: 4 AA batteries
- Programming language: Picaxe basic
- Sensors / input devices: Sharp IR
- Target environment: indoors


