


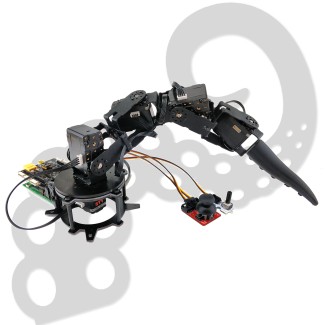
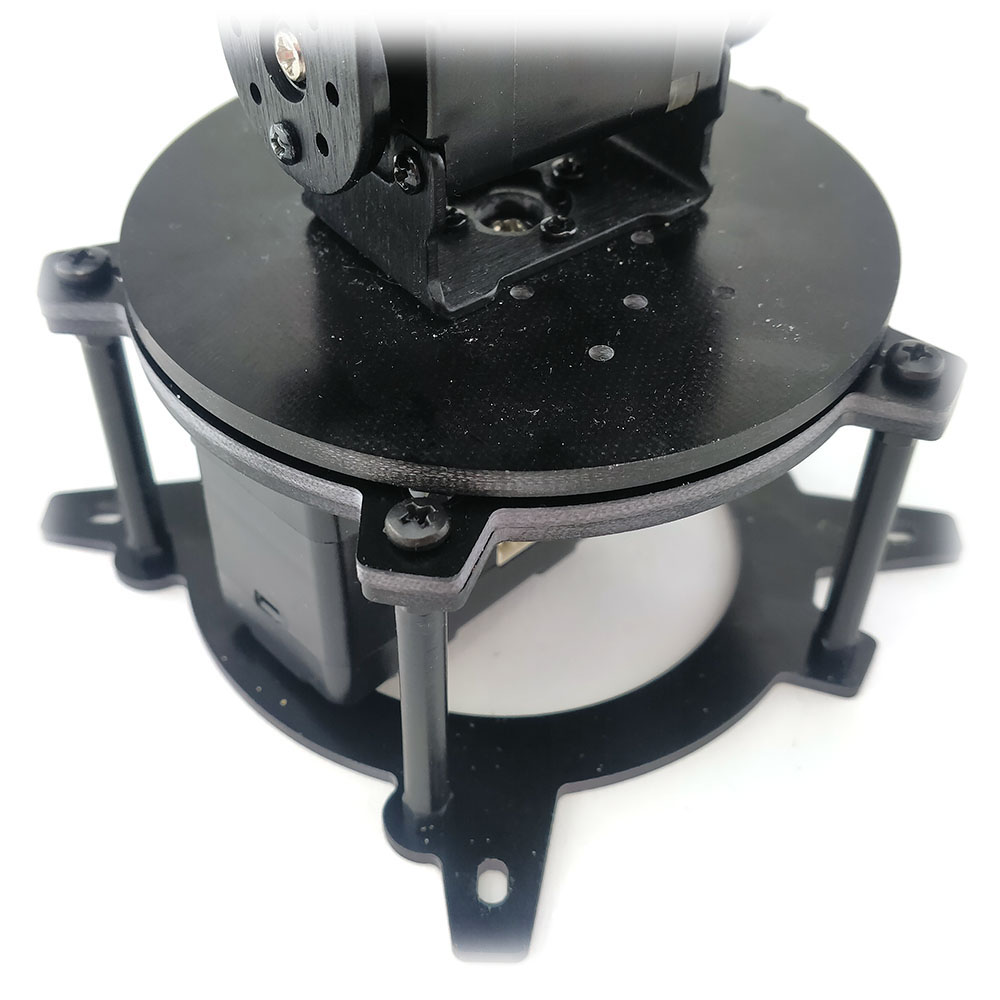
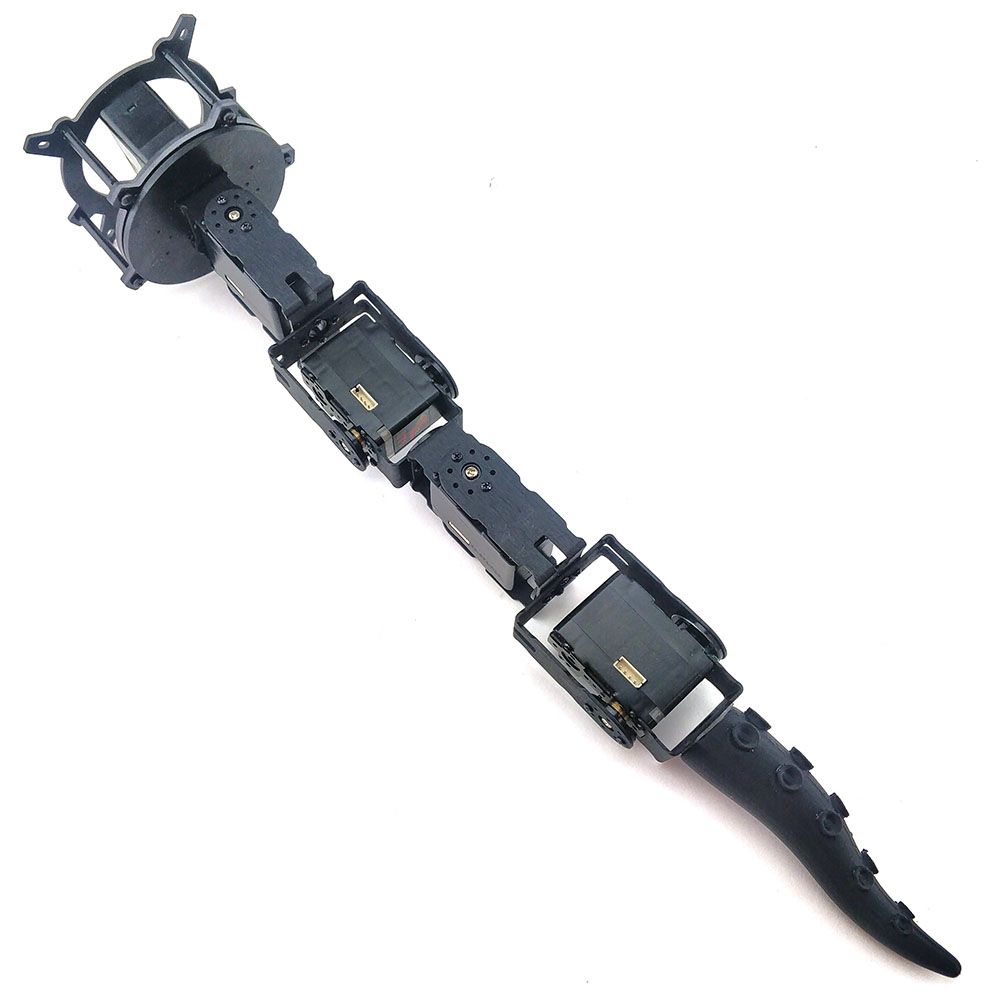
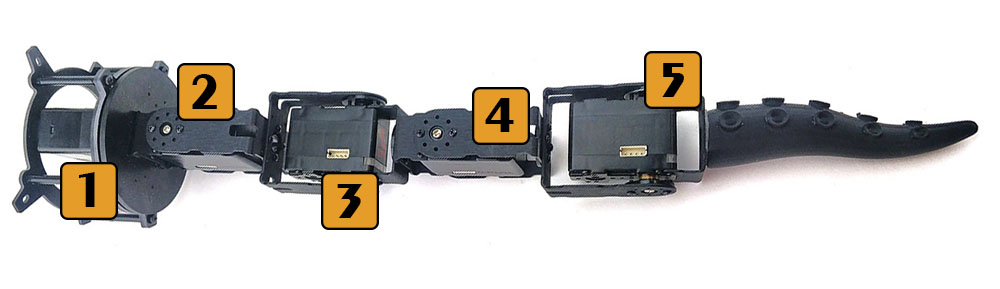
The mechanical part of this tentacle is pretty simple and consists of the same assembly repeated four times and mounted on the LSS Base.
Required:
- 5x Lynxmotion Smart Servo (LSS) - ST1 (RB-Lyn-989)
- 1x Lynxmotion Smart Servo (LSS) - Base Rotation Kit (RB-Lyn-1017)
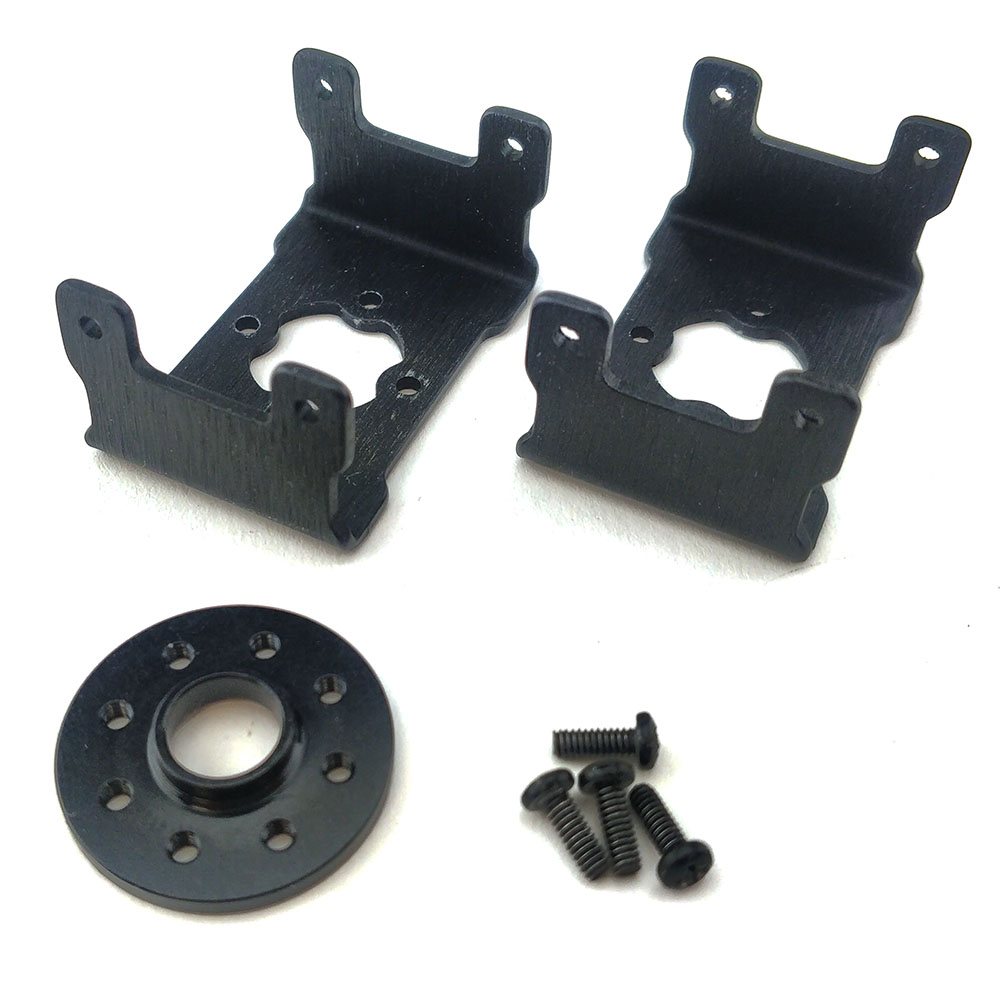
- 4x Lynxmotion ASB-28 Single Wide Bracket (RB-Lyn-1003)
- 4x Lynxmotion ASB-40 V2 "C" Bracket (RB-Lyn-1007)
- 3x Lynxmotion LSS Idler Horn (RB-Lyn-1010) "can be substituted with 2-56 matching nuts instead"
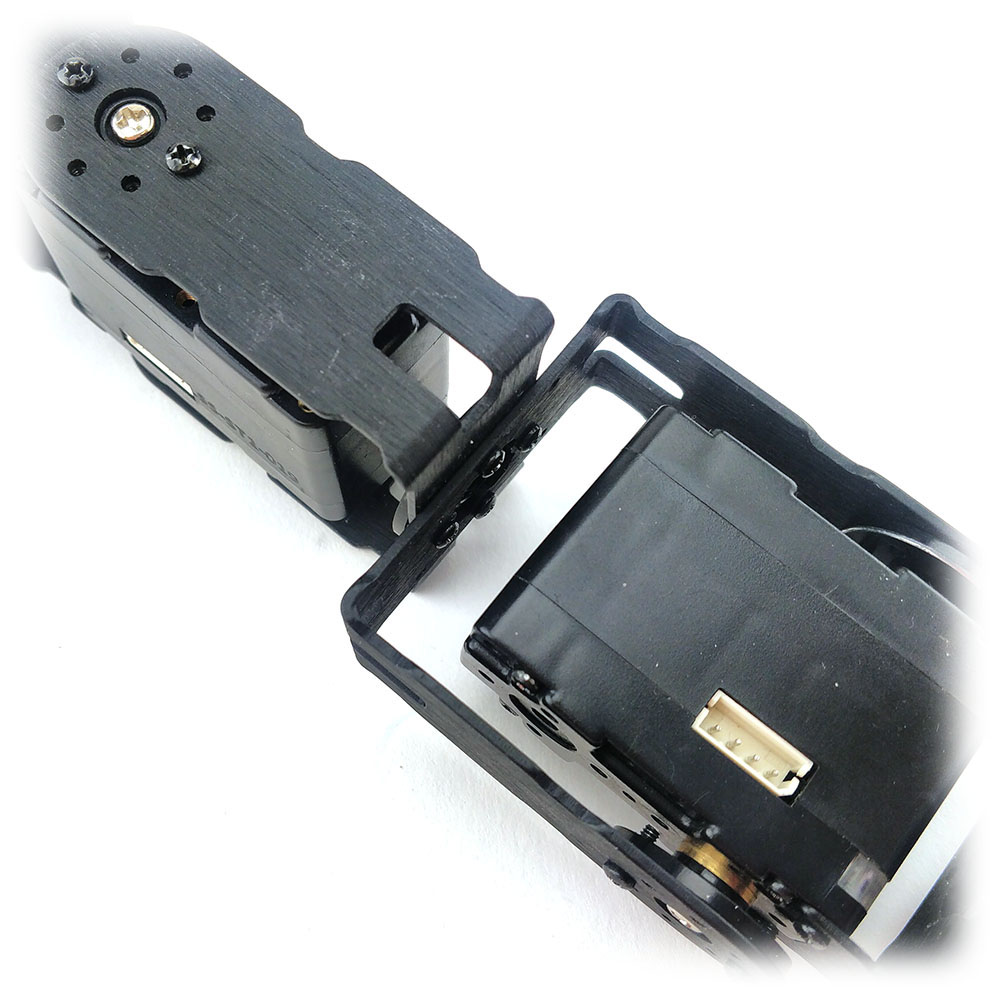
Brackets are held together using an idler horn instead of four 2-56 nuts and four 2-56 x 1/4" long machine screws:

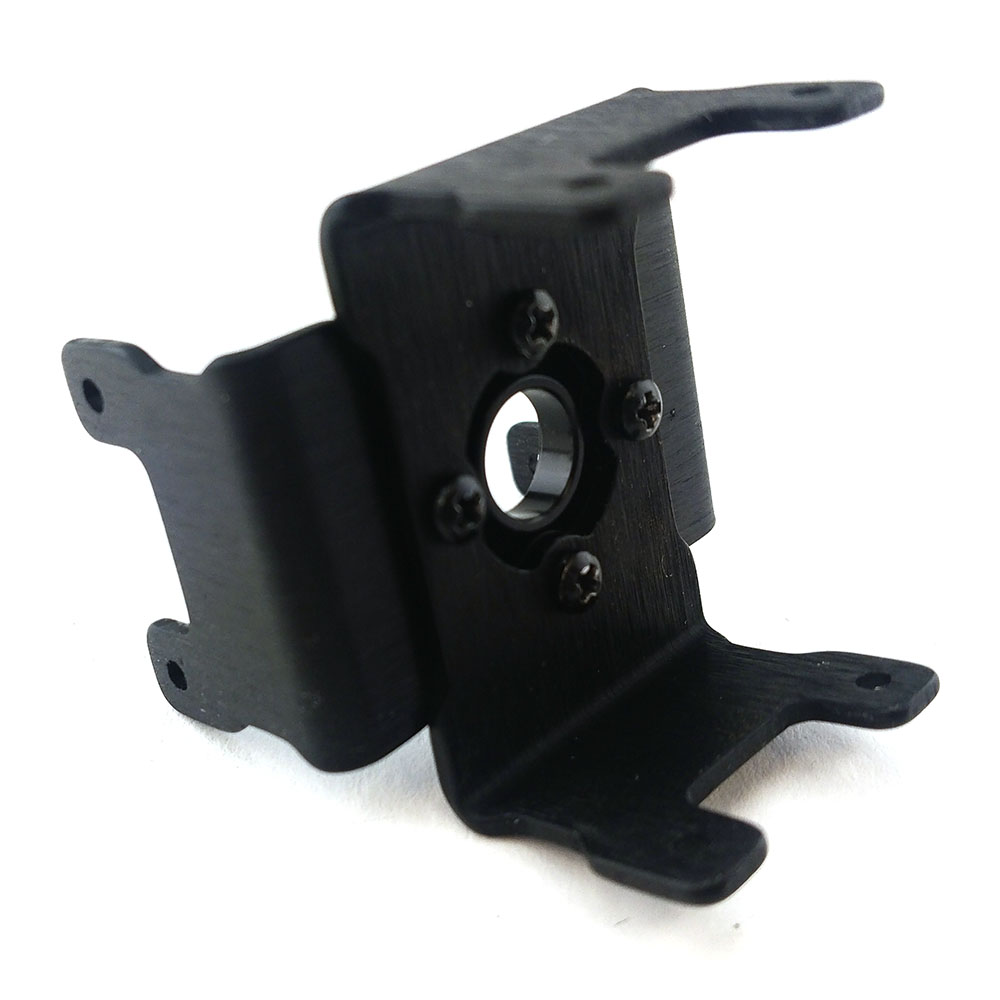
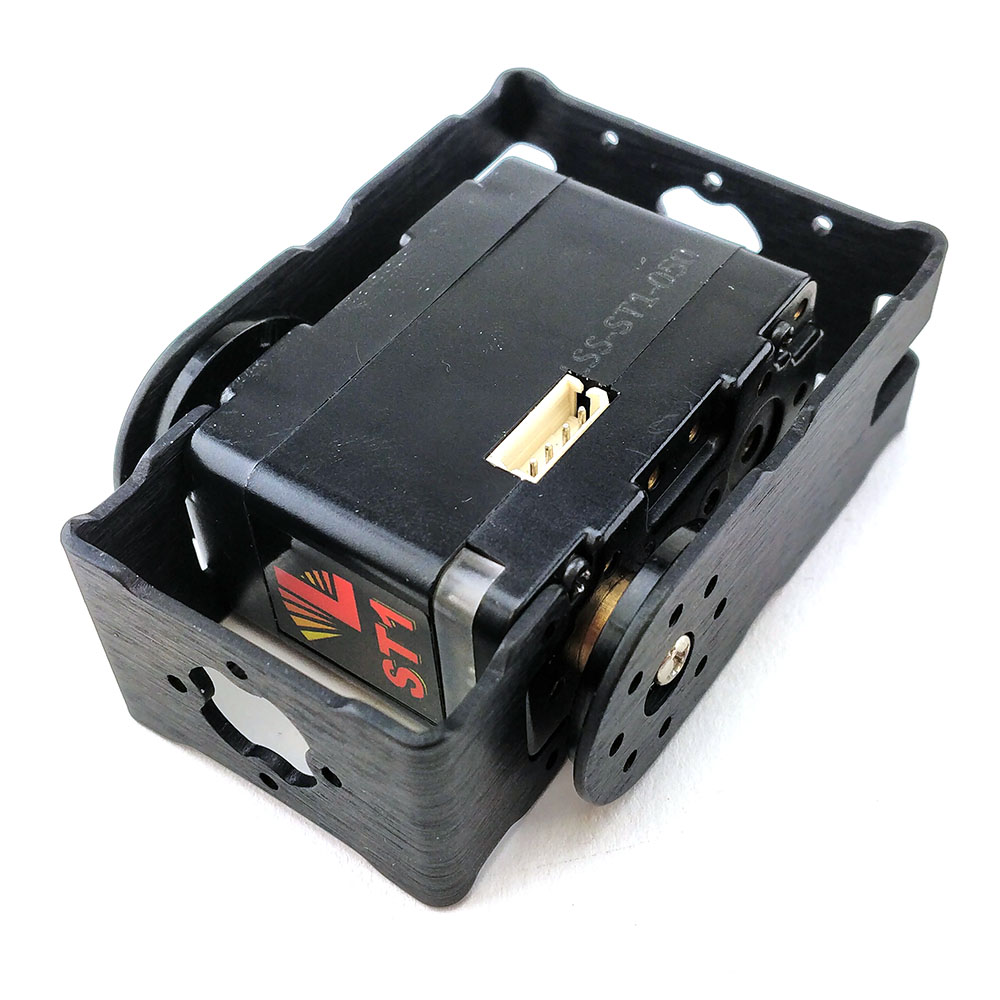
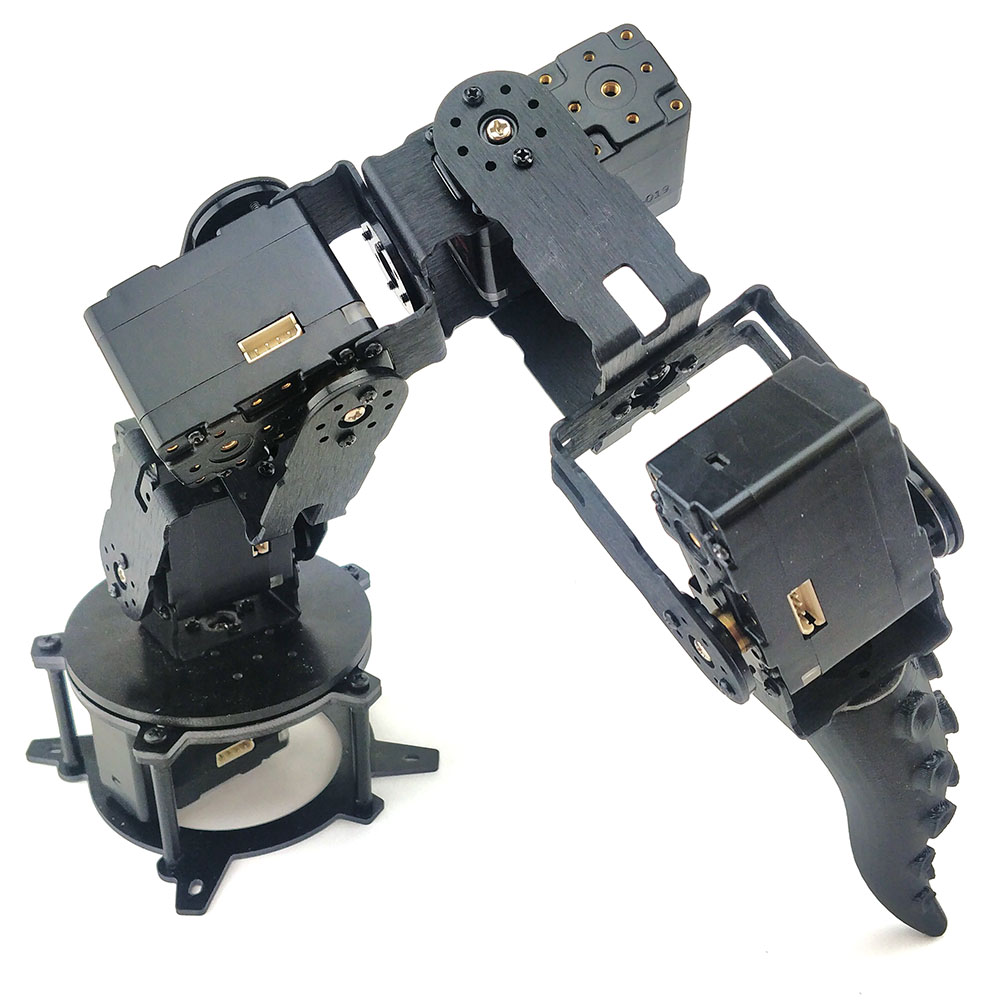
The basic block is shown here and repeated 4x prior to being assembled:
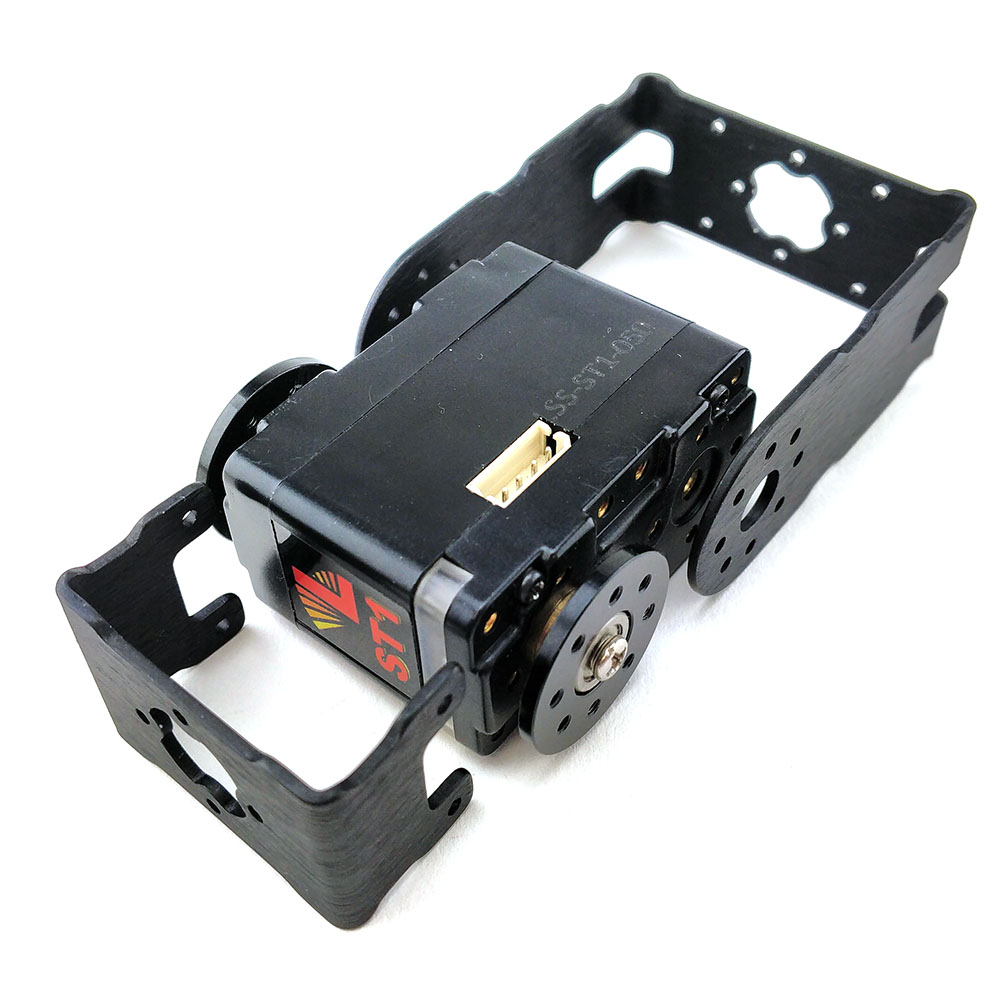
Each block / assembly is then assembled at 90 degrees to the previous one:
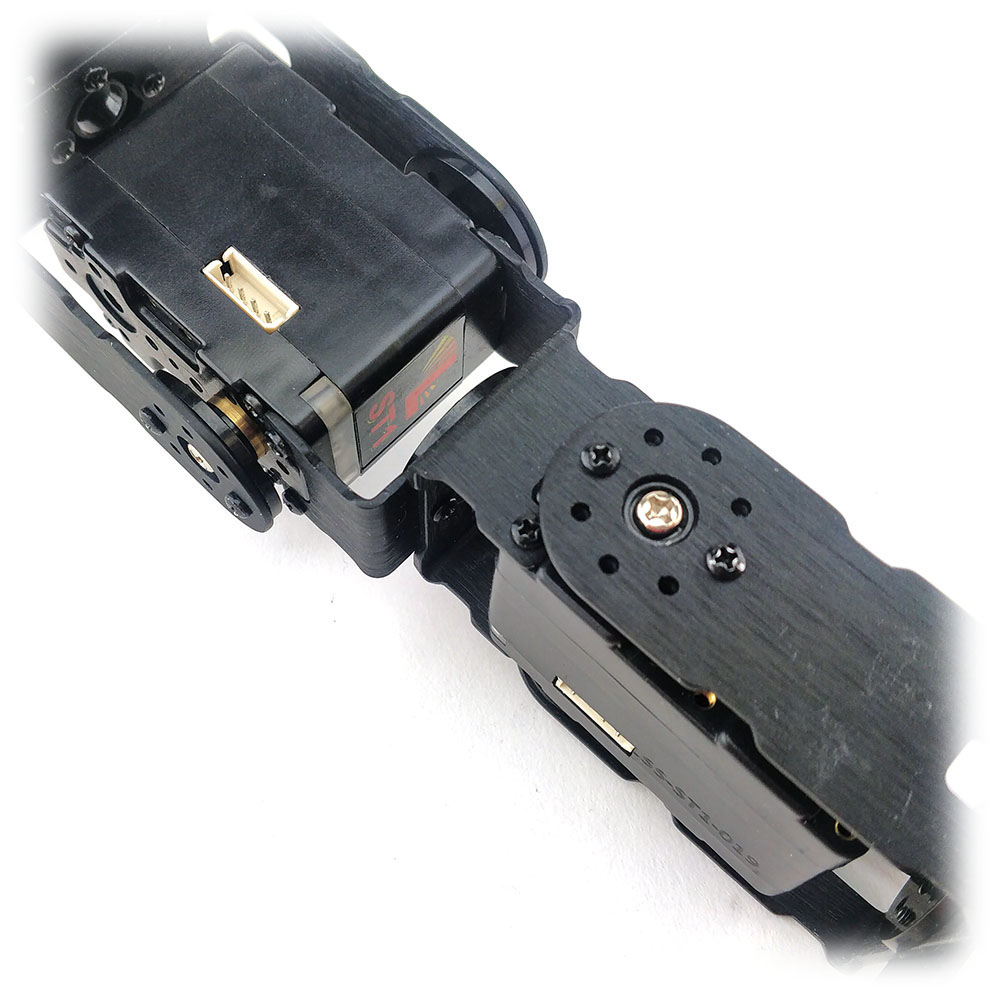
The final assembly should look something like this:
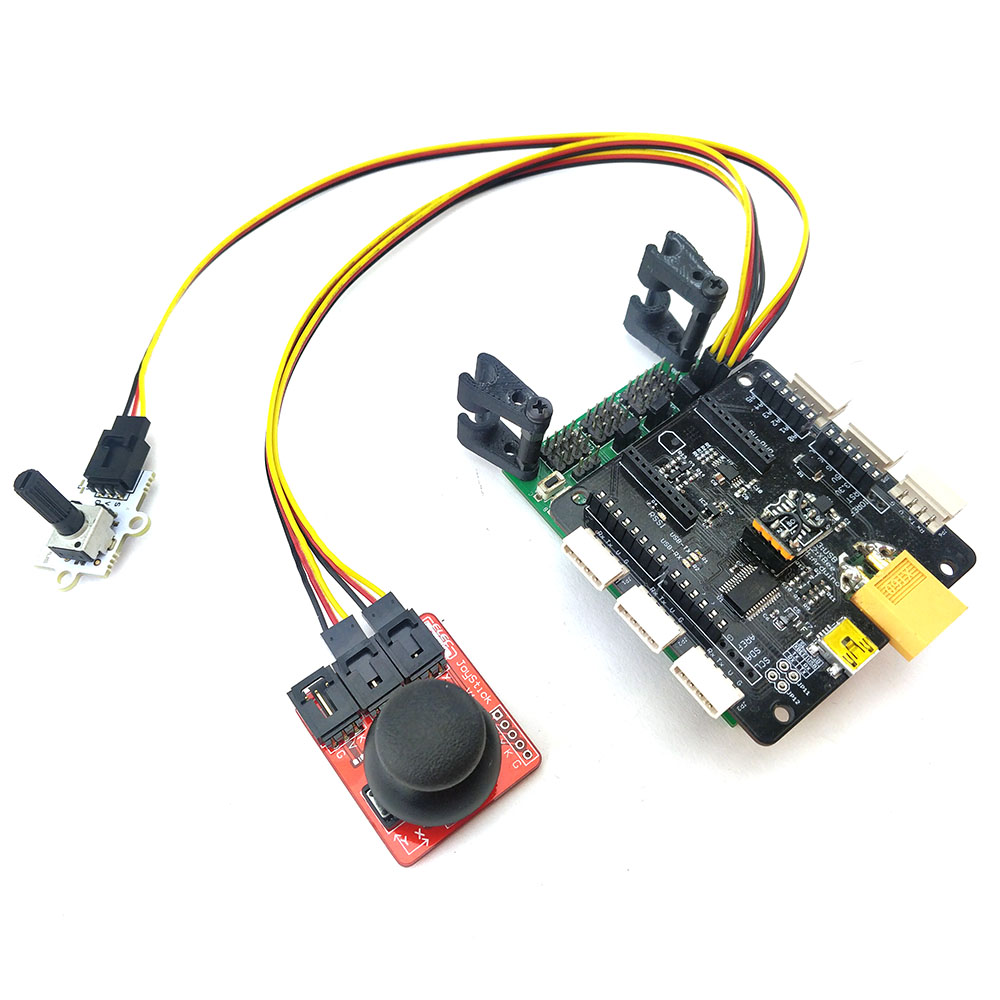
Regarding the electronics, this tentacle will daisy chain all servos on the same bus down to the LSS Adapter board. The "brain" is an Arduino compatible microcontroller (BotBoarduino) which will run the code and take care of the input / output.
Required:
- 5x 200 mm LSS Serial Cable (RB-Lyn-995)
- 1x LSS Adapter board (RB-Lyn-1018)
- 1x BotBoarduino (RB-Lyn-363) or any other shield-compatible Arduino microcontroller
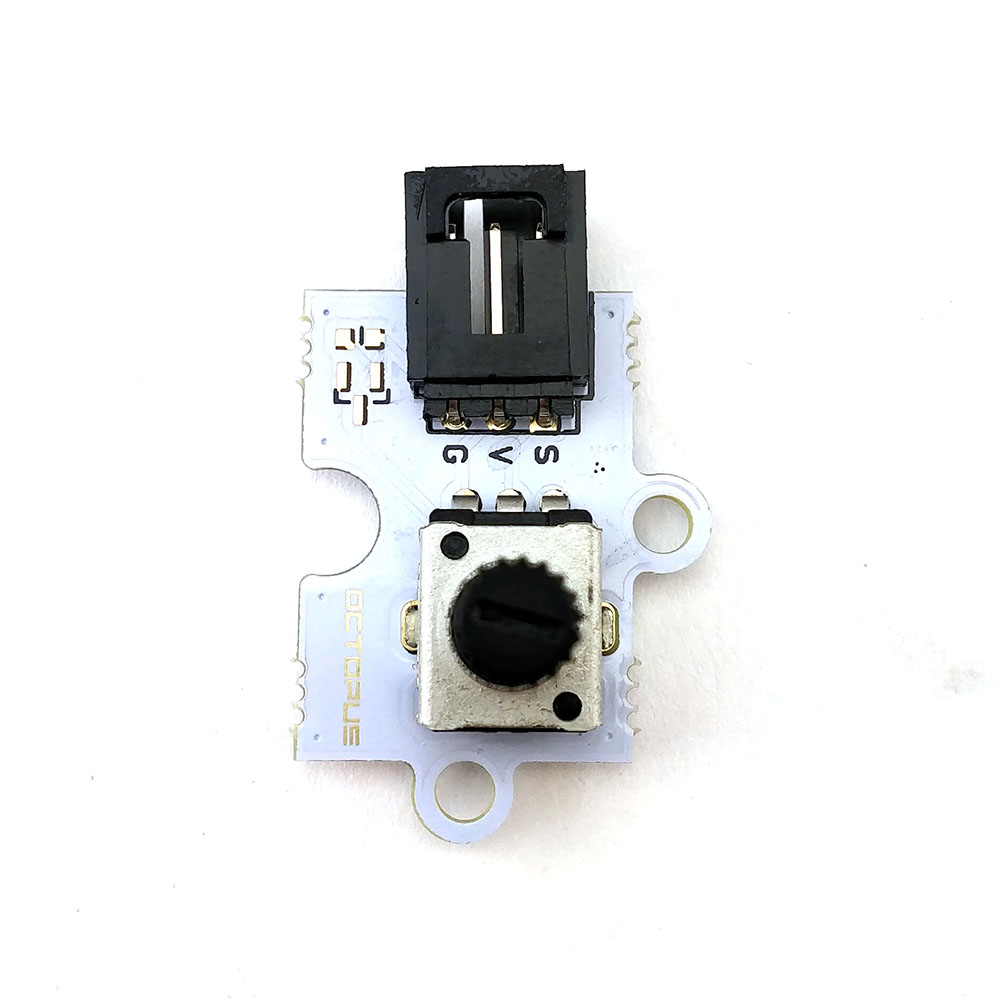
- 1x Joystick breakout module (RB-Elf-29)
- 1x Potentiometer module (RB-Elf-82)
- 1x Power Supply with XT60 connection (RB-Hap-05)
All the servos are "daisy chained" which means you connect one servo to the next one, which will connect to the following and so on. This makes the wiring very easy and clean.

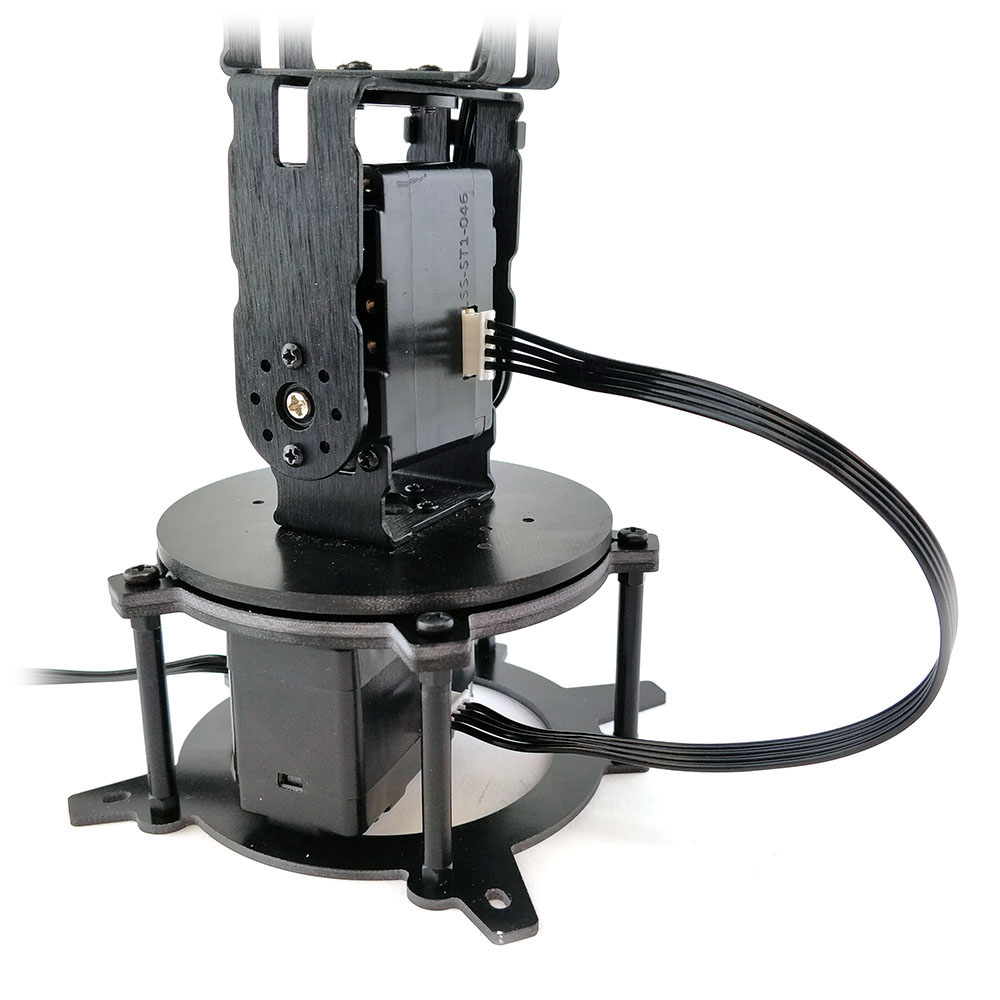
The electronics consist of the LSS Adapter which can be used as a shield stacked on top of the Lynxmotion BotBoarduino. The joystick and potentiometer modules were chosen for their easy connections as well for their 3 pin connectors which connects directly to the 3 analog inputs of the BotBoarduino.

Each LSS actuator requires an individual ID so the code can communicate with them individually making the daisy-chaining possible. In this regard, you will have to set each servo a specific ID and we started from the base up with ID #1. This has to be done one at a time with the LSS-Configuration Software.
It's now time to set the "zero" or what's called the "Origin Offset" by sending an appropriate command. This is easier to do with a serial command broadcast to all servos at once (it's possible to use the LSS-Config and do them one by one as well).
- Setup a terminal with the correct COM port and using the default settings (baud rate at 115200)
- Move your servos manually to have a perfectly vertical tentacle and rotate the base at the "centered" angle you want (which will become the default position)
- Send the following command, "#254CO/r"
- All servos should have their new origin set (configured) and stored
The BotBoarduino needs to be loaded with the example code that can be found on the Lynxmotion GitHub under LSS-Tentacle.
Bear in mind that I am not a programmer and this has been done to actually show how easy it can be to control a "smart" servo without advanced programming skills. I've used some basic functions available in Arduino for this to be simpler and easier to understand.
Some of the functions used in the code include:
- analogRead: To read the values sent by the joystick & potentiometer
- constrain: To be sure not to get glitches and values outside the 0 to 1023 range
- map: To convert the analog value into degrees so it can be sent to the motor
- millis: Used to avoid any stops in the code usually created by the delay() command
- sprintf: Create the serial string to be sent to the servo (this is more advance libc function)
- println: Actually sending the above command with a line or carriage return at the end (/r or <cr>)
There are a couple of "defines" regarding the speed & limitation that can be modified as needed
#define baudLSS (115200)

#define baseSpeed (85)

#define tentaculeSpeed (60)
// Axis range in 1/10° on either side of the Zero

#define lssRangeK (1750)

#define lssRangeX (550)

#define lssRangeY (900)
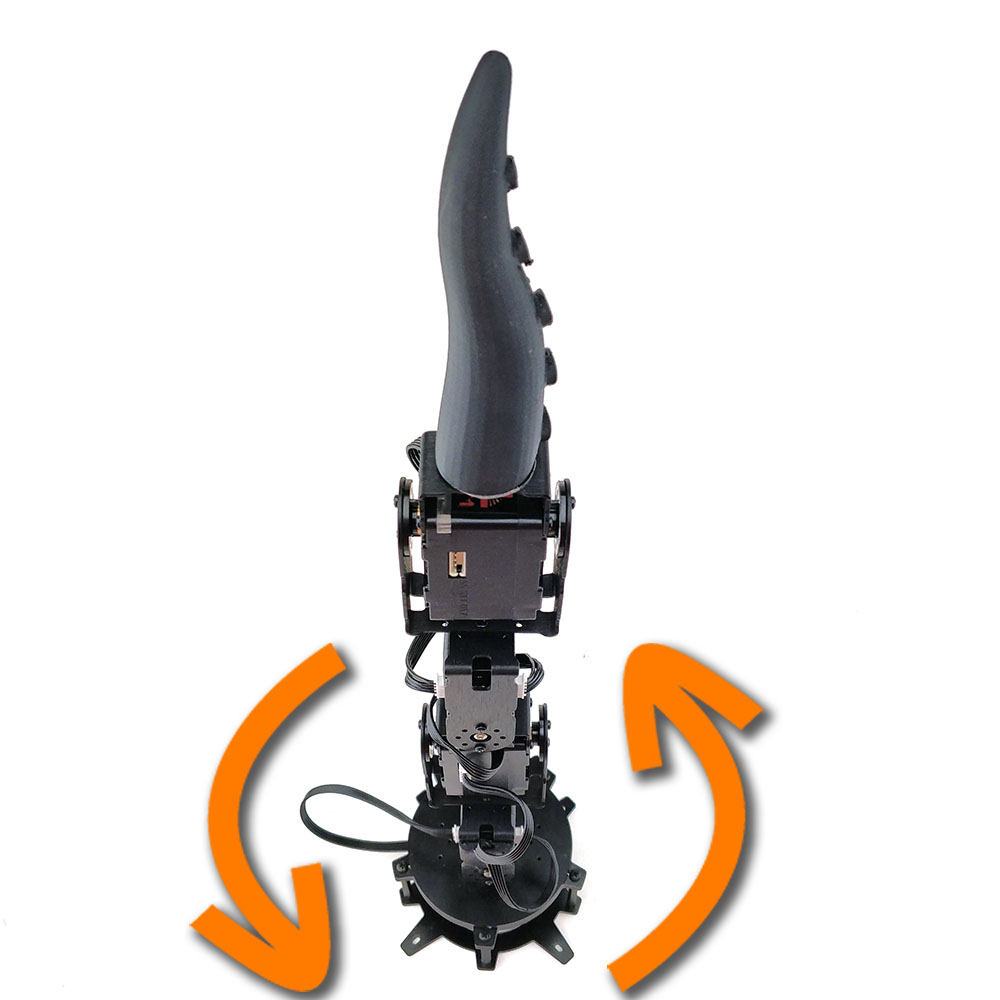
The controls are fairly intuitive if all the directions above were respected.
Tentacle control with joystick:
- Left & Right: Lean the tentacle left and right.
- Up & Down: Lean the tentacle up and down.
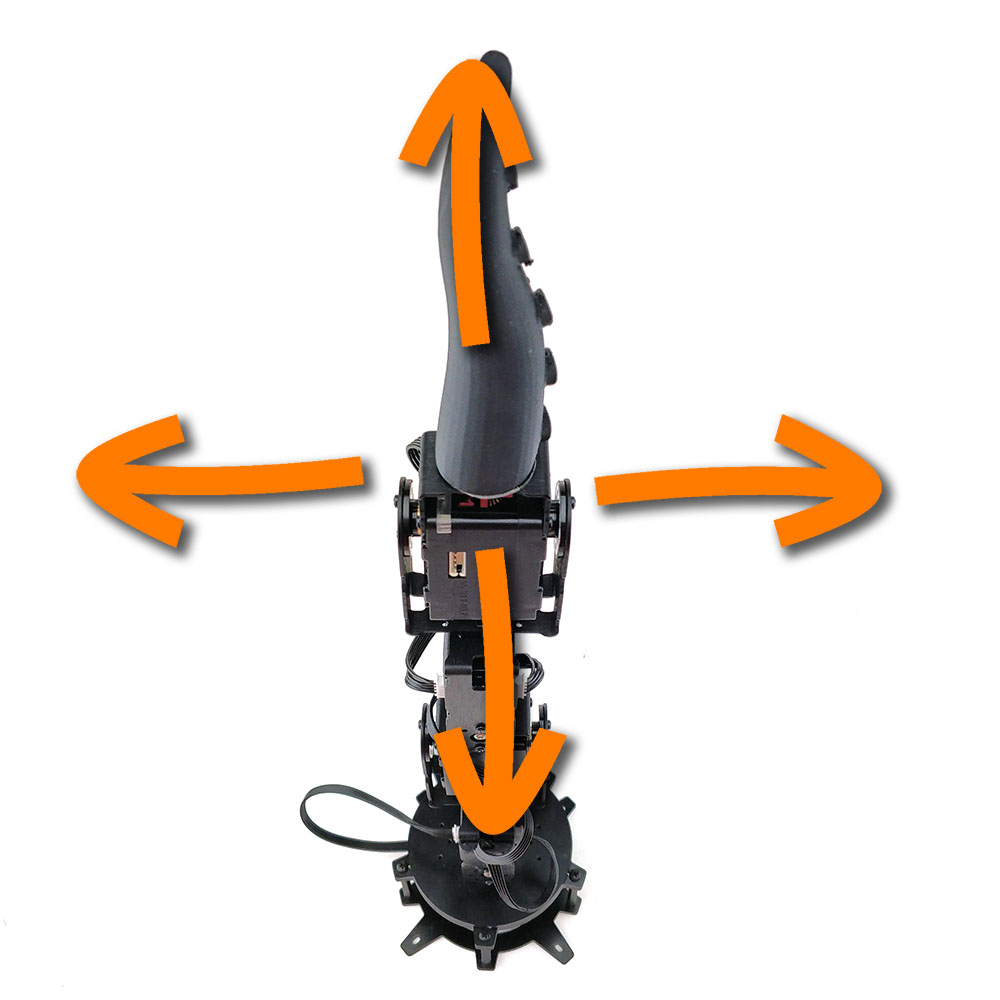

Base control with potentiometer:
- Turn the table according to the potentiometer position.
Here's a quick video showing the Tentacle in action:
Although the 3D printed part at the top makes this look like a tentacle, it can easily be adapted to other animatronic objects like a tail, a snake or a dinosaur neck. Use your creativity, along with the Lynxmotion Smart Servos and accessories to bring your imagination to reality.