


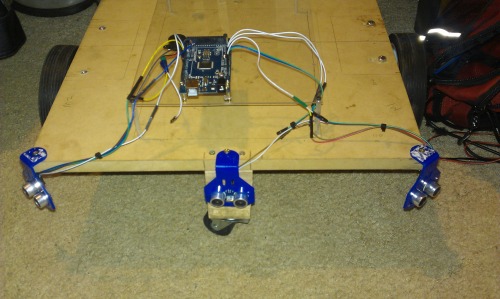
Simple outdoor test platform for sensors
I have recently taken an interest in making multi terrain/outdoor robots i decided that buidling a test platform will be good for testing sensors and differen conditions without the need of making a new robot all the time. The chassis is wooden and dimenstions are 470 x 430mm. 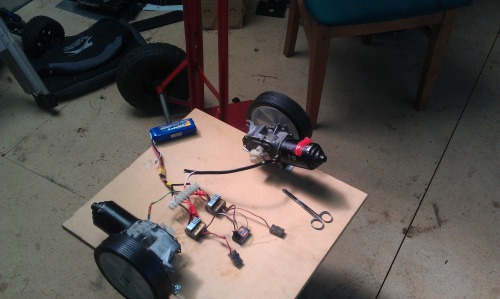
Choice of motors
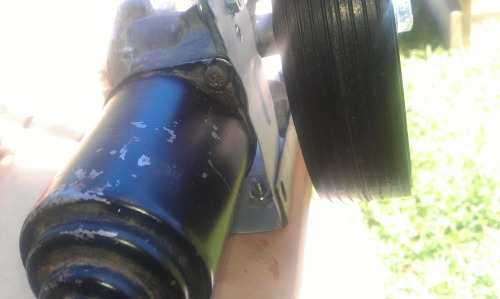
2 years ago I had intended on making a 4wd robot using 4 wiper motors but due to a busy school year i was unable to complete the project. When i had the time, two motors had siezed and attemps to fix them i ended up accidentally destroying one of the motot's gears, so it was back to the drawing board. i ended up deciding on making a 2wd robot platform for testing sensors, prototyping and general fun. The motors are rated at 12v 180'sh rpm and pull 2.5 amps at no load. Torque is pretty good and i ts impossible to stop these easily.
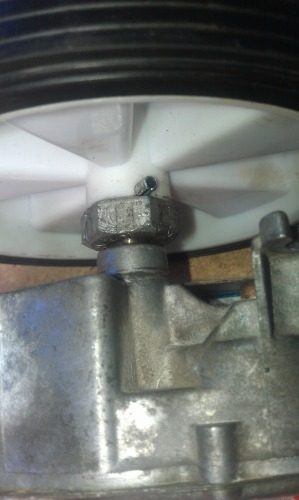
The wheel and motors were connected by means of a custom shaft adaper. This was cleverly done by a friend of mine. The wheel cannot come off and its a very sturdy system.
Choice of wheels
I had 4 plasic trolley wheels sitting in the shed and their diameter (150mm) was okay since i was going to mount the motors undernearth the chassis so groud clearence was not something to worry about. each wheel has a diameter of 150mm, a width of 38mm and a weight of 0.5kg the quality of the rubber is mediocre and using it on grass may not yield the best of results unless it is a 4wd platform.Overall whether it is a smooth concrete or rough surface, the wheels will provide excellent traction.
i also added two swivel wheels on both the front and back taking an idea from my smaller 2wd platform. i found that it was better ballanced and offered a better weight distribution
Choice of batteries
I used 2 3 cell 11.1v (2200mah each) lithium polymer batteries (12.6v fully charged) They are alot lighter and cheaper than sealed lead acid batteries of the same capacity.They outpeform sealed ;ead acid/Nimh and NiCad by a large margin and i highly recomend them They are also lightweight and charge rapidly and last longer.
Choice of motor controllers
I had two rc electronic speed controllers from my previous surveillance robot. They were purchased on ebay for $17 each and they are not 320Amp as the sellers claim to be. Here is australia the same ones are sold as 30 Amp and they have not blown up when i used them so i am currently using them while i wait for my 50A motor controller. The elecronic motor controllers are also good because they use the Arduino servo library which increases their flexibility in this project.
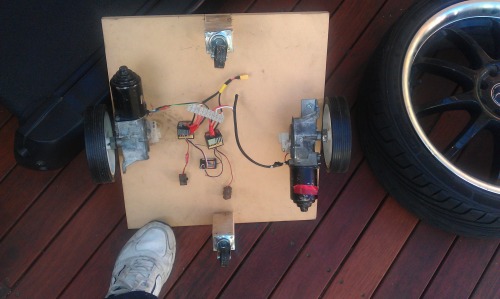
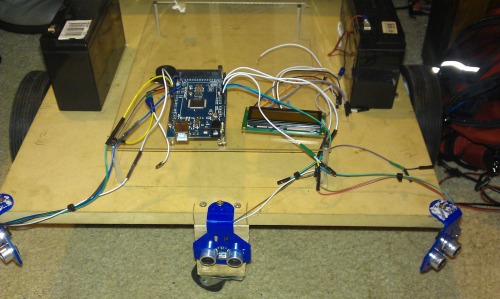
Finished product for now; ready for some testing: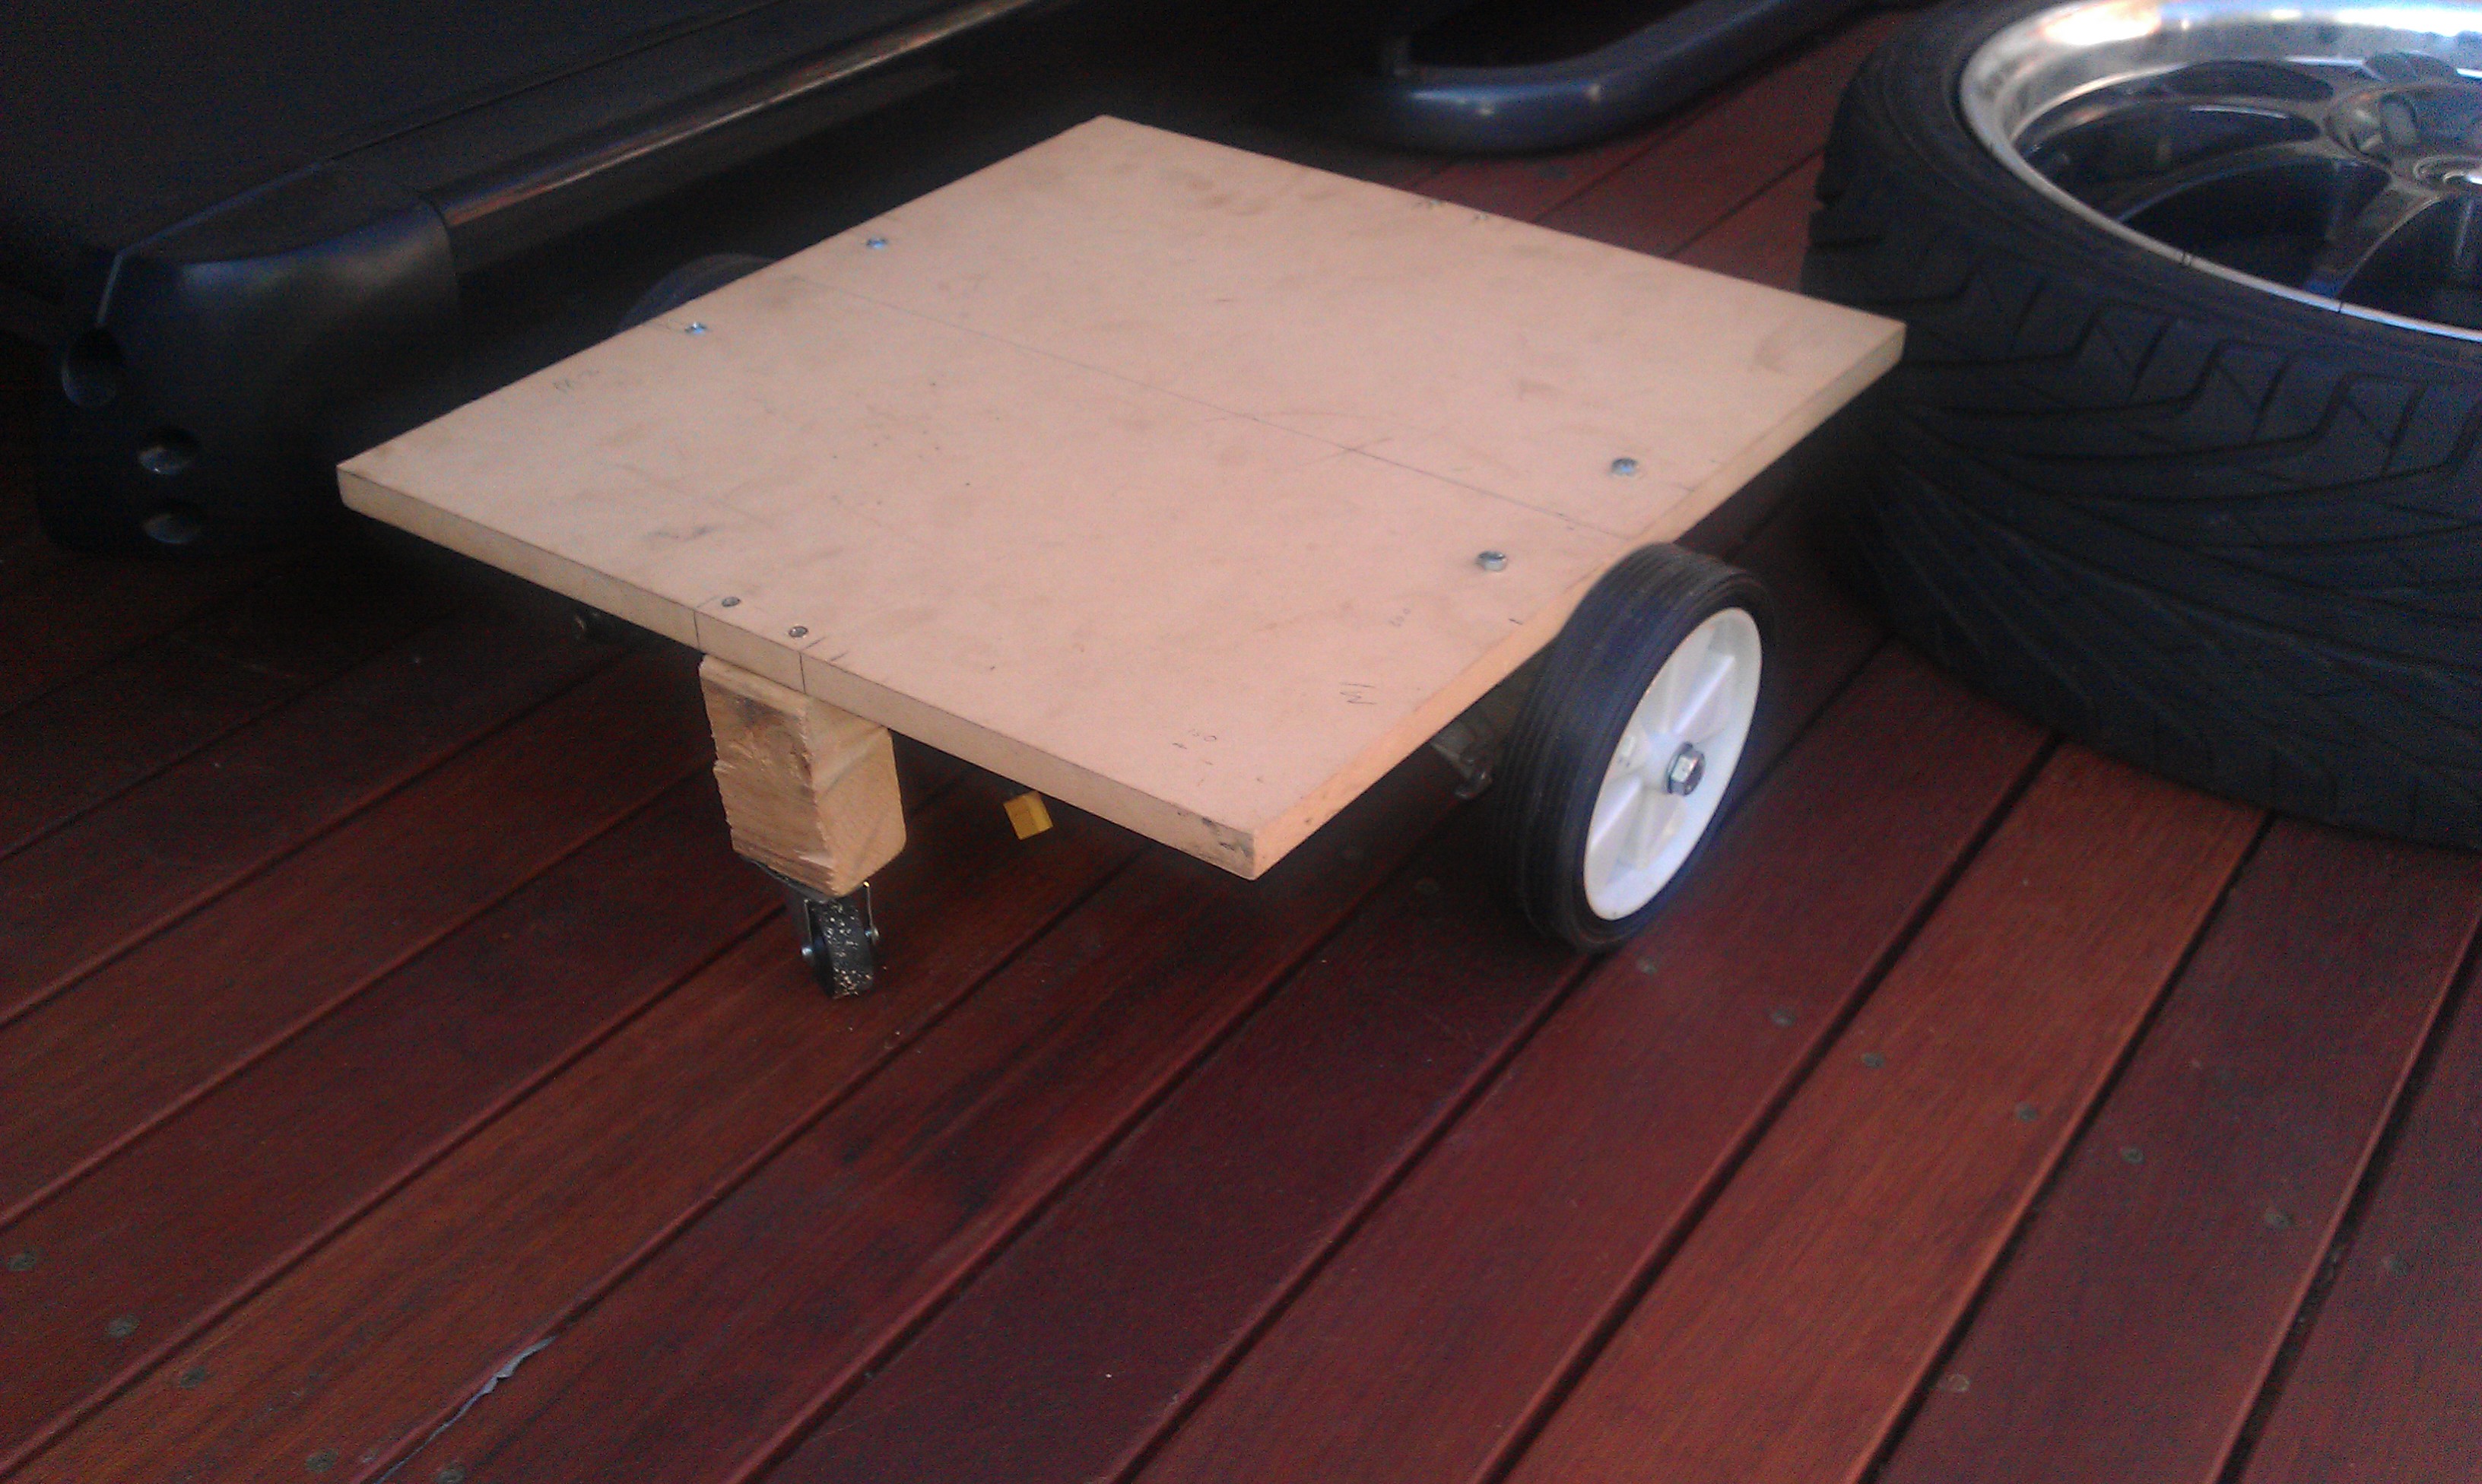
Update #1
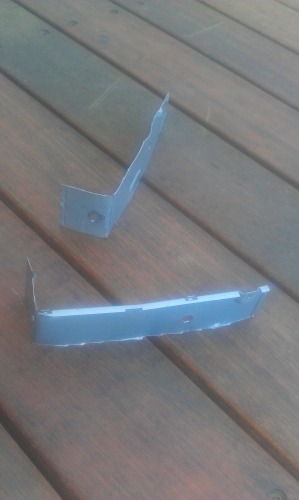
Extra motor mounts
To further stabilize the motors, i made these L shaped brackets. They might look a bit weak but they have good strength and have not given me issues. With these installed, they made the platform much more stable.
Sensors(At the moment)
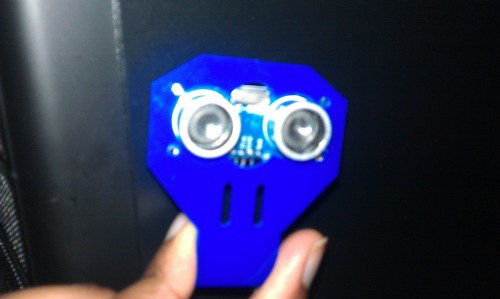
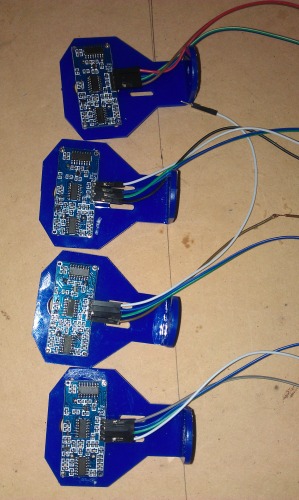
I purchased 6 HCSR04 sensors 4 of which will go on this platform. Due to the fact that these use soundwaves to determine distance, putting too many may cause some inteference so i spaced them out and to compensate for the blind spots, I will put some "long leaver" limit switches so that it does not mow everything down with its momentum. I purchased the mounts for the ultrasonic sensors extremly cheap on ebay but they don't come with screws. I overcame this by using screws from an old toy. The mounting hole sizes may vary depending on model of HCSR04 mine was 1.7mm.
Arduino, motor driver mounting Platform.
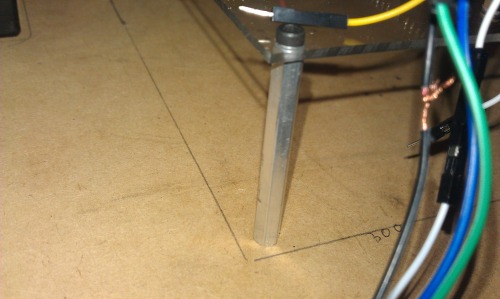
To mount my arduino and other devices idecided to mount them on a piece of 2mmclear acrylic. This acrylic sheet would be supported by 5 aluminium hexagonal pillars. The 5th one ill be in the middle to take the stress away from the middle as it would bend inwards with only 4. The hexagonal pillars were salvaged from my brother's old rc helicopters that were damaged.

Sensors and hardware mounting platform installed...A lot more updates to follow
UPDATE #2
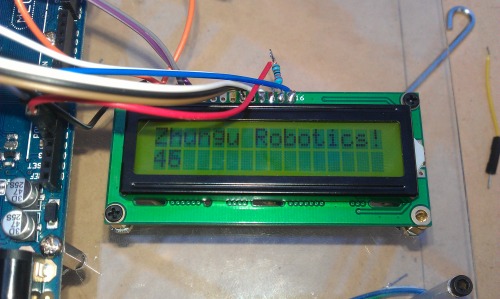
The LCD module purchased from ebay i will use it for reading sensor values and such .
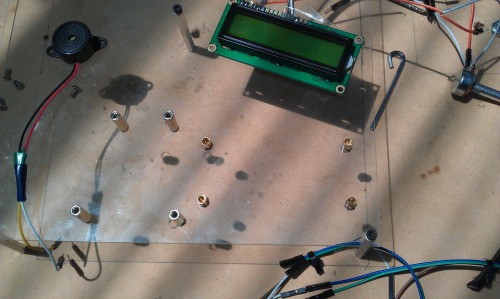
The lcd module fully mounted. It is a 16 x 2 character.The backlight is
not bad and for $2.70 its quite a bargain.
Possible location of batteries. I think this would be ideal as the weight
of the batteries will help provide some traction on smooth surfaces.
Although i prefer Lithium Polymer, I get more run time from these 6v
sealed lead acid batteries. Each has a capacity of 12A and i can either
configure them to 12v 12AH or 6v 24AH, depending on what program i am running.
I decided that 3 ultrasonic sensors are not enough to avoid the robot from
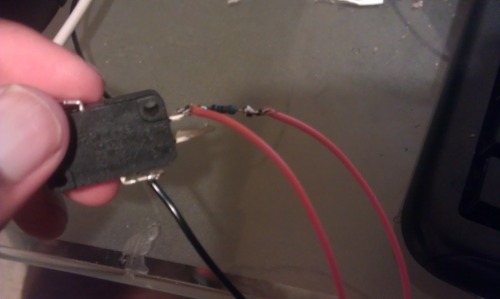
mowing thing over, the robot's imense momentum would likely damage it or damage the objects its running overm so i decided to install 4 limit switches to act as bumper switches and avoid serious collision. two will go between the right ultrasonic sensor and the middle sensor and between the left sensor and the middle sensor and two will be fixed infront of each wheel.
You can see how to wire them by following my tutorial which i will upload soon..
A large useful platform for any outdoor projects
- Actuators / output devices: 2x Wiper motors
- Control method: Arduino, RC, semi autonomous
- CPU: Arduino UNO or MEGA
- Power source: 2x 11.1V 2200mAh LiPO
- Programming language: C
- Sensors / input devices: Depends on your project
- Target environment: outdoor, Large open spaces