


SHR v2.0 Revisited v1.0
UPDATE: October 21st, '12: Added third test video shot at night and one pic. Uploaded code. Building up to a summary; the bot is almost done.
Introduction: Nobody is too old for a Start Here Robot :)
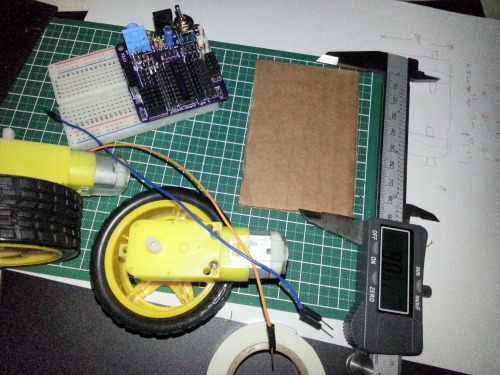
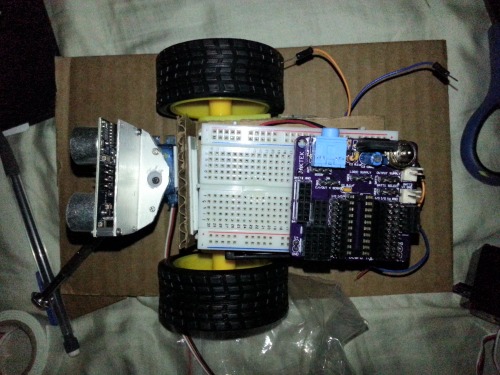
Setup. A 60mm x 90mm cardboard plate seemed good. A PICAXE Board Type 1 is plugged into a 400-point breadboard.
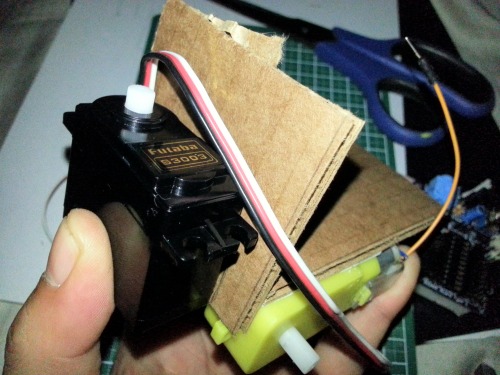
Cellulose-based servo mounting plate. I wanted to use a standard sized servo but would've needed to make a sensor bracket to fit.
A table tennis ball is the perfect height for a static caster. Using the ubiquitous HC-SR04 sensor.
Still needs some stuff! Will use an L293D, CD4017, RGB LED, and a 5V piezo for extras.
Update: October 14th, 2012
I just had another one of those "entered-the-perfect-long-winded-project-description-hit-preview-and-then-accidentally-click-the-LMR-logo-and-watch-the-page-load-at-unheard-of-speed-before-I-can-click-STOP!" moments. I'm running out of time now so all you get is the video and this blurb:
Ping pong ball sucked. You can even hear the shopkeeper trying to figure out what kind of wheel I needed to replace it with. Adding 1" Pololu ball caster. Returning to store for victory lap afterwards.
That is all for now.
Update: October 15th, 2012
Added the ball caster to the rear and took the bot to the other market on the other side of the street. It rolls much smoother now but still has the classic problem of driving in a straight line. It looks like the next project is to PWM the motor lines to even them out. To do that I need to wait for the M2 chips to come in. They have a separate timer for PWMing and one for the servo so you can do both at once.
I promise to add more info to this thing. There just doesn't seem to be a proper chunk of time available for me to redo my previous efforts.
Side note: Comb your hair and don't wear wrinkled clothes when doing public testing. You never know what kind of attention these little bots will attract.
AND WHY DON'T BREAK RETURNS WORK ANYMORE??? Grr.
Need to modify code for shorter turn delays with the new speed. I will increase the safe distance value to compensate for the speed as well.
The LED currently changes color whenever a tune starts to play. In the end each color element will be hooked up to a channel on a CD4017 decade counter. The 4017s clock will be driven by the LED mask output that goes with the TUNE command for M2 chips. This option is not available for the X2s which is what I'm stuck using right now. I had the RGB LED hooked up to individual outputs on the PICAXE 14M2 previously. I thought it would cycle through the pins as the music played but it just turns all the LEDs on or off, so it was just a white light flashing. I might try to do something with that as well but I desired more color, more stimulus.
Update: October 21th, 2012
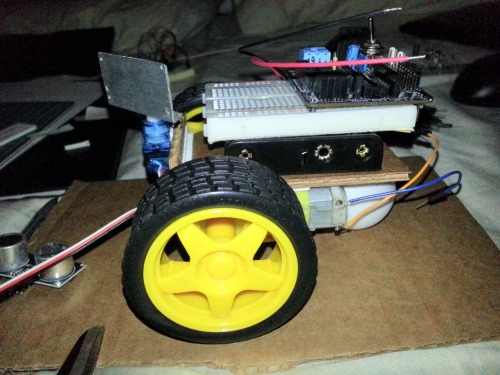
Here's a pic of the almost-finished bot:

I programmed in some PWM to the enable lines of the L293D. It helps to even out the motors some. I got the 4017 hooked up to the proper output pin on the new 20M2 and now have a nice light show when a tune plays. The ping pong ball got a second life as a diffuser over the LED. I tested the whole thing on the sidewalk outside my house in the twilight of dusk.
So let me try to get the build list composed here:
- PICAXE 20M2 (1)
- PICAXE Board Type 1 (1)
- 400 point breadboard (1)
- DC Robot Motor + 65mm wheel (2)
- 4AA battery holder with tinned wire leads (1)
- 1" Ball Caster (1)
- 9g Servo (1)
- HC-SR04 Ultrasonic Sensor (1)
- HC-SR04 Sensor Mounting Hardware (1)
- Custom sensor mounting plate (1)
- L293D motor driver chip (1)
- CD4017 decade counter chip (1)
- 5V piezo unit (1)
- Diffused 5mm common cathode RGB LED (1)
- 330ohm 1/4W resistors (3)
- Ping Pong Ball (1)
- assorted male-to-male jumper wires (???)
- assorted female-to-female jumper wires (???)
- double sided foam tape, hotglue, and cardboard (???)
I'll try to get the BOM all linked up but that will have to be at a later date.
Posted the code as seen in the nighttime viddy.
All the chip's memory is used up although I could cut out some songs to get some more code in, but eh. I do want to do a couple more things before I check the "Done" box on this robot, though.
Navigate around via ultrasound, play tunes while flashing some LEDs
- Actuators / output devices: Robot DC motors from eBay
- Control method: autonomous
- CPU: Picaxe 20m2
- Power source: 4xAA NiHM
- Sensors / input devices: HC-SR04
- Target environment: Areas with smooth surfaces