


ShC v1 (Simple hexabot Clone version 1)
ShC v1 (Simple hexapod Clone version 1)
Description.
This small hexbot its based in the simple three-servo hexapod robot using the Pololu Micro Maestro.
This version uses an ATMEL with ATMEGA32U4 and small shield to connect sensors and servos.

Note: Each square is 2.3 x 2.4 cm

1 Circuit Design
1.1 T(ee)nsebo and Brain
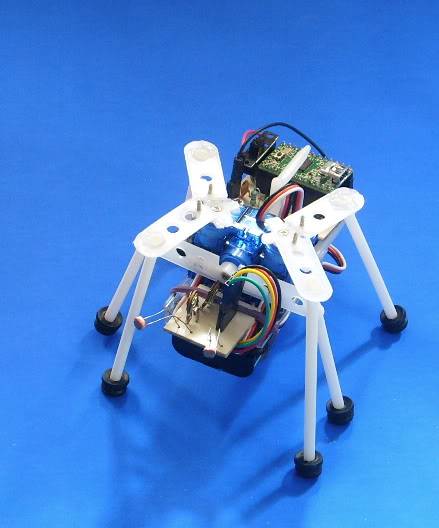
The brain of ShC uses a Teensy 2 (Figure 1.1.1) with ATMEGA32U4. Advantages of this board are: the size, price and code compatibility with Arduino. For better usage its designed a shield which support : 4 Analog sensor inputs, 2 Digital Inputs and 6 servos inputs. The PCB design of the Tnsebo its shown in figure 1.1.2. At this moment its only assembled: 2 Analog sensor inputs, 2 digital Inputs and 3 servos inputs (Figure 1.1.3). Finally the Tnsebo its mounted at the back of ShC (Figure 1.1.4) .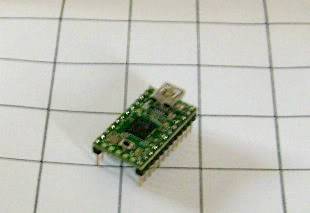
Figure 1.1.1 - Teensy 2, wit ATMEGA 32U4 .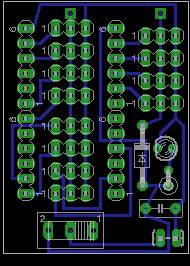
Figure 1.1.2 - Tnsebo Version 1 PCB.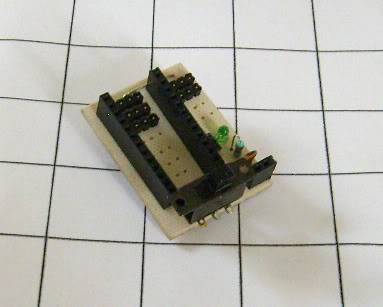
Figure 1.1.3 - Assembled Tnsebo Version 1.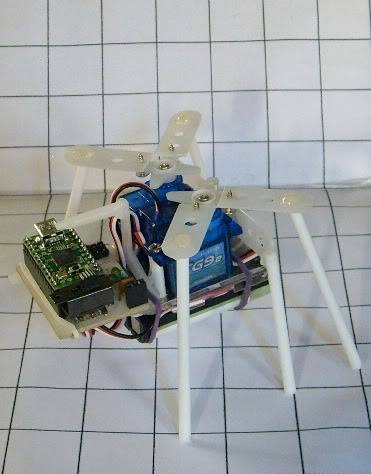
Figure 1.1.4 - Tnsebo v1 mounted on the ShC v1.
1.2 LDRs for light following
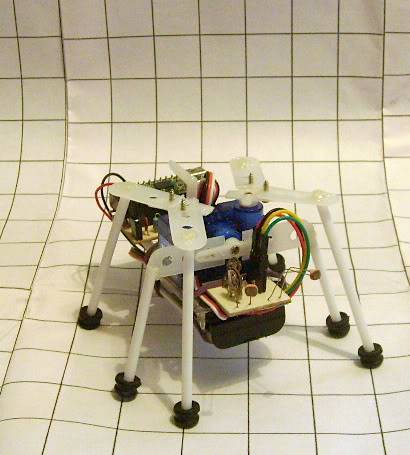
For the LDRs its used a basic configuration using potentiometers to calibrate each eye, the base value is between 2.1 - 2.6 volts. In figure 1.2.1 its shown the PCB. In figure 1.2.2 its shown the ShC with the mounted PCB.
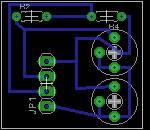
Figure 1.2.1 - LDRs PCB. 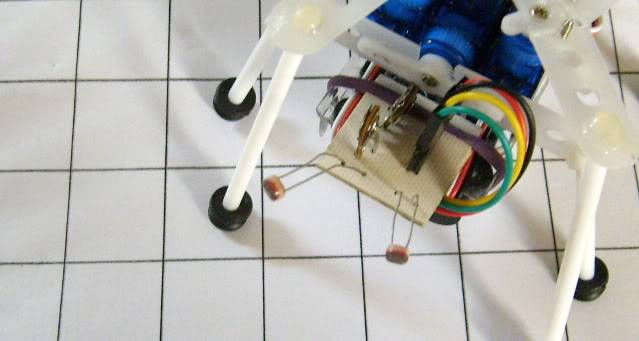
Figure 1.2.2 - Eyes of ShC.
2 The ShC design
2.1 Basic Design
I was reviewing the manual of the hexapod from Pololu, which is a great reference to built this clone. In figure 2.1.1 its shown the original design of this nice hexbot. The main differences are: battery and battery base, cable compartment, processor, sensors and legs. Making this changes the clone was born, which is shown in figure 2.1.2,
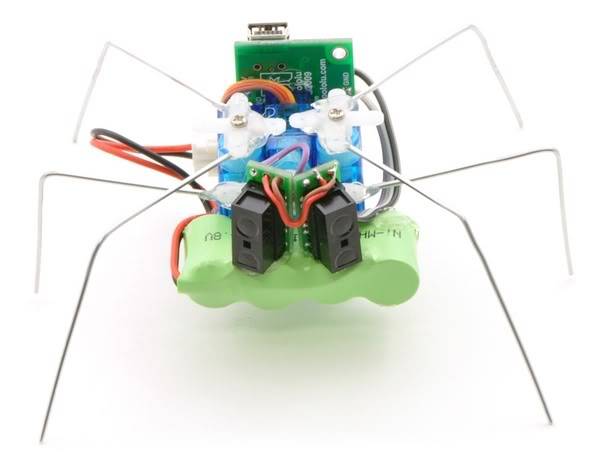
Figure 2.1.1 - Original hexapod design.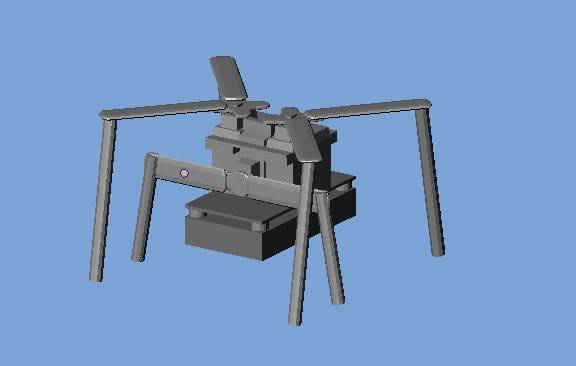
Figure 2.1.2 - ShC design with plastic legs and base.
2.2 Parts of ShC
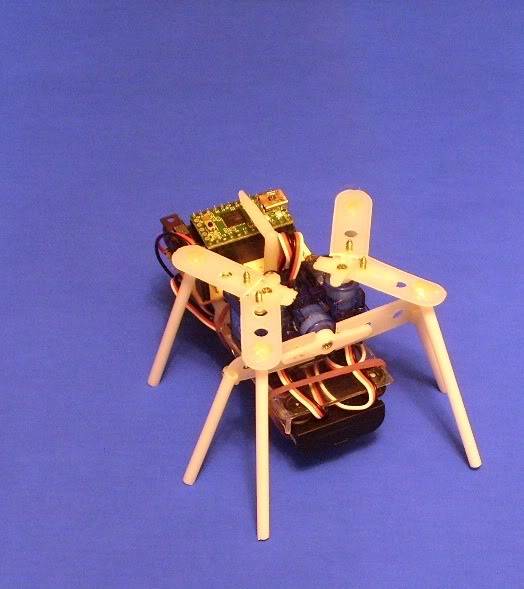
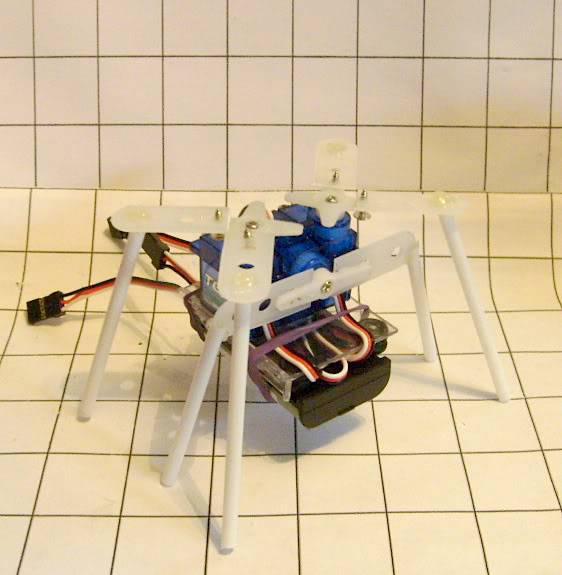
In figure 2.2.1 its shown the parts of ShC, all plastic parts are from old toys packaging. The acrylic base is cut from an old CD case.
The long pots are from Chocolate pops :) (Figure 2.2.2). TG9e small servos supports 1.5 kg of torque, and the old 3.6 V battery as power supply.
In Figures 2.2.3 and 2.2.4 are shown the construction of the leg, both are glued and screwed. Finally in
figure 2.2.5 its shown the assembling of the motors based in Pololu´s Manual, and both legs are mounted.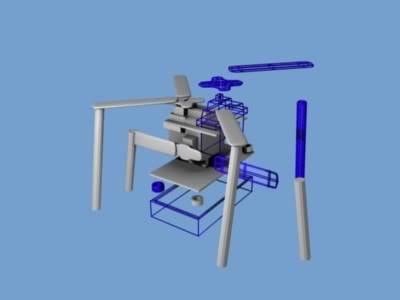
Figure 2.2.1 - Parts of ShC.
Figure 2.2.2 - Parts for assembling ShC.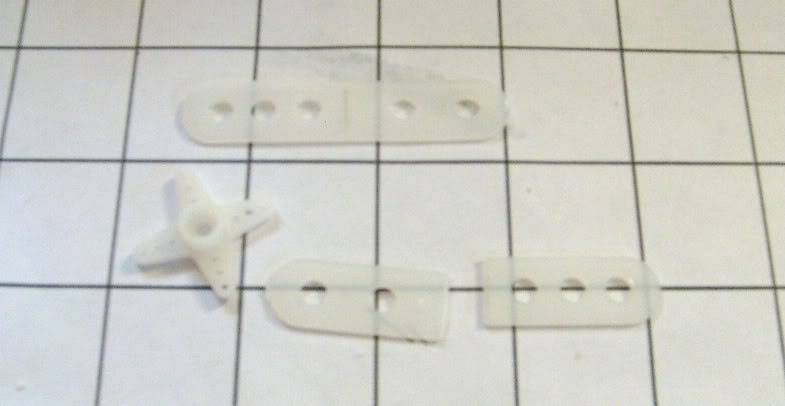
Figure 2.2.3 - Parts of the leg.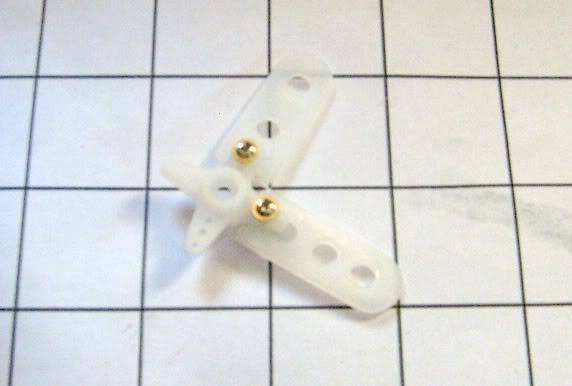
Figure 2.2.4 - Creating the leg.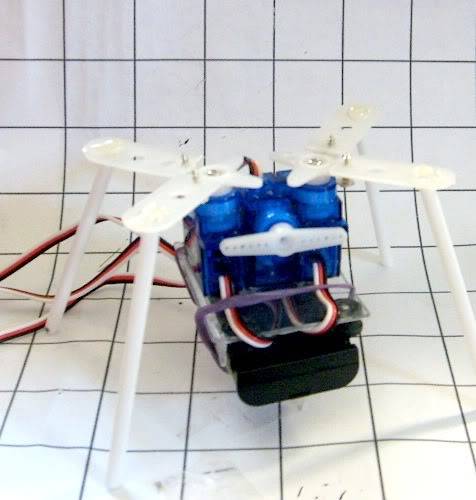
Figure 2.2.5 - ShC with 4 legs.
3 Testing the ShC
3.1 Basic Walk Cycle
The first step, is to test the walk cycle of the hexbot. For that reason a simple program its design. This version takes via serial communication several characters that indicate a movement to each leg. On this way its possible to change the movements and see how the behavour is. In table 3.1.1 control and angle changed are shown.
Table 3.1.1 - Legs and control characters
Leg 1 Leg 2 Leg 3
+10 a b c
-10 d e f
For cycle movements the following table can be generated (Table 3.1.2). This based on figure 3.1.1 and Pololu's online manual.

Table 3.1.2 - Secuence using control characters
Frame 0
Frame 1 e a c
Frame 2 d f d f
Frame 3 b b
Frame 4 a c a c
With the code (TestSerMot.) for Teensy, we can send the complete string as follows:
eacdfdfbbacac
3.2 Testing
Taking the data below, another program is design to test two walk cycles. Using angles table 3.2.1 is generated, and is possible to move the hexbot as shown in video 1.
Table 3.2.1 - Angles for walkcycle based on Table 3.1.2
Leg 1 Leg 2 Leg 3
0 80 80 80
1 95 65 95
2 60 0 60
3 0 95 0
4 95 0 95
5 0 65 0
Figure 3.1.1 - Movements for walkcycle.
The basic cycle could be written as:
Init: Initiate (0)
Start (1)
Cycle: Move1 (2)
Move2 (3)
Move3 (4)
Move4 (5)
Go Cycle
3.3 Follow me
3.3.1 Base Algorithm for ShC
The Follow me program consider a base algorithm designed to take several condition using a binary action table. For each eye we initialize with the ambient base light obtained as follows:
nAmb1 = analogData
nAmb1a = nAmb1 + 50
nAmb1b = nAmb1 - 50
Then, its created all the thresholds areas for each action according to a previous calibration on LDRs.
nAmb1s = nAmb1a + 63
nAmb1r = nAmb1s + 63
nAmb1c = nAmb1 - 205
nAmb1d = nAmb1c - (nAmb1b - nAmb1c)
For each cycle its obtained a new light value saved as: AAmb1, evaluating:
if (AAmb1 < nAmb1a) & (AAmb1 > nAmb1b)
-1
if (AAmb1 > nAmb1a) & (AAmb1 < nAmb1r)
0
if (AAmb1 > nAmb1d) & (AAmb1 < nAmb1b)
1
For real values its evaluated using a binary table:
01 02
0 0 Backwards()
0 1 Turn 1()
1 0 Turn2()
1 1 Forward()
0 -1 Turn 1()
-1 0 Turn 2()
1 -1 Turn 2()
-1 1 Turn 1()
-1 -1 Stop()
Those functions contains the basic cycle for each movement.
In Video 2 its shown how ShC reacts to light. First obtains ambient light, the it reacts to the low light (shadows), and begins to turn arround, when the lamp shows up, we can see different reactions, until the ShC follows it. And again, it finds low light and try to avoid it turnign arround.
hexapod Clone
- Actuators / output devices: 3 servos
- Control method: Autonomous.
- CPU: Teensy
- Sensors / input devices: 2LDRs
- Target environment: indoors mainly