Shapeoko CNC Engraver
It all started one day when I was working on my old CNC engraver last summer at my makerspace. Someone went up to me and said "You should work on this CNC. You have talent and this Shapeoko CNC could use it." So in August I decided I would get it to work.
In August I realized the CNC had two spindles it could use. The two spindles didn't have any mount but one was bigger than the other. I decided the one that was a dewalt that happened to be the bigger one I would 3D print a mount for it. A member at my space warned me someone who had worked on the machine before me had gotten seriously hurt doing that so I decided to ask the space to buy a metal one.
I had then learned the CNC has been at the space for 3 years. That is longer than most people had been members there including myself. It has only worked once supposedly... I kinda doubted it would work at all to be honest.
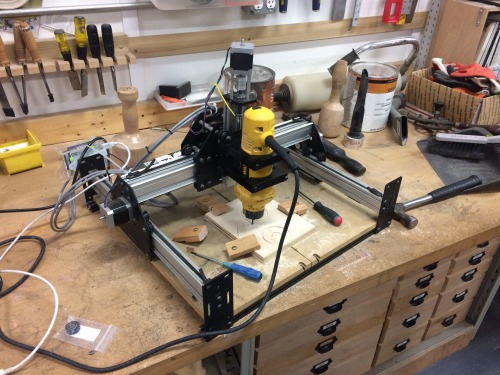
After the space had bought me a mount for the shapeoko's dewalt spindle for their cnc I had installed the mount when I encountered a few problems. I realized the Dewalt was interfering with the z axis when I made spacers for it out of M5 hex nuts. After that I ran into another problem. I couldn't attach the mount because the bolts would be in such a tight space no ordinary wrench or fingers could put nuts around them. Then my friend who gave me this project told me he would tighten them the next day with wrenches from his home. So he did.
Then I ran into mechanical problems. I didn't know it was mechanical problems at the time so I put a new power supply on the machine because I thought the old one was what was causing the stepper motors to skip. So I installed a new one and that didn't fix it.
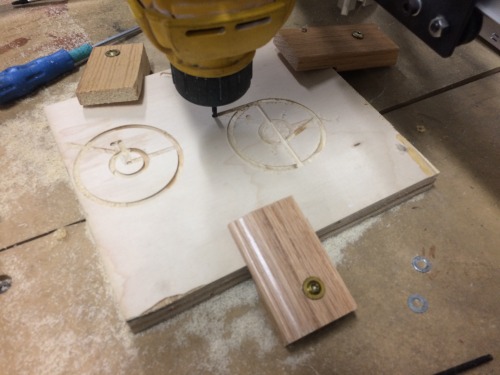
So anyways I had realized that the V-Wheels on the machine are chipped. A month later the space had gotten new ones and that was today I got to install them. I then replaced the wheels that needed replacing and the axes were smooth without bumps once again. But that didn't fix it entirely. I had to tune the stepper drivers after that to get it fully functional. So it was. I engraved a terrible pokeball but it was a proof of concept. It worked!!! I had been working on this since August and it was alive. Although I made a few mistakes on the engraving it was a pokeball and I liked it. Here are some more pictures.