


Serial Hybrid Powered 6WD autonomous vehicle
This is my project blog about creating a serial hybrid driven (RC glow engine -> BLDC generator -> LiPo battery -> 6 DC motors) 6WD autonomous vehicle.
Step 0: Preparation
Where should I start... My idea is building an autonomous vehicle, driven by 6 DC motors, powered by a LiPo battery, which is again charged during operation by a RC 2-cycle (or better 4-cycle) glow engine powering a BLDC-motor-generator. The whole system will be controlled by an Arduino.
I know the whole idea is from an economical point of view crazy (the efficiency of the overall system will be around 10%), but I'm just curious about the technical challenges on the way.
Initially I started researching the web, if similar projects have been tried before. I found a quite promising series of YouTube videos about building a glow engine - generator set-up (https://www.youtube.com/watch?v=HL1wzOx_JbU). This could be a good basis.
But let's start with the basics first... the vehicle itself. I needed to find a flexible platform but still standardised enough to avoid over complex "mechanical engineering" tasks. After some research I found on this webpage the project for a 6WD frame build from VEX Robotics bits, which I think is a good starting point (https://www.robotshop.com/letsmakerobots/node/40034#null).
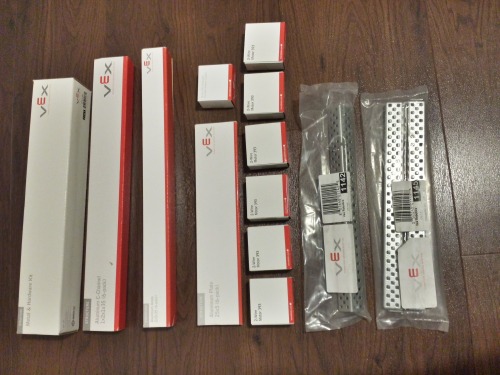
After ordering the first bits, let's start.
My shopping list so far:
VEX components:
1x Metal and Hardware kit (276-2161)
Aluminium Plate 25x5 (6-pack) (276-2311)
6x 2-wire motor 393 (276-2177)
Motor 393 Integrated Encoder Module (2-pack) (276-1321)
Aluminium Angle 2x2x35 (6-pack) (276-2304)
Aluminium C-Channel 1x2x1x35 (6-pack) (276-2289)
Angle 2x2x25 (4-pack) (275-1142)
Chassis Rail 2x1x25 (4-pack) (275-1145)
Wheels:
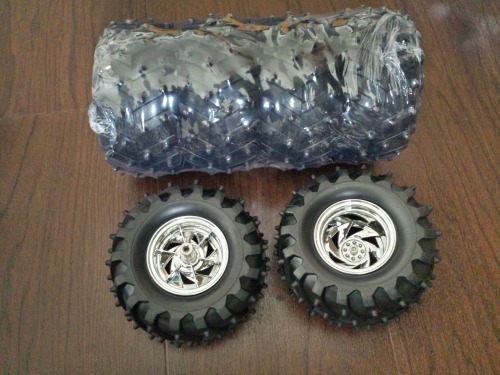
2x Dagu All Terrain Wheels Four-Pack
Suspension:
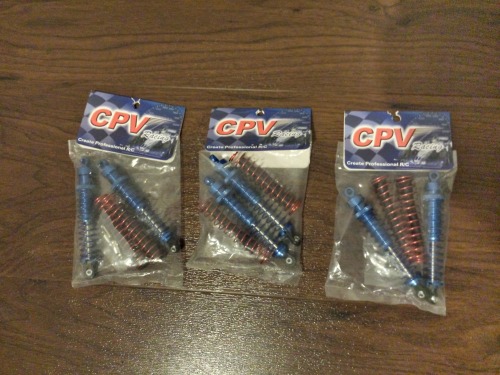
6x CPV 100mm Blue Aluminium shock Absorbers
1x 50ml Silicone Oil 45WT
Motor Control:
1x Sabertooth Dual 12A 6V-24V Regenerative Motor Driver
Overall Control:
Arduino Uno Rev 3
Power:
1x ZIPPY Compact 4000mAh 2S 25C Lipo Pack
1x Turnigy P405 AC/DC 45W Digital Balancing Charger
Step 1: Frame work...
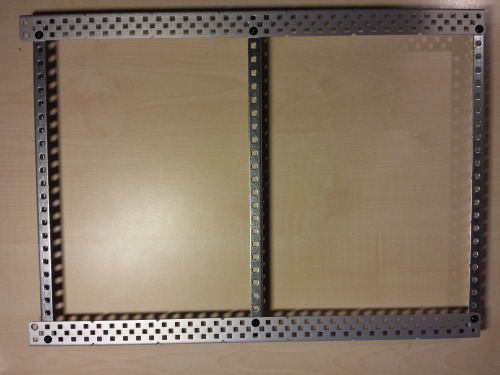
My VEX delivery arrived today :-)
Assembly of Main Frame
The frame should be large enough to carry later on the glow engine, generator and maybe some other "gimmicks" like a robotic arm, etc., so it needs to be large enough. I chose to build the frame 35 "VEX-units" long and 25 units wide (the 1 unit overlap in the end is needed to fit the T-frame below the platform later on). *Update*: after adding the suspensions (see Step 2), I realised that the end beams (front, back) will need to be moved further inwards, to allow the fitting of the two front and rear wheels).
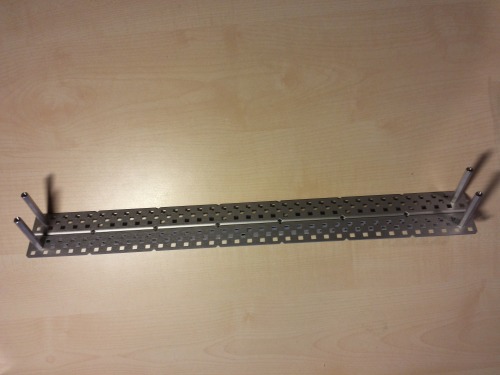
T-frame:
Now I'm using two of the 35 unit long alu angles and the four longer hex spacers to build a T-frame which will be fitted under the main frame (maybe I should add 2 more spacers in the middle but it seems to be robust enough for now and I just have four of them :-)).
Putting both parts together:
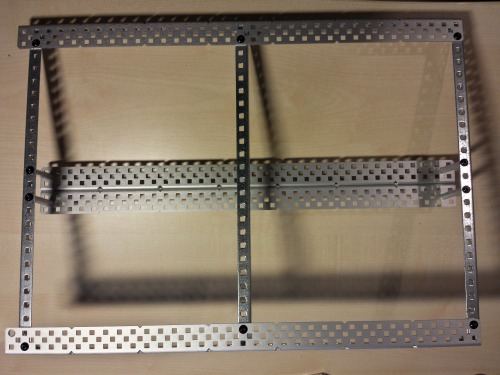
The shocks for the suspension are there but unfortunately are the screws delivered with them to short, so I'll need to order some more M3 16mm screws incl. washers and nuts.
Step 2: Suspension and Motors
The wheels have arrived:
Assembly of the suspension:
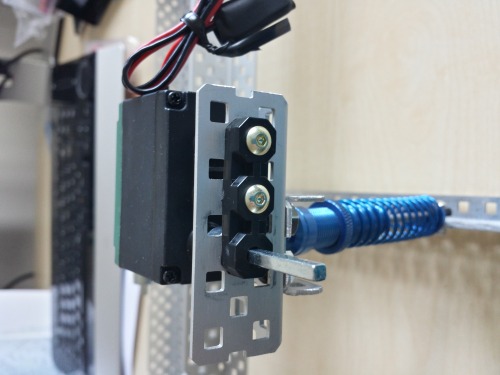
The bext step is designing and assembling the suspension and motor mounts. I'm trying to achieve a design which allows to use the full suspension travel and be as lightweight as possible (undamped mass isn't good in a vehicle).
Parts needed:
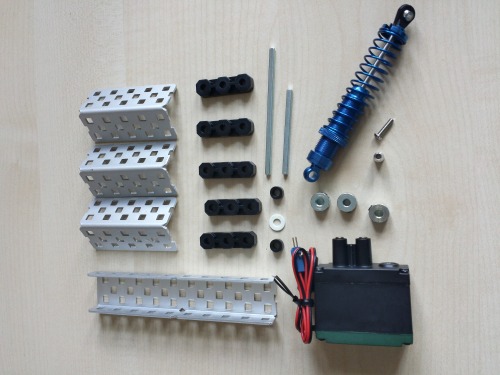
Assembly:
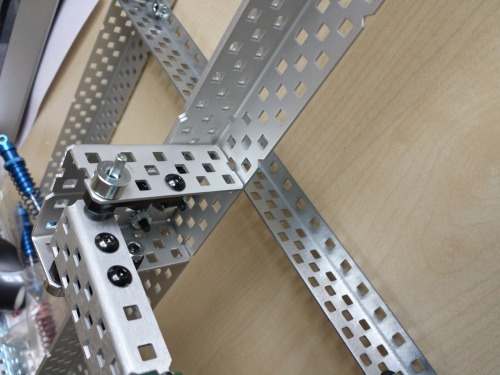
I used an axle for connecting the suspension assembly to the main frame, but I'm not really happy with this solution (mainly because it means I need to order more material from VEX which I want to avoid, so I'm experimenting with a long bolt instead).
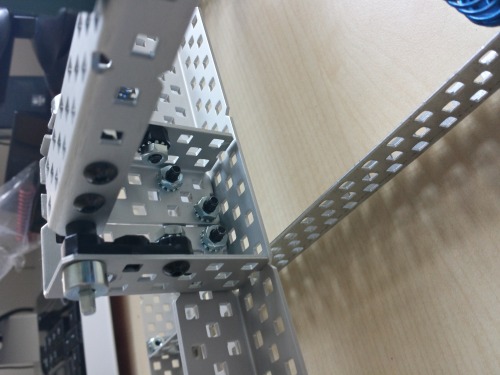

The axle is roughly 1ck too long and will be shortened later on.
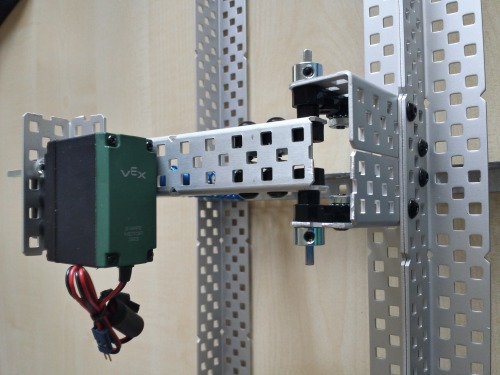
These assemblies have to be guilt six times (one for each wheel and motor).
After two finished, my robot looks like this:
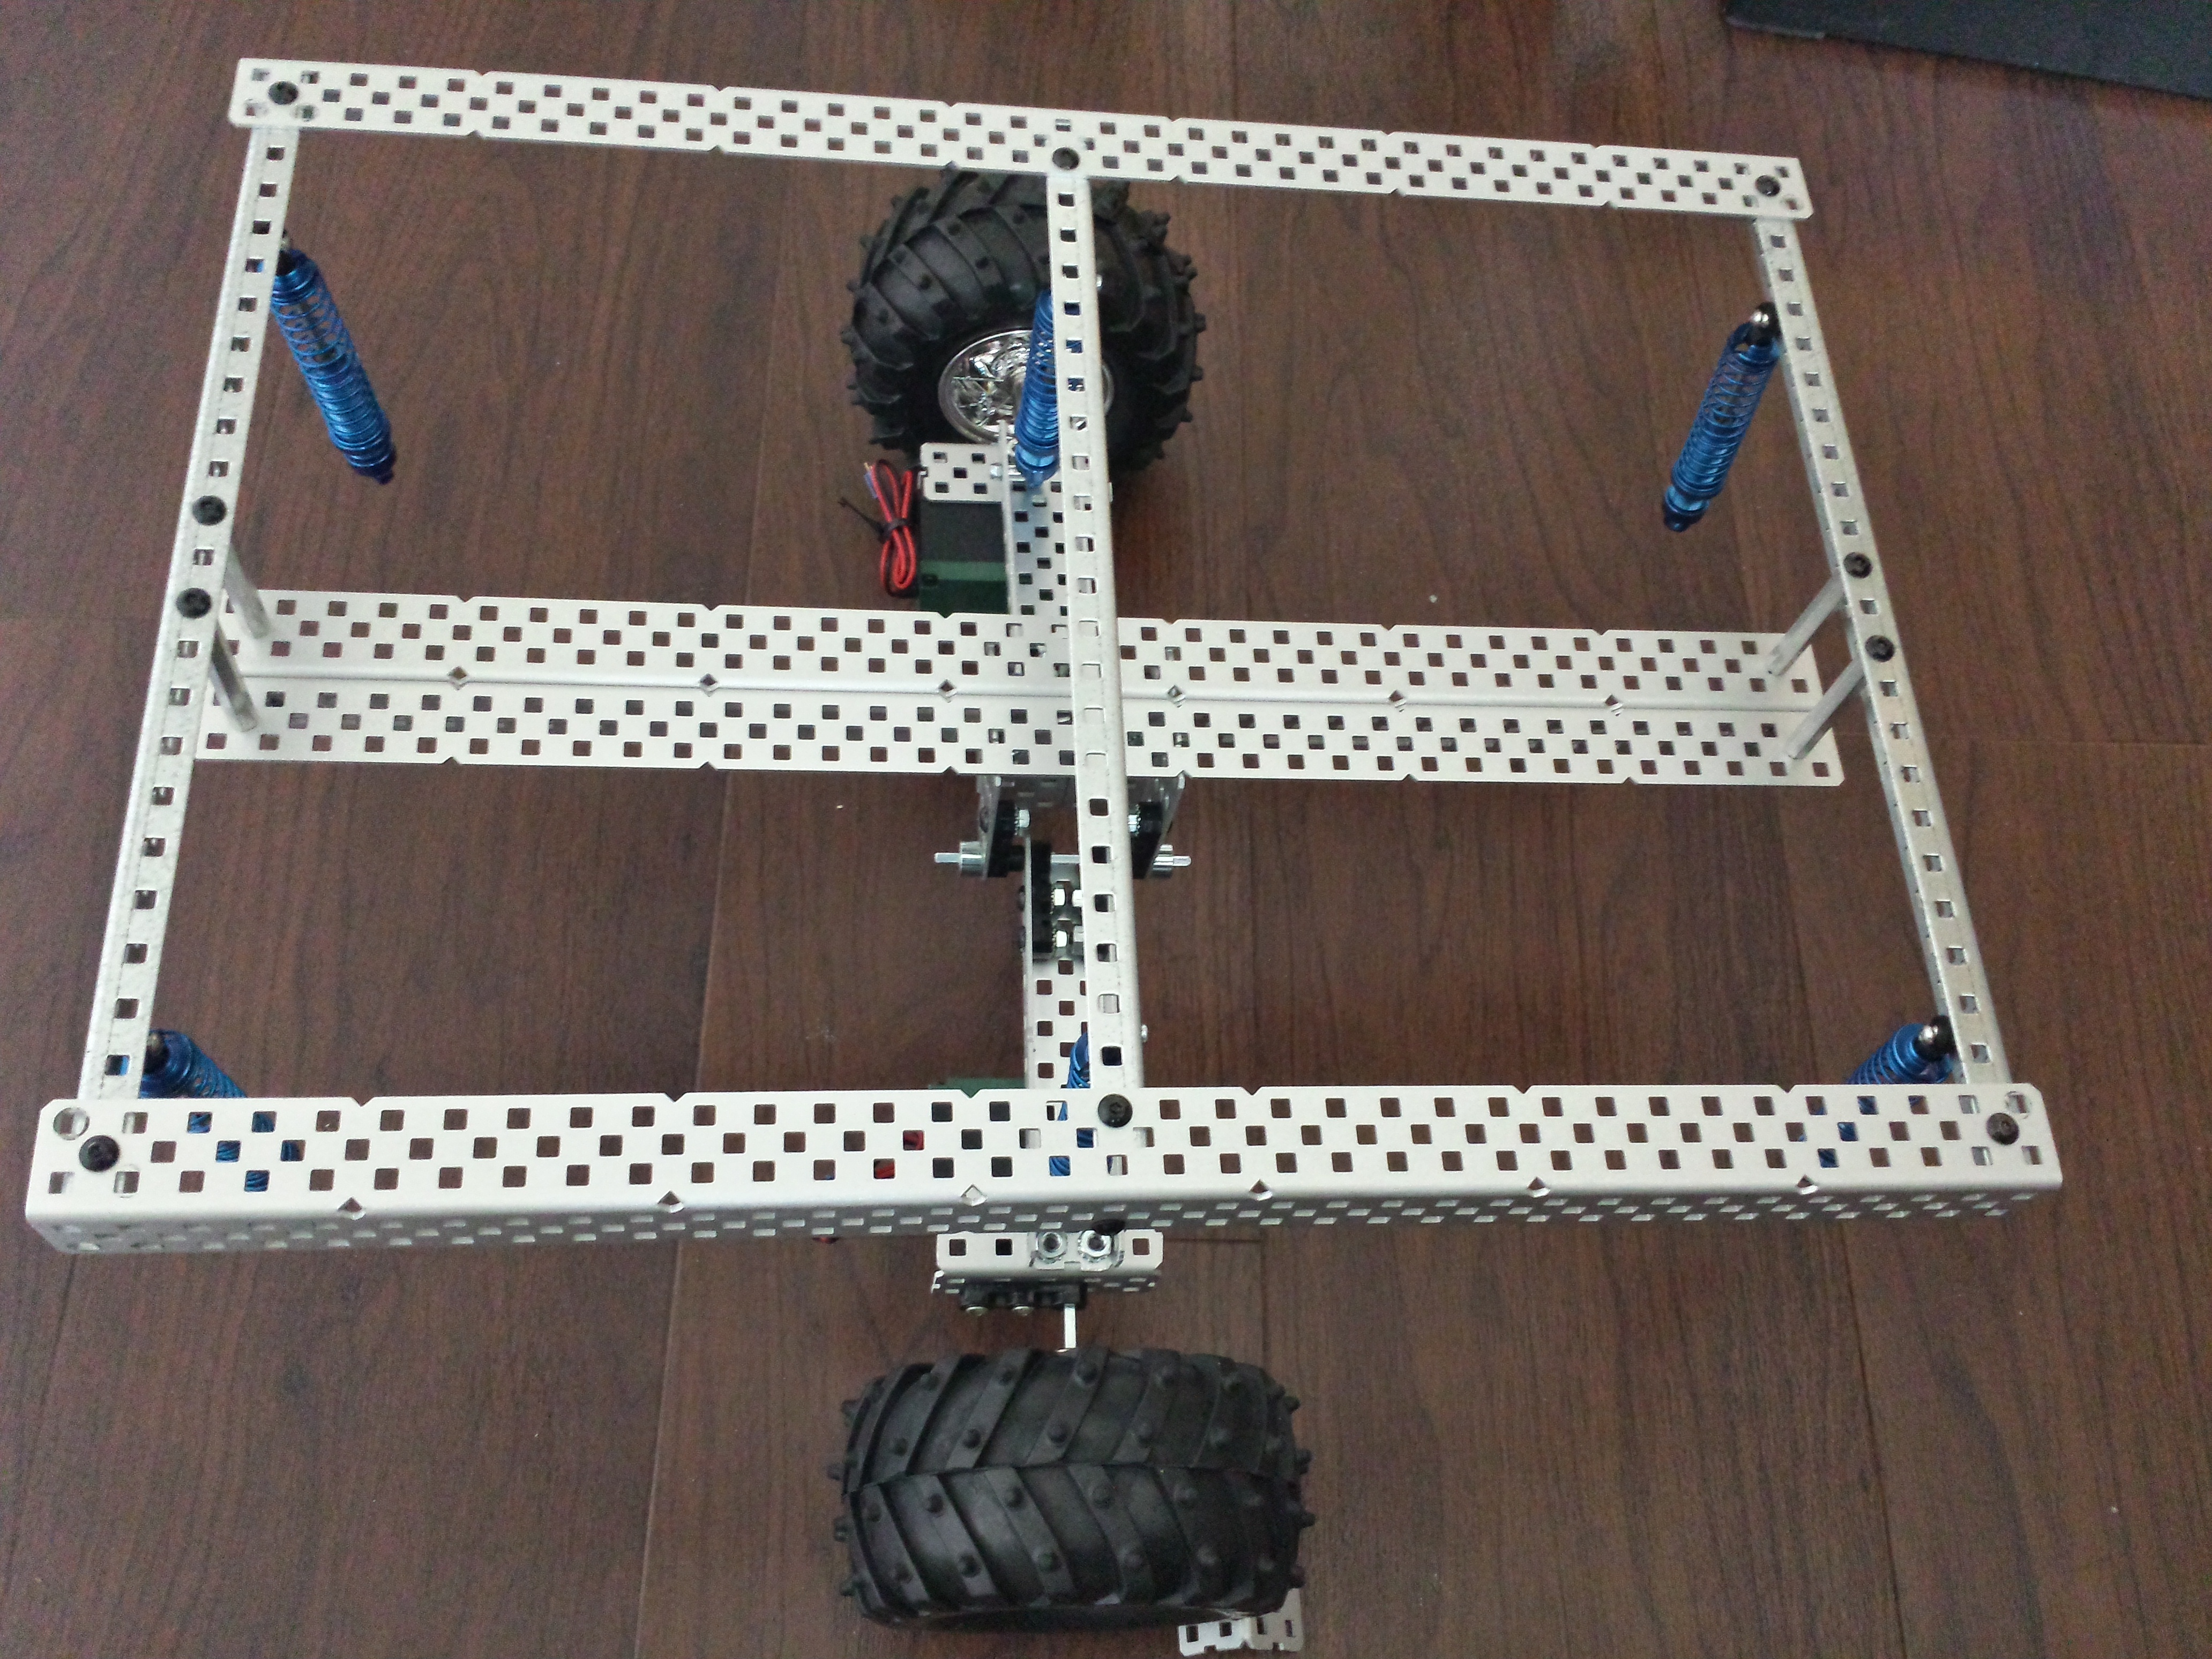
I will shorten the axles a bit and the main frame beams left and right will need to be moved inwards to allow mounting of the other suspension assemblies.
To be continued...
Will hopefully drive autonomously powered by an IC engine
- CPU: Arduino UNO Rev 3
- Operating system: Arduino bootloader
- Programming language: C
- Sensors / input devices: TBD
- Target environment: Indoor and outdoor smooth or rough surfaces