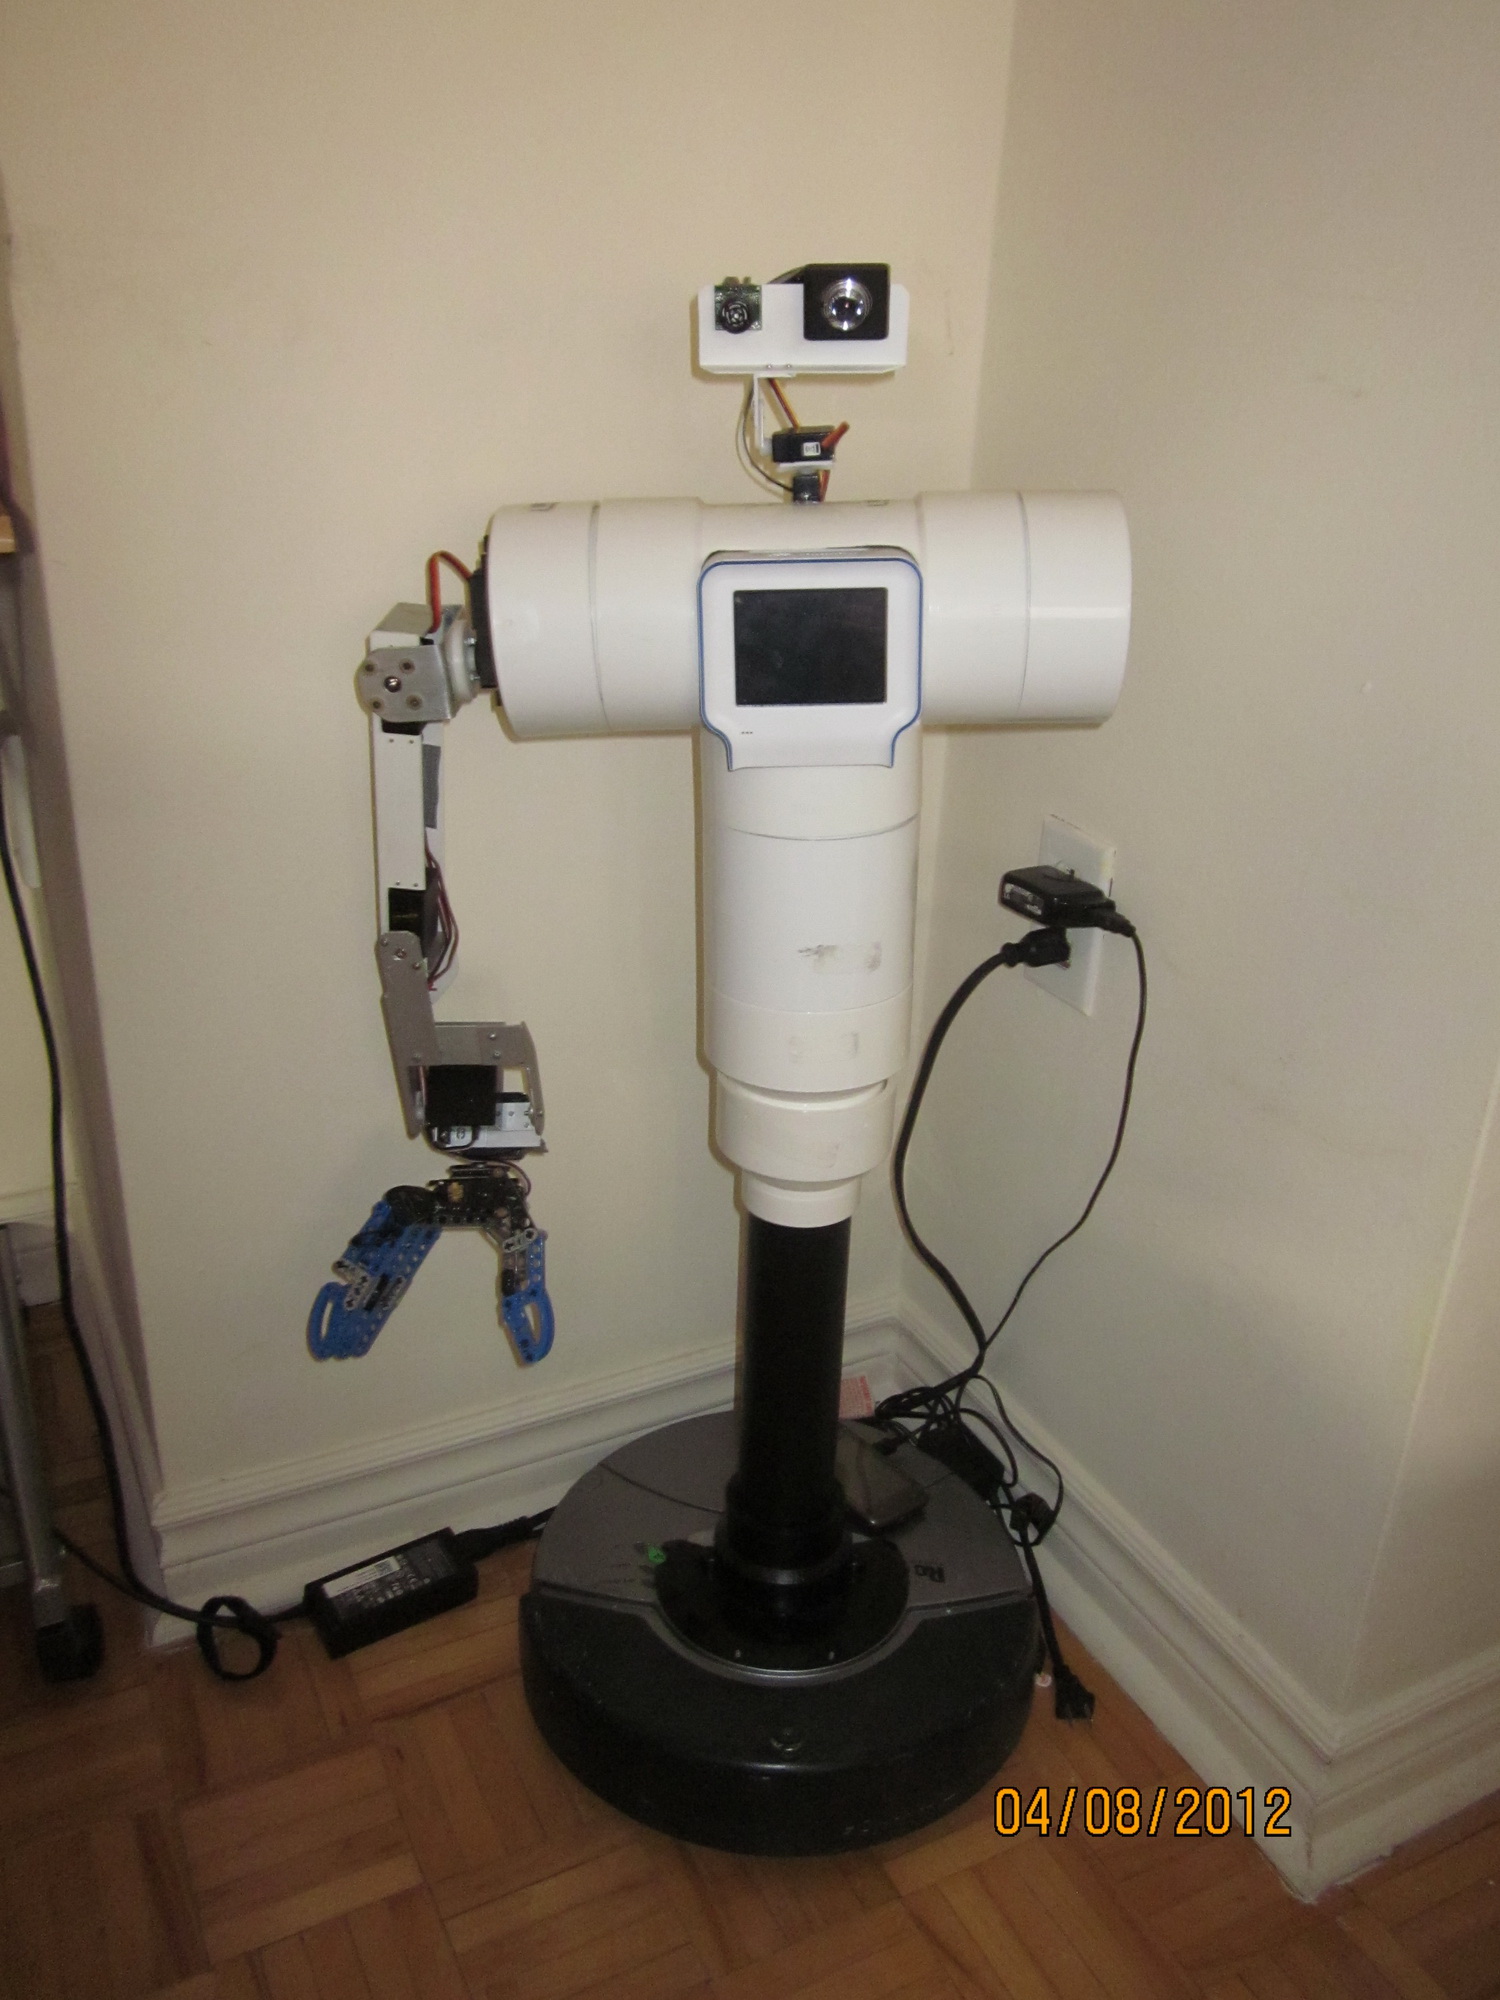
Rooby the butler robot (WIP)
Last fall my wife bought a powerful vacuum and I got the green light to transform our Roomba into a butler robot. So I went to Home Depot and bought a few PVC and ABS pipes and connectors and mounted them on top of Roomba. I cut a square hole with my Dremel in the T connector and placed there my Chumby One that will be used as the brain. The name is a combination between Roomba and Chumby, thus Rooby.
Chumby needs 5V regulated, so I bought a 5V switching regulator from Pololu so I can power it directly from Roomba's 14.4V battery. I mounted the old arm I built for my previous butler robot version without the hand yet because I need one more servo for it. The servos will be controlled by one of my uServotino boards and will be powered from Roomba's battery through some 6V uBEC I got from HobbyKing. Chumby has only one external USB port so I needed to use a USB hub and plug Roomba, the webcam, a USB flash drive and the uServotino into the hub. The only problem with this setup is that Chumby has problems booting in robot mode with all these plugged in. Oh well, we'll see what we can do about this later.
GroG worked hard to get his My Robot Lab to run on the Chumby and some more work needs to be done to be able to access all the peripherals directly from MRL. In theory, the software is set up so I can do all the programming remotely from a MRL session on my laptop and then run the code directly on Chumby. But I didn't get that far yet. The work was interrupted by the need of some parts and a damage to the Roomba's battery monitor circuitry. Then I got preoccupied by another project so this one is still waiting for my better mood. I'll take more pictures of it soon, for now, you just have the one above.
I have attached all the servos and the Lego Adaptive 4 digit hand to the robot, here is the picture: