


Rock Crawler
Update 5/16/14
Sorry I haven't updated this project in a while... Been busy with other projects which I should be making posts about soon ;) Anyways, my intention with building this bot was to take it to a competitive technology fair, that day came and went and this project recieved the highest award at the competition! I've now been invited to present this project to several hundred educators this fall. So needless to say, I'm thrilled with what's happened. I've made some significant progreess since the last update, the robot is now fully capable of obstacle avoidance and I'd say it avoids 90% of obstacles, runs over 8%, and the other 2% are ocasionally an issue, but for 3 $3 sensors I'm more than happy. I've started designing in Eagle, and over the next couple weeks I'll send a new controller board which is much cleaner, to the fab house, I'll include the current version below. Additionally, I picked up a cheap SD card reader and implemented it on the crawler, I must say I wasnt too hopefull but it's one of the best features of the bot, tons of data including the time, servo positions, motor speed, and any errors are printed into a .txt file for later debugging and review. Upcoming development includes a custom fabricated controller board, functinal RasPi/Vision Software, GPS, digital compass, and im looking at a custom remote with some cheap RF modules. Thanks for all your support guys, development will probably be slow as I'm graduating high school this week and starting a 45hr/week summer internship immediately, but I'll be working on this nonetheless. Any ideas more than welcome :)
Nathan
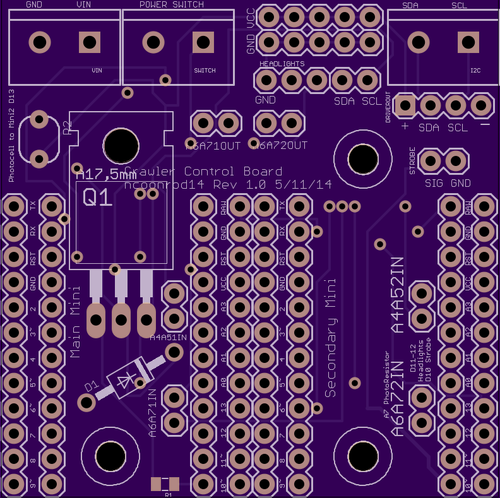
Current version of control board, feedback would be great before I order!
Update 3/20/14
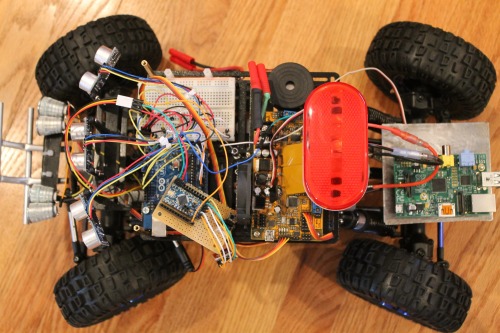
Lots of work done, added video of updates and obstacle avoidance. Headlights, upper strobe light, and bumper look awesome. Mounted the Raspberry Pi on the rear of the crawler, ordered a 50cm Pi camera cable to stretch the length of the crawler. Once that arrives I'll start struggling through some Python scripts and OpenCV. Also debating on adding Twitter capabilities as it will already be connected to the internet... Anyways, I'm planning on replacing the UNO with two pro minis. These are a mere fraction of the cost of an UNO ($3 on eBay) and have very similar capabilities. Will also power them off of the 7.2V battery pack so I'll be adding a voltage regulator. One mini will control the lights and the other will recieve info from Pi, ultrasonic sensors, and send commands to driver board. There will also be a beefy transistor onboard to cut the power in case something ever goes wrong. As it's warming up here in central Iowa, I took some beautiful outdoor shots of the robot and will add them at the bottom. Other photos and info updated as well. More updates coming soon!
-Nathan
Update 2/24/14
First motor driver board was partially DOA and replacement board arrived and has been tested and set up. I got ahold of some 90 lumen smd white LED's on ebay super cheap and have been implementing them. I put three of them in the "strobe" and it now looks phenomenal! I wanted to add some nice headlights and decided on using four sewing thimbles with the LED's poking through holes in the back. They provide tons of light and look amazing. I wired them such that I can control them 2 at a time from the Arduino. The headlight brightness will most likely be either controlled by switches on the robot, a photoresistor on the UNO, or both. Now planning on replacing the Trinket with an Arduino Pro Mini I picked up; might give the job of determining brightness to it, we'll see. Pics have been updated below about the headlights and strobe.
Next step will be working on the code for autonomous motion, will also start tinkering with my Pi and OpenCv. Any witty name ideas out there? - Nathan
Update 1/26/14:
Steering and object detection tested and video uploaded. Will be working on making the distance and steering algorithms more efficient as they're rather slow at the moment. Also will be wiring up the motor and hopefully by next week obstacle avoidance should be complete! Having issues with not having enough current through the strobe light (it's barely visible) so I'll be working some way around that as well. Still need a name, any witty ideas out there? Would love some more feedback. -Nathan
A few months ago I decided I wanted to take my projects a step further and build an extravagent robot while I still have the time and space before I head off to college next year. I wanted something unique, yet not custom fabricated; something that would serve my robot purposes perfectly, but was not designed for any such purpose. I found my solution in a RC Rock Crawler. These beasts have a very solid chassis, and perfectly hackable steering and power.
I chose a chassis manufactured by Mad Gear RC, this chassis stuck out to me because of it's exceptionally good build quality, value, and hackability. Coming in around $125 this chassis is on the cheap end as far as "ready to run" RC goes. Consequently, this chassis doesnt have some of the newer tech such as four wheel steering or a brushless motor but neither of those qualities would significantly improve the completed robot so this chassis was perfect for me.
Chassis link: http://www.nitrorcx.com/72c-bs703t-blue-crawler.html
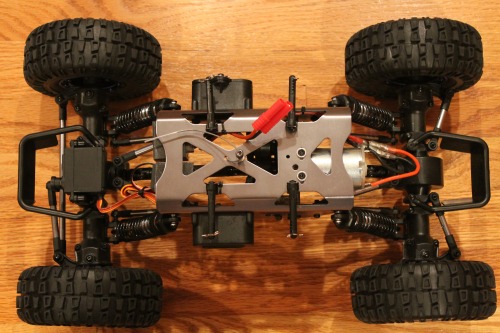
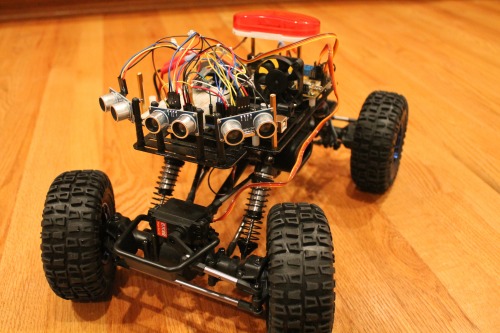
Chassis after removing body
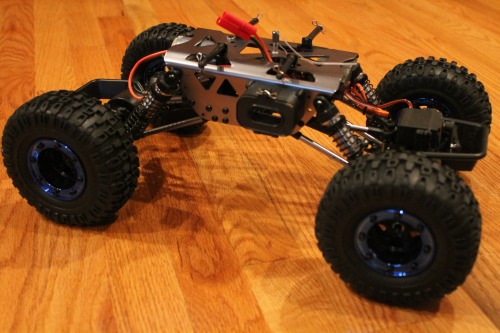
Side view of chassis
One of the biggest issues I've faced thus far is finding a way to mount all of the electronics aboard the chassis. I thought about simply bolting a 5mm sheet of scrap aluminum I had laying around but thought I'd pay the extra buck for a nice looking mounting plate. I've used DFRobot's "Prototyping plates" on both robot's I've posted here on LMR and have been impressed with the quality and range of hardware you can mount on them. My only complaints are that these are somewhat pricey compared to alternatives and the shipping from China is torture when you're used to two day shipping.
Prototyping Plate: http://www.dfrobot.com/index.php?route=product/product&filter_name=prototyping%20plate&product_id=381#.Ut8ORhDnaUk
Next, I took to choosing a motor driver. I found plenty of drivers that would've done the job, but I was intrigued by DAGU's T'Rex driver board which sports dozens of features not in any other boards. This board is more than capable of powering my DC motor, provides a servo controller, has a development arduino board for controlling motors directly from driver, 3 axis accelerometer, Bluetooth capability, I2c control, and several other features. This board will allow me to free up my arduino sketch and have a seperate sketch on the motor driver handling the messy parts of the motor control and steering.
I had to power the board in "Low voltage mode" because of my 7.2V power supply which creates a lot of excess heat on the voltage regulator, so in addition to the board there is a small heatsink on the regulator as well as a 5v 50mm cooling fan powered directly from the drivers 5v output.
Motor Driver: http://www.dagurobot.com/goods.php?id=135
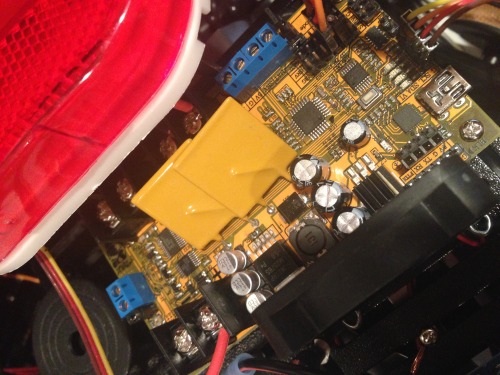
Dagu T'Rex Motor Driver board
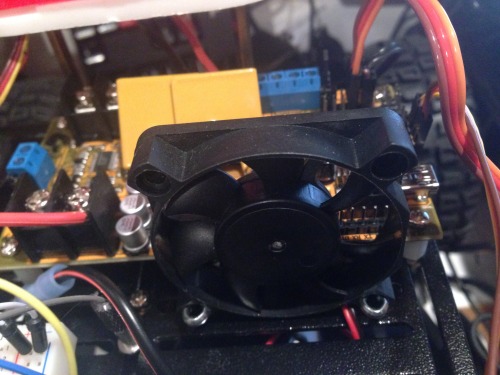
Cooling fan with motor driver in background
The main computing platform of the bot is a Arduino UNO I had laying around, If I have a few extra bucks later on I'll buy a Mega for the increase in memory and digital communication pins. The UNO will process sensor data, send directions to motor driver, and recieve data from Raspberry Pi. For now, the UNO will be adequate for these purposes.
Additionally, I picked up a dirt cheap piezo buzzer from an electronics store which the UNO will control. Turns out the buzzer is SUPER loud, my guess is at least 90db (learned this the hard way). The UNO will use the buzzer as a horn and I'll probably back the voltage down to 3.3V to save my ears, it should still be plenty loud at that voltage.
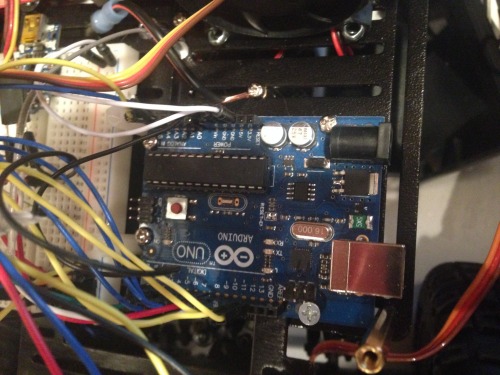
Crappy photo of the UNO through the jungle of wires. Sorry!
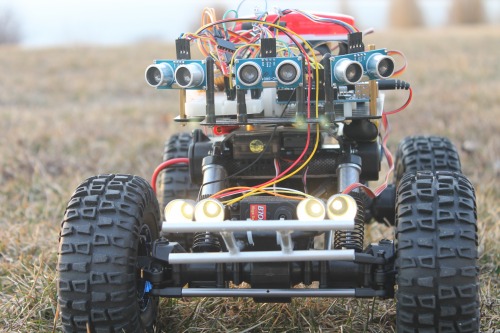
3 HC-SR04 ultrasonic distance sensors mounted on the front of the bot take care of obstacle avoidance. These sensors are dirt cheap and offer a reliable distance calculation both indoors and out. I'm also thinking about using a fourth mounted on a servo to "map" the surroundings. These sensors wont be ideal for that as corners will produce "ghost echos" and flaw the map, I'm not too concerned with the accuracy of a map, only that it gives a general idea of the surroundings.
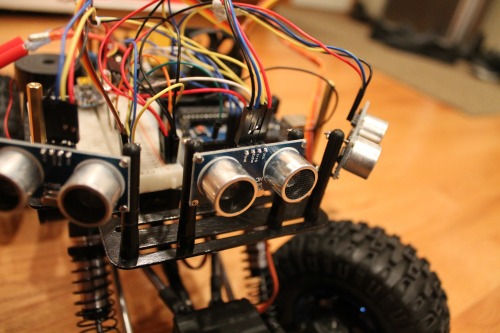
View of HC-SR04 sensors on front of bot
One of the cooler aspects of this project is the implementation of a Raspberry Pi. I have no experience with Pi's and recieved my Pi and camera board only a week ago. I hope to be able to use the Pi for several things. It will be connected to the UNO via I2c and will run OpenCV, a machine vision software which will enable the robot to recognize symbols, faces, ect from the surroundings. I plan to have a ramp or two pylons with a symbol of a checkered flag that the robot will recognize and will proceed to jump the ramp/cross the pylons. The posibilities here are infinite and I hope I'll be able to get a few ideas from feedback here on LMR :)
In along with OpenCV, I plan to have the Pi connected to my WiFi network and be able to recieve commands from a Java GUI on my desktop and maybe even send a live video stream. We'll see what I can throw together on the Pi, I'm entirely new to Python but I figure by the time I get to implementing the Pi I will have had plenty of time to learn the language.
Pi/Pi camera are not in any photos of the robot as I'm still trying to figure out where to mount it!
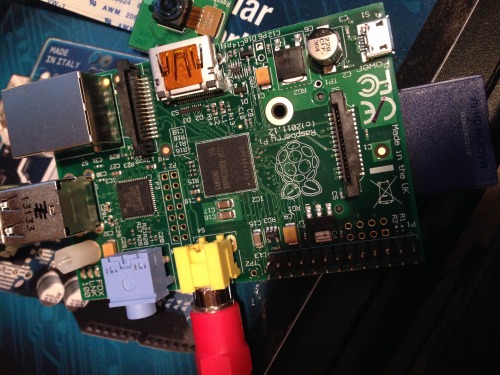
Raspberry Pi with Pi camera in background (upper center)
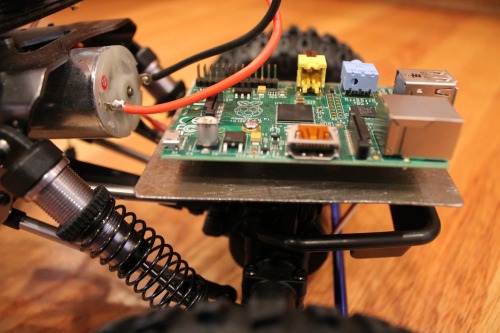
Pi mounted on robot
One of my favorite parts of my robots is the LEDs and the visual aspect in general. All of the LED's on this project are going to be controlled by a Adafruit Trinket. The only LED system onboard at the moment is a red strobe light mounted on the rear of the bot. I mounted two LEDs from a scrapped flashlight into the body of a replacement trailer brake light from which I removed the stock bulbs. The end result looks quite awesome and very realistic to a real life warning/strobe light. The light currrently flashes brightly once a second but I could put a pattern or shorter delay on if need be later on. The robot will also have some "auxiliary" lights as well as headlights. The color of the auxilary lights shining from the bottom of the chassis and the brightness of the headlights will be determined by the reading of a photo resistor which will be read by the Trinket.
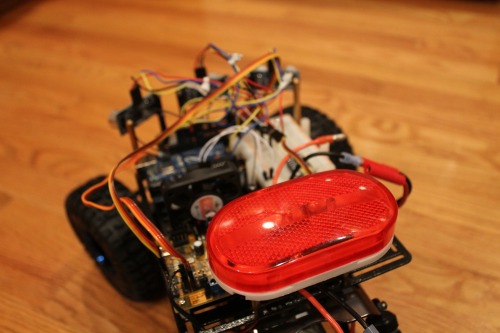
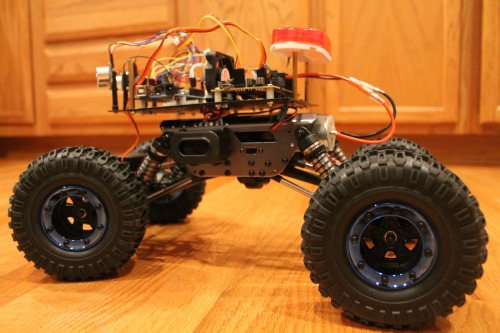
View of strobe/warning light on back of bot. Also acts as roll protection for hardware mounted below.
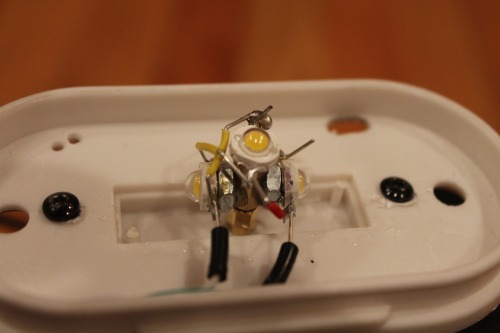
Inside of strobe light. Three 90 lumen LEDs mounted in a very sketchy manor... Nuts used as heatsinks
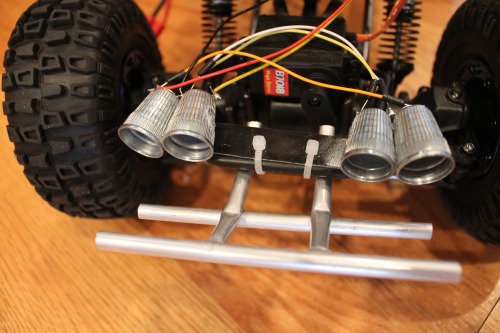
Side view of headlights. LED's are mounted on the rear end of four thimbles. LED's get very hot so thimbles work as excellent heatsinks.
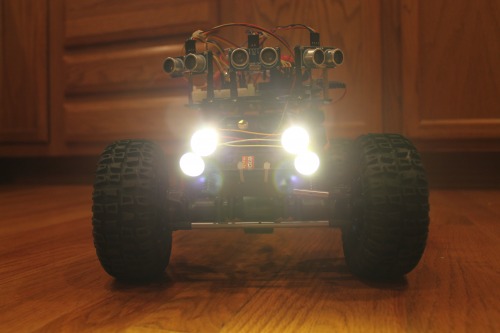
All headlights on. Can control upper lights and lower lights seperately. Very bright!
Photo Gallery:

This robot is still in it's VERY early stages. I've barely even begun to write sketches. If you have a direction you'd like to see me go with the robot, feel free to let me know and I'll see what I can do! I'd love to get some more ideas from the LMR community. This project will be in heavy development over the next few months as I hope to present it at a local technology conference in April. I'll be sure to post 2-3 updates between now and April to get your feedback!
One of the things this robot needs most is a name! If you have a witty or punny name that fits the robot comment it!
- Actuators / output devices: DC motor
- CPU: arduino uno, Raspberry Pi, DAGU T'rex Motor Driver Board
- Operating system: Raspbian
- Power source: 7.2V NiMH
- Programming language: Arduino, Python
- Sensors / input devices: 3 axis accelerometer, photoresistor, HC-SR04 Ultrasonic Sensors