


Robie - A "Start Here" Robot
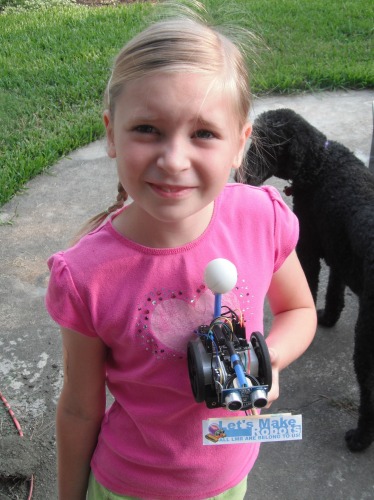
This is Robie, a "Start Here" robot my 7 year-old daughter (D1) and I built while away on vacation. We used the LMR kit from Solarbotics, a cheap soldering iron, a rusty pair of diagonal cutters, a trusty Leatherman and some craft supplies we found at my mother's house (craft sticks, crazy glue, hot glue, etc.). D1 isn't yet interested in soldering, and I didn't expect her to have the patience to watch me do the intial prep work, so I did all the preliminary soldering and bench-tested the components (board, LEDs, motors, servo, sensors...) the night before we began. I haven't used the Picaxe system before, so I also needed to become familiar with the programming tool.
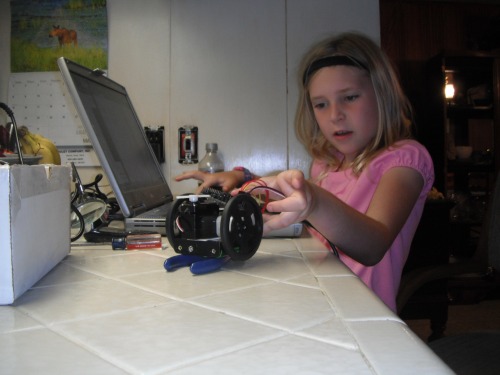
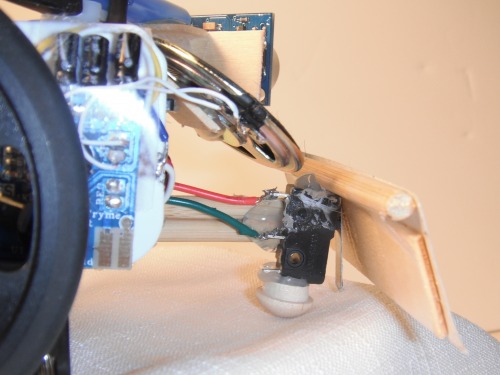
D1 did most of the mechanical assembly (I did end up taking over responsibility for using super glue - lesson learned), and she got to decide on placement, which servo horn to use, how the sensor should be mounted, bumper design, etc. I helped her plug the jumpers into the Picaxe project board and guided her in programming the output pins for motor control. Eventually I wrote simple subroutines for her to use so that she didn't have to continually peck out individual pin instructions. After the first session we had a motorized platform that would move about - yeah team! We also smoked the Sharp IR proximity sensor that shipped with the kit by plugging the header in backwards - boo hoo! So we put an LED on the servo instead and flashed it at whatever interval suited us.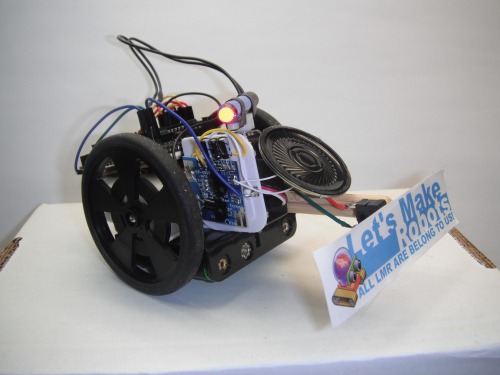
I was disappointed that we had a blind robot, but D1 seemed happy. She wanted it to make sounds and have more lights, though. So the next day I purchased a "recordable" greeting card from the grocery store - $7 or so. Then I went to Radio Shack and bought a couple of transistors, a three-color LED and a microswitch to be used for a bumper interrupt. I also discovered that they sold the Parallax Ping ultrasonic sensor. It was more expensive than other models available online, but I don't have all that much more patience than my 7 year-old, and I really wanted to give our project eyes.
The greeting card is an easy hack. You rip it out of the paper, solder on a transistor, a lead to the transistor base and a lead to the battery ground. I should probably add a current-limiting resistor to the base lead, but since I have the resistor bank in the project board I'm hoping I'm covered. (I could calculate it to be sure, but I haven't bothered.)
The bumper switch was a nice addition - and the bumper was a nice place to put an LMR sticker. We recorded "Ouch!" (and later "Oh NO!") on the greeting card circuit. When the bumper switch closed, the software interrupt stopped motion, played the recording then moved Robie in a new direction. We finally had interaction with the environment! Unfortunately when we added the ultrasonic sensor, it didn't work when the interrupt was set. I still haven't figured out how to make the interrupt and Ping sensor work at the same time - that's a future task.
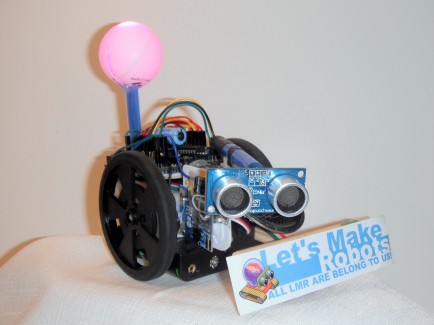
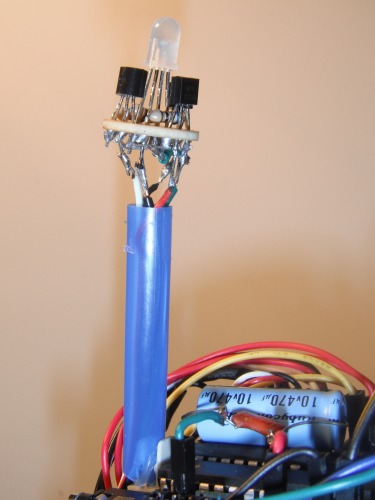 I built a simple circuit to drive the tri-color LED. Rather than limit the LED current to protect the Picaxe, each of the three LEDs has a transistor and resistor appropriate for operating at the maximum currents (30 mA for green and blue, 50 mA for red). The LED and circuit were put into a pingpong ball and mounted on top of a drinking straw. We can use the mood light to indicate sonar range ("allClear" - green, "caution" - yellow, and "danger" - red). It is also used to indicate when the processor is actively changing course - as opposed to the normal tendency to drift left while driving.
The current navigation scheme requires the sonar to be scanned right-to-left. The processor tries to identify the "best" heading based on the sonar measurements over a range of consecutive servo positions. Unfortunately, the sonar isn't terribly reliable. I have put in some data rejection and averaging, but there are still a lot of errors. Some is due to electrical noise - this has been addressed by adding some filtering (thanks OddBot) and software pauses. Other errors come when measuring walls at oblique angles or obstructions which are too small (in width or height) or too furry (it never seems to recognize the dogs as obstructions). Robie is able to navigate out of a (simple) maze of walls, but it isn't very efficient or very pretty.
I probably never would have gotten around to building a project like this without my daughter. I would have waited until I had access to machine tools, proper electronic diagnostics and a detailed design with everything specificed before purchase. With a 7 year-old you don't have time for all that. It has to be chopped with pliers, whittled with a pocket knife, and held together with fast-setting glue. The good thing is that it doesn't have to look good. And if the glue fails after a day - glue it back tomorrow morning. The project is going to be dropped several times anyway, so what difference does it make if the bumper is perfectly square to the body? It won't stay that way! Most of all, she reminded me to have fun and take enjoyment from the simple sucesses - like making the motor turn, even if it is going backwards.
Navigates a room worse than Mr. Magoo
- Actuators / output devices: Dc geared motors, GWS S03 servo, hacked greeting card, mood light
- Control method: autonomous
- CPU: Picaxe 28x1
- Operating system: Picaxe speak
- Power source: 4 AA rechargeable batteries
- Sensors / input devices: Parallax Ping, bumper switch
- Target environment: Even surface