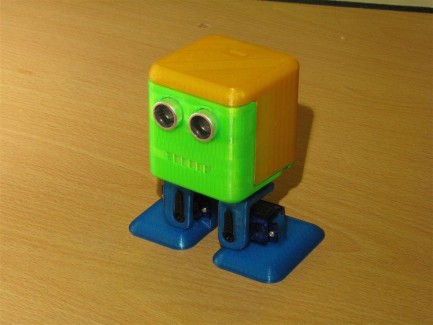
Re-Bob : Re-engineering the little fella.
It's now over 18 months since the first BOB appeared strutting across K120189's worktop and I still haven't made one so I'm going to remedy that. However, now I've discovered its joys, I really like playing around with 3D CAD so I'm taking this opportunity to give Bob a facelift and a bit of a re-hash.
I believe that Kevin didn't have access to a 3D printer when he was designing Bob, so couldn't tinker with the design as much as he would probably have liked. However, I have and I have been. Please don't take the following as criticism of the original Bob - I love the look and the movement. He's a real gem of a bot.
From watching the videos of existing Bobs, many have their brains or batteries on the outside. I want both to fit inside and my design has space for a 2"x2" (50mmx50mm) PCB, mounted on posts, and is also designed so the electronics can be fully assembled before putting the (clip on) headshell in place. Bob's legs have always looked a bit gangly to me (maybe that's part of his charm) but I'm moving the servo horns to the other side of the brackets (and the servos further into Bob) to reduce the side forces on the servo spindles. And the face - I can't decide whether my mouth design is smiley or sinister. Who knows what Bob is thinking?
For batteries I'm using 2 x Turnigy Nanotech 750mAh LIPOs connected in series and my Bob will have a Picaxe brainbox. I'll post files for the 2 main sizes of ultrasonic sensor in due course and will be adding to this thread as work progresses. As it is, I'm happy with the feet and brackets and almost there with the two parts of the head.


Oct 18th 2014:
I've been working on this as well as a couple of other projects, but recently suffered a bit of a setback. I'd fully assembled the servos and legs to the body and then ran some simple test code to waggle the servos a bit. It was so simple that I didn't test it first and when I powered up, all four servos went thud-wallop to the 0ms position, well beyond the endstops. I had forgotten to initialise the position variable before entering the movement loop. Result : Two stripped servos. Next time I'll simulate the code before applying the juice. (It looks like my comment to rwinscot was prophetic! ;¬)


