


R.A.V.
R.A.V. ( Red Avoiding Vehicle)
LOG:
// 10/2/11 : LMR RAV and servocentercode files added
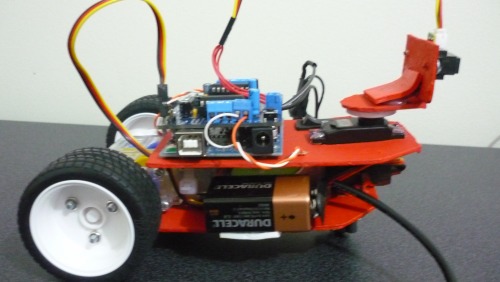
R.A.V is an avoiding objects vehicle based on Penny from ignoblegnome. It uses the arduino Duemilanove and the Motor Shield from adafruit as a motor controller and mini breadboard. The code is an adjusted version from Penny. Summary below:
Microcontroller : Arduino Duemilanove
Motor Controller : Motor Shield
Actuator: Tamiya Twin Gearbox
PSU : 7.2 v, 9v ( arduino)
Servo: Hitech HS 255 BB
Sensor : Sharp IR
Wheels: Tamiya Sports Tire Set
Structure : Reinforced Cardboard
How to:
First download the body. (Attached to the post)
Problems:
Any gear motor should work as long as you have 2. We need two for steering purposes. The caster ( from Tamiya) provides a smooth movement and it has various configurations.
The PSU (Power Source Unit) is the biggest problem. I've used one from a RC helicopter which means that is small. Any PSU should work as long is 7.2v or more, the only problem is the space. Since this is NOT a tutorial but rather a little help I cannot give an exact battery model.
Any 9v Battery is good for the arduino.
Assembly PART1
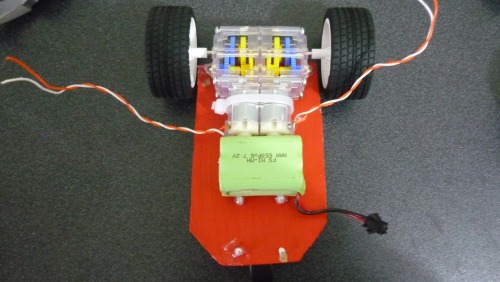
First the lower deck. Place and hold your motors , I forgot but you should use some capacitors for noise reduction. Next step is to place the 7.2v Battery right next to the motors and the caster. For the battery you will use Hot glue.
Assembly PART 2a
Upper deck. We're going to need a switch ( any switch is acceptable, but again you'll have to change the measures). If you don't know how to use a switch click this link. I'd recommend the use of shrinking tubes and a thicker wire.
Next step is to place the servo motor with some screws or hot glue.
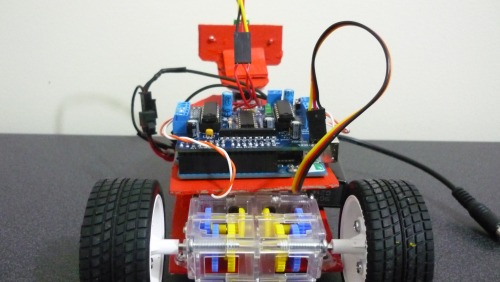
Finally secure the arduino and put some hot glue below the servo motor and attach it to the lower deck. If you want you can put some hot glue under the motors and battery for a better structure.
Assembly PART 2b
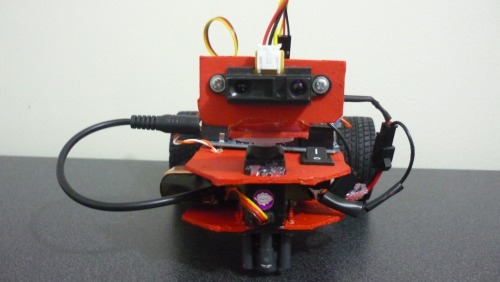
We're almost there. Assembly the IR layer but first mount the Sharp IR sensor. Paste the scanning structure onto the servo ( Run this code to reset the servo position.( servocentercode)
Connections:
Take a conscious read of the arduino manual and the motor shield manual, then make the connections as it is showed in the picture.
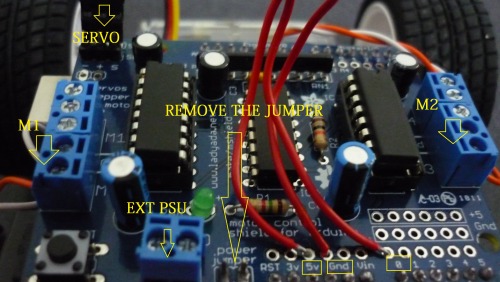
1. Wire up the 5V, GND, Analog 0 inputs
2. Connect the servo in the upper connector ( the other should work but you'll have to change the servo pin to 9)
3. Connect the motors and run MotorTest to test the polarities. (FORWARD is forward and BACKWARD is backward).
4. Connect the Sensor. Analog 0 to Yellow, 5V to Red and GND to black.
5. Stack up the Motor shield
Code:
This code is based on the one that Ignoblegnome wrote, so send him some muffins. There are some instructions but is pretty simple, not complex algothingy yet
Any doubt in the comments
Navigate around with IR sensor
- Actuators / output devices: Tamiya twin gearbox
- Control method: autonomous
- CPU: Arduino Duemilanove
- Operating system: Windows 7, Mac OSX Lion, Ubuntu
- Power source: 9V, 7.2V NiMH
- Programming language: Arduino
- Sensors / input devices: SHARP IR sensor
- Target environment: indoor