Project Phoenix (a sequel)
UPDATE MAY the 11th, 2012
New updates can be found here:
https://www.robotshop.com/letsmakerobots/node/32610
note: don't comment on that blog, comment here!
Hello everyone, here i am again, making the sequel of a dismissed project called Project RNGTN w/c will also have the same face, and functions, but.....more smaller in size and more portable, as i have said before, it is my Magnum Opus (for my younger days) and i have never said this before, but i created this for the awareness of the orangutans (don't laugh)
if you want more info, visit this link
so...pictures, they worth a thousand words, what about a video (soz, no videos for now)
UPDATE February the 12th, 2012
Another update! it's been a long time since i have updated this project,i am working on a new project, but i won't stop this project, so for the updates:
-i have connected all the electronics together
-i have added the charging plug
-i have placed the programming panel
so roll in the pictures:
here he is:
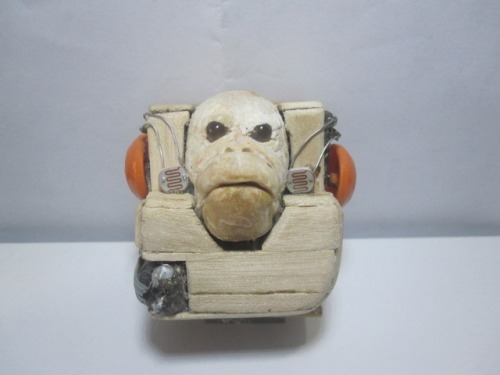
side view (you can see that i have added 2 switches, one for the whole robot and another for the charging of the batteries:

here is ALAN's circuit board, a jungle of wires, you can see the recharging socket right on his arse bellow the pcb:

here is the programming panel and the recharging socket:
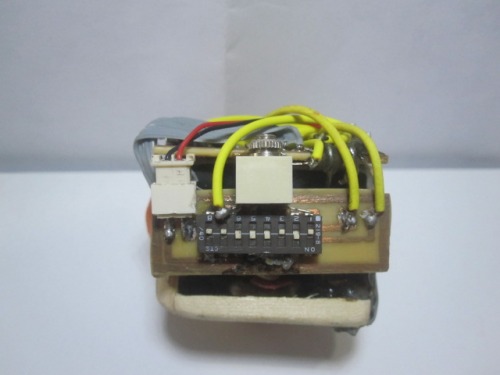
here is the plug (i'm gonna connect the battery charger in that plug):

here he is with the postcard from Steve Grand:

that's all for now
cheers! - ⁰ℨ
UPDATE January the 29, 2012
HAPPY BIRTHDAY LMR!
It's all on reverse now,all updates on the top, so, another update and it's about ALAN's new look, roll the pictures:
here he is:


This is what he would look like if he has his arms (i still haven't added the arm mechanism):
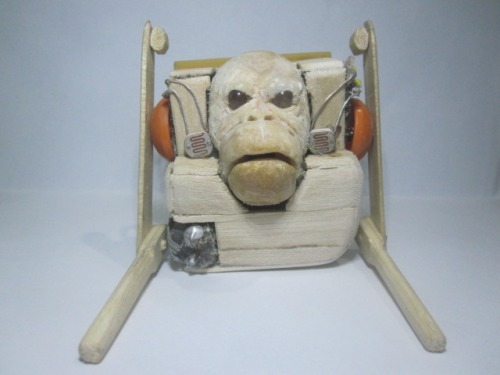
he now looks like my sketch drawing

Before i have taken all those picture, his eyes broke, so here is my solution:

i have my homemade "magical clay" dried off (portable), just break a piece, wet it with water, mold and let it dry:


that's all for today! cheers! {:(|)
- ⁰ℨ
UPDATE January the 22, 2012
Yes! another update for a long time! and if you have heared the news, ALAN had a broken motor, but the case has been solved, it's just elementary my dear....
here today i'm gonna show you an update for ALAN's (the name's a real controversy, my assistant/classmate's father's name is Edgar Alan (yeah like poe)) motors and also a change of the battery because it got broken.
now for the updates:
here is where i got ALAN's new motor, it's a hand cranked LED torch (ahhh...the beauty of scavenging):
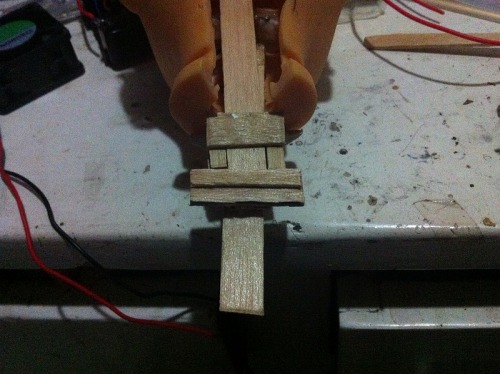


here's the motor:

i have replaced the old motor of the arm mechanism with the new one, and used that old motor for the mouth:

here is the mouth mechanism connected to the new battery case:

here he is now:


the new battery and battery case:


there are the updates!
and if you may ask why i'm making a robot using junk and scavenge parts and not buying parts (except for the motor, i cant find any replacement for it, and also the battery)?
well,in my case, buying parts and assembling them into one robot makes it sound like a kit, and if it is like a kit, then it's not really yours and your own creation, so that's all for now and now for all!
cheers and still cheering! {:(|)
- ⁰ℨ
UPDATE January 12, 2012
Another update, but this time, it's not on a blog....
I have decided to name this orangutan as A.L.A.N, for Artificial Life and Analogue Neuro-computer. and a scientific name of Pongo Mechanicus,
Also, i have finished the woodworking part of this process using popsicle sticks and chopsticks, and i also have formulated it's electronic neuron , and i decided to add a neural logic circuit so he can choose food (like a tamagotchi). i also added a programming panel so i can "alter" his mind, sorta like giving him drugs (for experimental neural behaviour purposes only)
here are the pictures:
Neural food logic schematic:
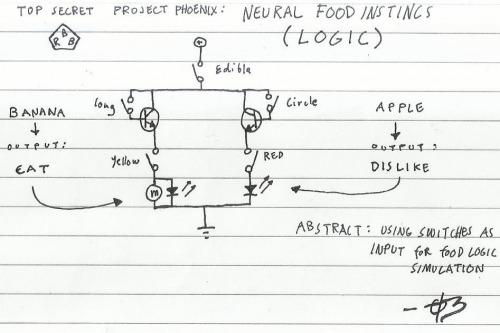
the switches will act as input for logic, i will soon change the switches for another sensor when i can, but for now, it will just be switches.
neural formulae and neural map:
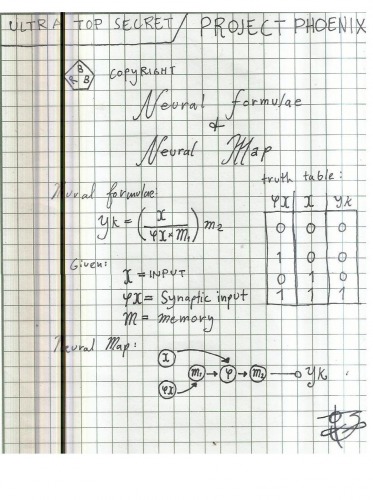
(note: the scanner had some bugs, that explains the thick black line) AHA! it's a miracle, i can do math! ....seriously, i have created my own formulae for my electronic neuron of ALAN's brain, my electronic neuron simulates like a real neuron of a human being, it also have a short term memory.
TIMBER!!!!
Here are my experiments to make a popsicle stick structure, it pleases me aesthetically,
the arms:


YEAH! it can be folded like a swiss army knife (copyright)!!! made from popsicle sticks and chopsticks sanded and polished (not really polished, but will be polished)
Back and front panel:


Programming Panel:
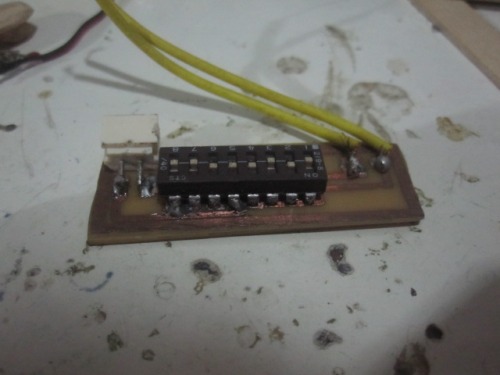
i have added a sound triggering mechanism below his jaw:


^the ape with an iron jaw...LOL


I have added some popsicle sticks for design and also cover:


it reminds me of this:
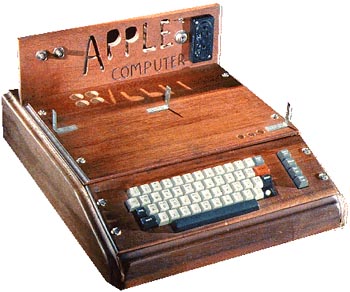
it is sanded and will be polished using wood varnish soon.
that's all for now! cheers! {:(|)
- ⁰ℨ
UPDATE January 7, 2012
project phoenix has a brain!!!
i finished the pcb and you can see the crafting process in this link:
https://www.robotshop.com/letsmakerobots/node/30645
just remember, if you want to comment on that blog post, no, don't comment there, comment here, thanks!!!
cheers!
- {:(|) ⁰ℨ
UPDATE January 2, 2012, (still can't believe it's 2012)
another update for today and posted it as a blog so this robot post can't be very long
here is the update :
https://www.robotshop.com/letsmakerobots/node/30551
if you want to comment on that blog post, no, don't comment there, comment here, thanks!!!
cheers!
- {:(|) ⁰ℨ
shown below are the pictures of the project's (haven't got a name for it, anyone of you suggest a name?) gearboxes, created from wind up toys' mechanism.
1. here shows the toys that my father bought, they are kinda cheap ya know (luckily, i't's two in one pack):

^ i told my father to buy a wind up toy, he literaly bought a wind up toy(s)
2. full view showing the toys:

3. yeah, china, where all things came from (God lives in china):

4. here are the toys! they are alive (they didn't know that they'll be disected later)

5. they have some simple mechanism that makes them flip:

6. OMG, i can see their insides!!! you can see the black gearbox, that's what i'm gonna modify for the motor
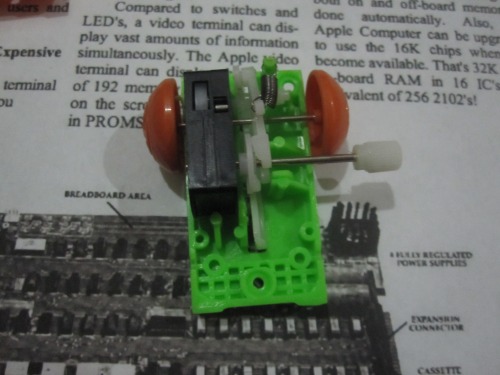
7. popsicle sticks, gonna use those for the chassis:

8. there be the gearboxes!!!

9. opened:

10. motors and gearbox attached:

11. gonna use this axle for the main gear:

12. here they are:

13. success!!! this is the arm's muscle

14. these are the two gearboxes, this is how they are placed along with the battery:

credits for the background (a poster of apples first computer, the apple 1)
that's for now, have a happy holidays to all LMRians
cheers!
-⁰ℨ
follow light, knuckle walking, "evolve" , "learn"
- Actuators / output devices: homemade gearboxes
- CPU: self made analogue neural network
- Operating system: analogue
- Power source: Cellphone battery
- Target environment: Tabletop


