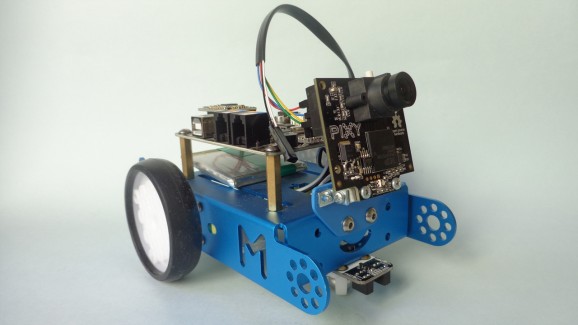
Object follower robot (with mBot + Pixy)
What motivated this post was my review for the Pixy CMUcam5 Image Sensor.
Actually the motivation was some issues that I had trying to make an object follower robot using the mBot. Issues that were easily resolved (but as I don't have much skill with programming, it didn't seem so simple at a first look).
Sure it's always a good way to learn more. And so, I would like to share the steps to implement vision capabilities in this little fella.
(Just a note: mBot was also received from a "Call for Reviewers".)
On the process to make content for the review, I thought a good way to show Pixy's potential would be an object follower robot.
Pixy is highly compatible with Arduino (so much that it comes with a cable suitable for this, to connect/interface with the ICSP SPI pins of Arduino).
The mBot's brain (mCore board) works like an Arduino UNO (ATmega328), and also have the ICSP SPI header. So the connections are easy.
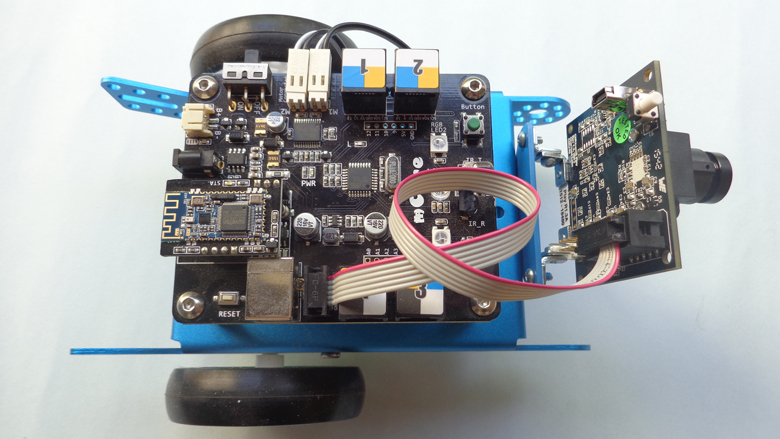
Everything worked well, and mBot could chase objects. But mCore have two built-in RGB LEDs that were blinking random colors. As I said before, It would be nice if the color of the RGB LEDs was the same as the object chased, but that way it was annoying.
Which I didn't know until then was that the SPI pins (MOSI, MISO, SCK) actually uses the digital pins 11, 12 and 13 of the mCore/Arduino UNO [1]. And in the mCore board the digital pin 13 controlls two WS2812 RGB LEDs [2]. This explains all that light show.
Seen this, needed to find an interface alternative (and now I see how good is Pixy has so many interface ways) [3]. And analyzing the alternatives, it became clear that the easiest and most appropriate would be I2C.
First because it requires just two pins (A4 for SDA and A5 for SCL [4]) plus 5V and GND. And, second, because it was only necessary to replace the two lines below:
#include <SPI.h>
#include <Pixy.h>
for:
#include <Wire.h>
#include <PixyI2C.h>
The rest of the code remained the same (the code is available here).
The default data out interface of Pixy is SPI. So, for all work well, it must be changed to I2C with the PixyMon application (File, Configure, Pixy Parameters (saved on Pixy), Interface, Data out port, I2C).
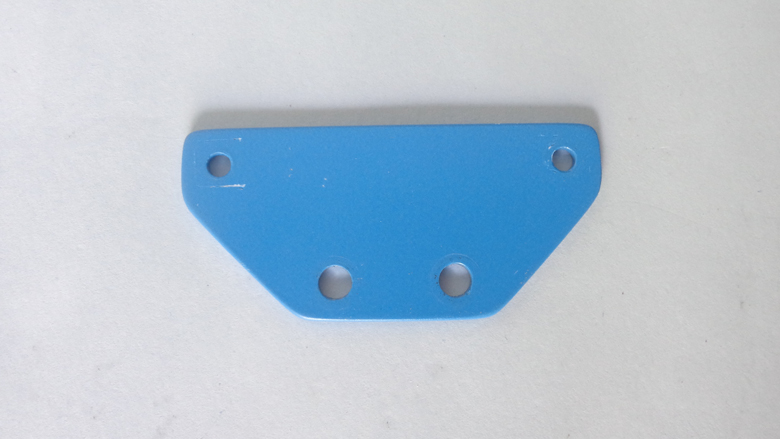
To attach Pixy in mBot, I made a custom mounting bracket (the template is available in the attached files).
The wiring was made with a RJ25 to Dupont Wire from Makeblock. As the name suggests, it's RJ25 at one end (connected to any port of mCore) and Dupont jumpers in the other end (connected to Pixy's I/O pins, as the picture below).
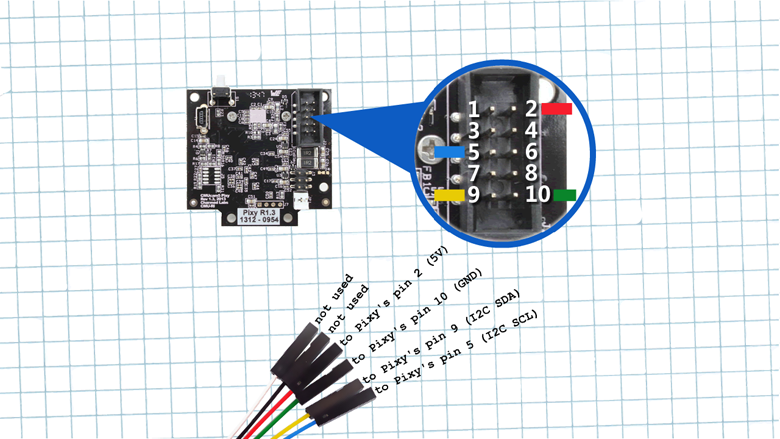
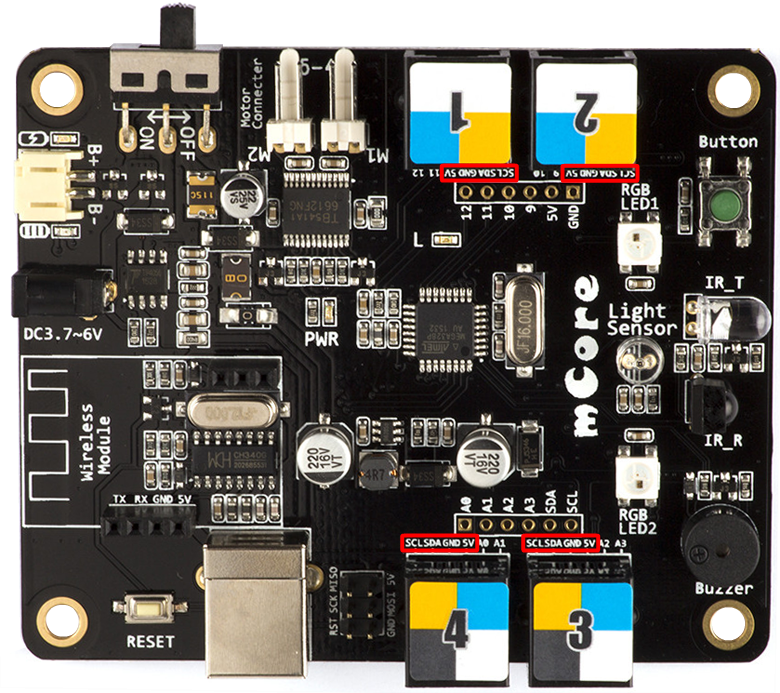
You can see in the video that I connected the RJ25 end in the port 1 of mCore, but as I said, it can be connected in any port, because all the ports has the required SCL, SDA, GND and 5V, as you can see in the picture below (highlighted in red). (Tested and it actually works.)
Ok... that's all for now. The rest you can see in the videos.
References:
1. https://www.arduino.cc/en/Reference/SPI - Arduino - SPI
2. https://github.com/Makeblock-official/mBot_Firmata/blob/master/hardware/mCore.pdf - mBot_Firmata_mCore.pdf at master · Makeblock-official_mBot_Firmata · GitHub - mCore's schematic
3. http://cmucam.org/projects/cmucam5/wiki/Porting_Guide - Porting Guide - CMUcam5 Pixy - CMUcam_ Open Source Programmable Embedded Color Vision Sensors
4. https://www.arduino.cc/en/Reference/Wire - Arduino - Wire
Additional links:
http://tutorial.cytron.com.my/2015/08/28/colour-tracking-mobile-robot-pixy/ - Colour Tracking Mobile Robot (PIXY) - Helped me with the programming.
http://cmucam.org/projects/cmucam5/wiki/Latest_release - Latest release - CMUcam5 Pixy - CMUcam_ Open Source Programmable Embedded Color Vision Sensors
Follows objects.


