


My First Hexapod
I have built a couple of rudimentary 2-wheeled rovers before, nothing special, but I really fancied trying a hexapod. So here it is/will be. It will be an autonomous 2 DOF hexapod, with the primary "brain" being an Atmega 328 with Arduino bootloader, and a separate servo controller based on a pic16f74. All parts are going to be made myself, mostly to reduce cost, no Lynxmotion SES brackets or similar.
Servo Controller:
Based upon a pic16f74 @ 20mhz, and programmed in SourceBoost BoostBasic (because it's free and I'm lazy), this was built from parts I had already. It accepts a very rudimentary set of commands over serial, sent in a 3-byte block with a following "run" character, and a buffer for 24 characters (8 commands). The commands consist of a start-byte (255), the servo to control (1-20) and the angle (10-170'). The "run" character is 254. It has a DIL switch for setting the baud rate or test mode, which sets all servos to 90' every 5 seconds.
It has an unregulated supply for the servos, a regulated (5V) supply for logic, or the ICSP programming headers can be used to send a 5V supply. There is a MAX232 on board, with headers for either rs232 or TTL level signals.
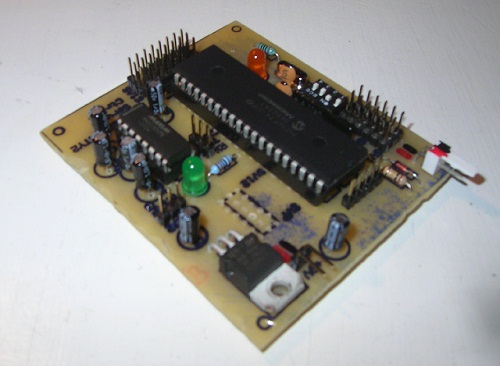
In my limited testing, it seems to run fine. Originally I had a 4mhz crystal for testing (all I had at the time), but this wasn't very accurate on the timings.
[Update] spent a BIG portion of last weekend working on the code for the servo controller. Now it supports setting a duration for the move, like the SSC-32 - any servo move (bar the first), can be made to take a set period of time, in 1/10ths of a second. Should help with some of the gait timings.
[Update - 28/02] Got the slow moves working really well now, except ran out of RAM on the pic16f74, and can only control up to 16 servos; fortunately that's enough for now. I've got some pic16F77 to try (double the RAM, but the free compiler won't accept it :( I will include the schematics and code when I'm happy with them
Servo Brackets:
I've built 6 of the 12 servo brackets that I need for the legs. Here are the steps I used to make them:
Step 1: Cut 100mm of aluminium angle, 30mm x 20m. Anneal this, allow to cool, then mark the narrow side at 10mm and 50mm.
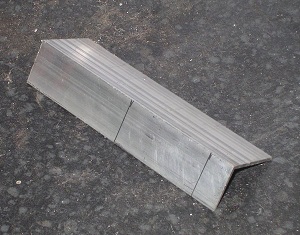
Step 2: Cut the short side out to the 50mm line, and 10mm line. The short cut end should cut into the wide side about 10mm to, to end up like:
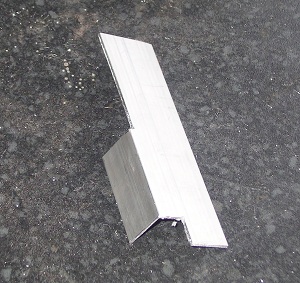
Step 3: Bend the short end to 90 degrees. Then trim this to ~5mm. I kept it long in the first instance to aid the bending.
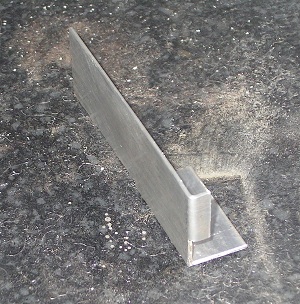
Step 4: Bend the long end at the 50mm mark, then again at 70mm. This last bed is the tricky one, I had to get a block of steel angle trimmed to 20mm to bend around.
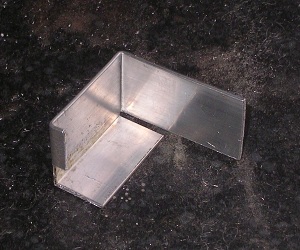
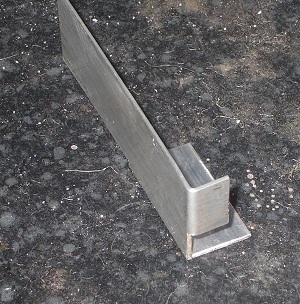
Step 5: Test the fit of your servos
6 of the little buggers:
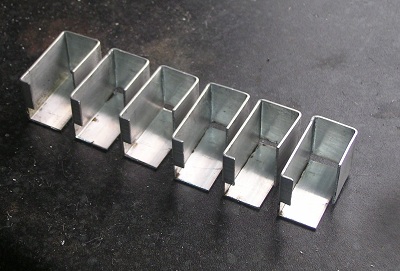
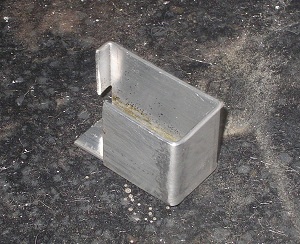
Step 6: Mark the bottom of the bracket, directly opposite the servo horn, and drill for the pivot. I'm using m4 screws for the pivots.
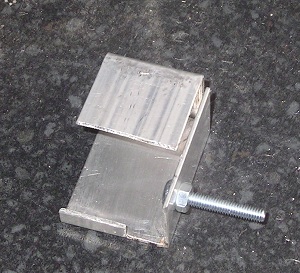
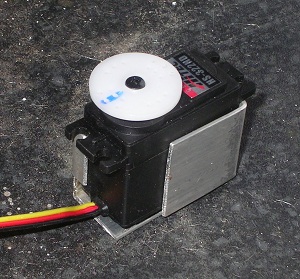
The long side of the angle will need trimming by a few mm to give some clearance, I'll using strong, thick foam double-sided tape to affix the servos in place when it's all finished.
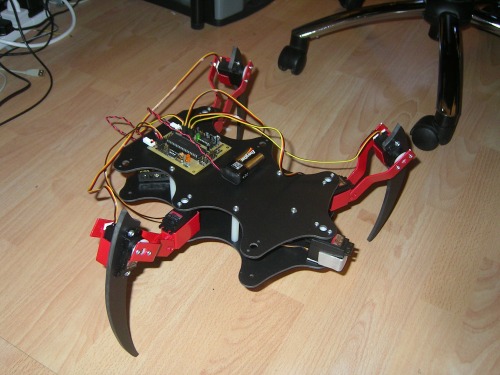
Legs:
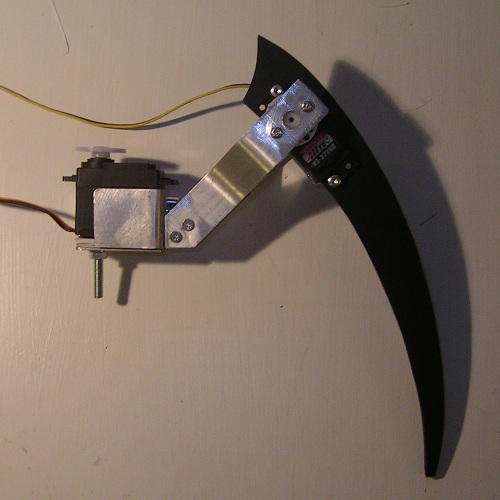
So far, I've finished the prototype for one leg. I've used 6mm Sintra(?) for the leg itself, and 20mm alu strip for the extension from the front-to-back pivot servo. So far it seems like it should all work, although it's going to need quite a bit of clearance to lift these things.

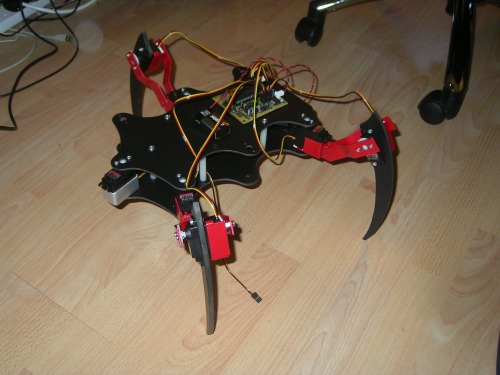
Body:
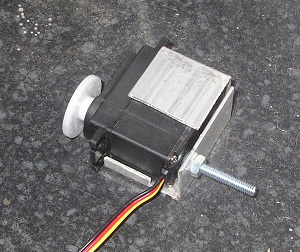
[Update 28/02] Busy weekend. Made the body, two sheets of 3mm Sintra cut with the scroll saw, and 50mm standoffs made from 8mm Nylon rod, drilled and tapped for m3 screws. I've completed and painted three of the legs, and got them loosely fitted too, to test. I think that the Hitec HS322-HD aren't going to be quite strong enough for the "knee" joints, so I think I'll go with the HS-48HB instead. Tested a few moves via the serial connection on the PC, so far so good (video above).
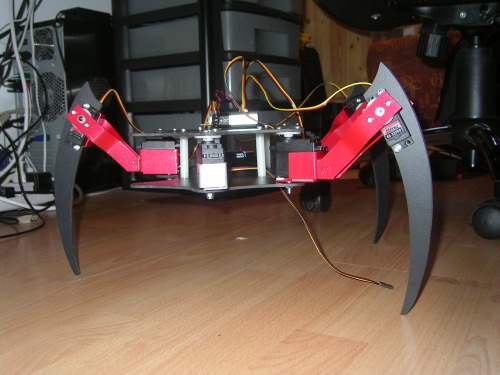
[Update 15/04] been busy working with strength issues on the servos. The planned HS-322HDs for the knee joints have been replaced with stronger HS-485HBs, but I still had to shorten the legs to reduce the load. He's turning out to be a bit heavier than I anticipated. After much tweaking, prodding and playing I've come to the conclusion that a significant part of my trouble has been around the use of standard AA NiMH batteries for power; they just can't get the juice out quick enough to drive 12 servos. I've now got a nice fat 3700mAh NiMH battery pack, rated at 30A max discharge rate. Initial testing looks like this should make a huge difference.
I've also added springs to the legs pulling inwards, which reduces the effort for the servos to keep the 'bot standing, although it does increase the effort to lift the legs. A bit like these: http://bit.ly/ddzlgz . This should help reduce the standing load on the servos.
[Update 24/04] it's alive! (video above) still a few issues with the servo controller but it's getting better. I'm waiting on a delivery of some 220ohm resistors to hopefully help there. The control is a ridiculously basic VBScript program, but it gets things moving. There's still a lot of work to do on the gait however.
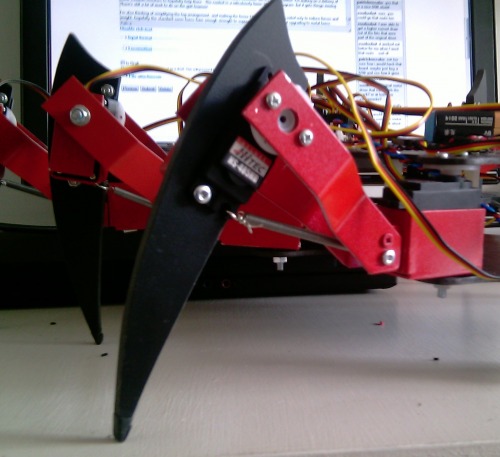
I'm also thinking of simplifying the leg arrangement, and making the femur (?) shorter and single-sided only to reduce forces and weight; hopefully the standard servo horns have enough strength to support the full weight without upgrading to metal horns. Below is a close-up of the spring-loaded legs.
Hopefully wander around and avoid obstacles
- Actuators / output devices: 12 (2-DOF) Hitec HS322-HD servos
- Control method: autonomous
- CPU: Arduino 328 (primary), pic16f74 (servo controller)
- Operating system: Arduino
- Power source: unknown
- Sensors / input devices: SRF05
- Target environment: indoor, outdoor