


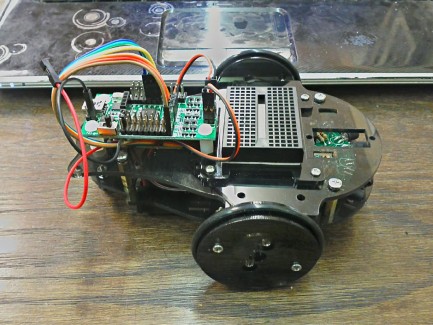
My first assembled 'bot
Finally, my first robot.
I believe I should clarify a couple things. First, build time was not me sitting down and building it beginning to end. I had spare time over a few days that allowed me to assemble it. Some build updates from Chris the Carpenter helped make the "finished" article a bit easier to assemble.
Finally, and most importantly, build time does not include programming time. For as smart as the crew here thinks I am, I can manage some MAJOR bone headed moves. Right off the bat, I managed to forget to set the OUTPUT pins to, oh, I don't know, OUTPUT? It is amazing that motors will move when you tell them to when the proper pins are set the correct way. WooHoo! It moves! It doesn't avoid a damn thing, but, it does move.
Time to go back over the code. What is going on? I add some Serial.print() lines to the code to get some feedback. The numbers I am getting aren't what one would call stable, but, I figured it must be right. Fight with it for an evening, and, give in.
Weeks go by. I finally decide it is time to make the bugger work. I go back over the code. I even look at the IR LEDs with my phone camera. *Ding* There is no light?!? Next, I look at where the TRIGGER pin is plugged in, and, back to the code. Doh! code says IRTRIGGER = 0. Trigger wire is plugged into D13; also the pin that controls the onboard LED. I move the trigger wire to D12, and, change the code to reflect that change. Yes! I am seeing the LEDs flash. I am also getting real solid numbers(300 - 3000) being returned from my sensor now. I am sure that, if I had watched CtC's video, I would have realized something was wrong. Oh well, live and learn. :D Now, it moves, and, avoids. It still doesn't travel in a straight-ish line, but, it does avoid, mostly. :) My code is bare bones with respect to what it senses, and, how it reacts. Currently, my code only looks at the reading from the Center sensor, and, if it is too close, it simply backs up, turns a bit, and, takes off again.
Obstacle avoidance
- Actuators / output devices: Gutted 9g servos
- CPU: ATMega8 16Mhz
- Power source: 4 AA batteries
- Programming language: Arduino
- Sensors / input devices: IR LEDs, and, IR Phototransistors
- Target environment: indoor