


Mr. Wake [Mr. Basic V2.0 challenge]
Ok,
It came to the piont Mr. Wake got some shape, so I'm posting it here. Wake is Mr. Basic V2.0 contest entry, and he is intelligent annoyeing alarm clock bot :D. Right now his hardware is pretty much finished except the alarm clock itself.I'll be posting updates and videous as I progress through building process. :)
UPDATE 4-Oct-2009
As you can see from new main picture Mr. Wake has got his new bumper and his head reconfigured. While testing his running behaivour I found out he is going to break his neck very soon, that is why his head is rearranged and I'll put some guards on chassis to protect head from collisions. I'm pretty ready to mount alarm clock and wire it up, which is going to be my job for couple of days now. Still got no video, as Mr. Wake's code is pretty primitive now, and I'm planning to work on it as soon as I get all hardware togeather.
UPDATE 5-Oct-2009
I was looking for construction material for protective frame andmy choice stopped on plastic tubes of ballpoint pens. So I got 20 of those, a "magic welding" lighter, and some drinks :D You can see what Mr. Wake looks like at the moment.


UPDATE 12-Oct-2009
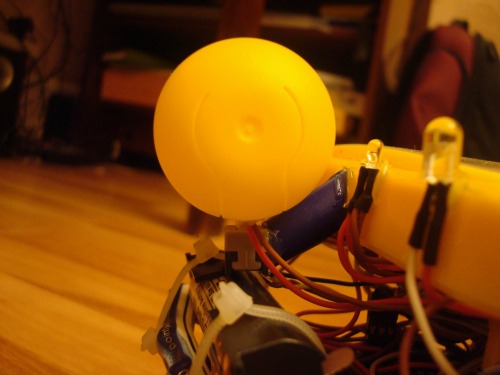
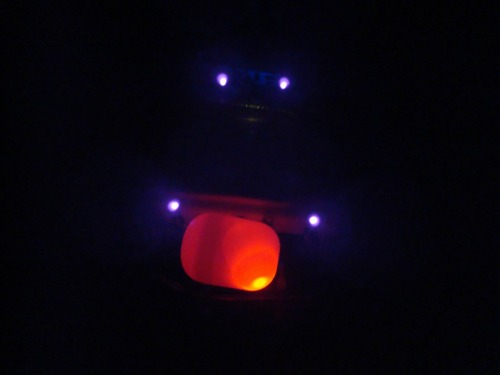
Finally I have Mr. Wake's hardware put togeather and wired. :D I have completed some tests on him, everything looks fine except sensitivity of my IR LED-Transistor pair... The range of detection is very short at the moment (~10cm) which is too close to be able to react and run away, so, I will need to tune it, increase number of IR LEDs probably to at least double the range. Will record some video of tests tomorrow and get some code put togeather. On pictures below you can see The Magic Button which stops Mr. Wake and how this button looks in darkness: I used empty Kinder surprise egg stuffed with red LED to attract the victim :D
UPDATE 23-Oct-2009
I'm proud to announce: Mr. Wake is finished! Taaarrrraaam!
Last two days I was busy finalizing the code and making modification to hardware. Modification is basically separating power supply for motors, as during tests of software I discovered that my mcu constantly resets when motors are stall, so I have added separate power supply and now everything is fine! :D
Now, to give you idea how Wake works: Alarm clock mechanism I used has 3 contacts, Plus, Ground, and Alarm, which goes high when alarm goes off. This was really fortune for me, as I had only to connect the grounds and use this Alarm pin as analog input (Could not use it as digital as clock runs on 1.5V) and it workes just fine. So, whenever Alarm pin goes high, my code picks this up and switches Mr. Wake from "standby" to "alarm" mode, which makes him switch on IR leds and red LED in Magic Button on, read ambient reading from IR transistors and wait till the reading inceased above ambiant one, which means something is aproaching from above (I have the detection only from above, where clock and Magic Button are. But... Shhhh, you did not hear that :D). At this moment Mr. Wake switches to "Run!!!"mode :) The name of mode is pretty self explanatory :) As you can see from "Showcase" video, everything ends when you push the Magic Button, and Mr. Wake calms down :) This is it! :D
Wakes people up and runs away with alarm clock on his back :)
- Actuators / output devices: micro servo for the head, 2 x Geared motors, LED
- Control method: Autonomous.
- CPU: picaxe 18x
- Power source: 4xAA batteries
- Programming language: Basic
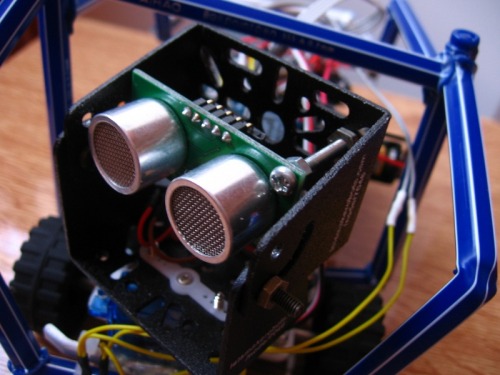
- Sensors / input devices: SRF005, bumper switches, IR transistors
- Target environment: indoor