


Mr. Tea
Alright, Mr. Tea is put on hold pending my graduation date, and the fact that pretty much everything fell apart RIGHT AFTER I finished my presentation. I got an A btw. My instructor is interested in further development I take with this machine, and will likely join us in the near future!
This machine even converted him to the picaxe chip. woot.
---------------------------------------------
So here I am again with anoter robot. I know I haven't finished Mortimer yet, but this one is due in a week and a half, and if I don't finish it, I don't graduate :P
What this machine does started out quite simple: To make the perfect cup of tea. The machine will heat the water using the heating element in a coffee machine, hold the water in the brewing basket to steep the tea, then pour into a cup, add sugar, stir, and monitor the temperature until it is safe to drink.
I've also added some safties to it as well. If the cup or basket is removed during operation, the element turns off and a light will blink letting you know there is an error. Also, if the user puts too much water into the reservoir, the element will not turn on and yes, another LED will blink.
Woohoo! Got the speaker hooked up and code working! Now instead of a boring "BEEP BEEP BEEP" when tea is done, it will play a little tune! Now I have to figure out what song I can play that's not too annoying. The tune code in the programming editor lets me use any RTTTL based monophonic tone.
11/14:
The cup sensor is in. I have a momentary pushbutton switch with a lever on it, and over that lever a thin piece of plastic that runs to the other end of the element. It's surprisingly responsive to the placement of the cup, which is what I was hoping for.
Working on assembling the arm and stirring motors now.
11;16:
Well, with some setbacks (see my blog), I wasn't able to get as much done tonight as I hoped, but everything is set up for assembly tomorrow!
Got my geared motor wired and a pulley disc I fashioned the stirring motor is just waiting to be put inside. And the temperature sensor is wired and ready to go!
As always, new pictures are below the old ones, so come along on the journey with me!
Some pictures of the journey:
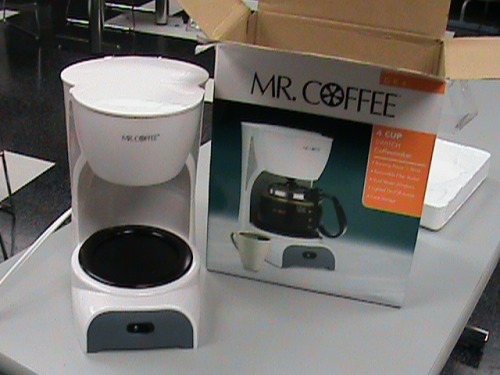
The victim. An unassuming 4 cup coffee maker.
This machine had no clue what was coming to it.
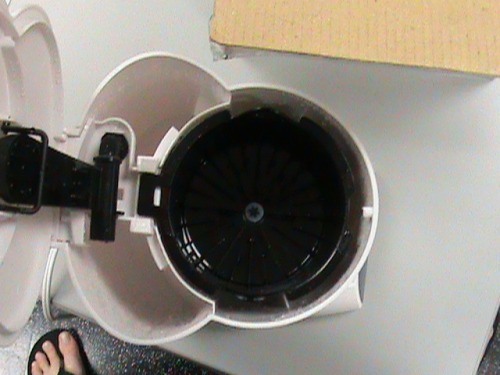
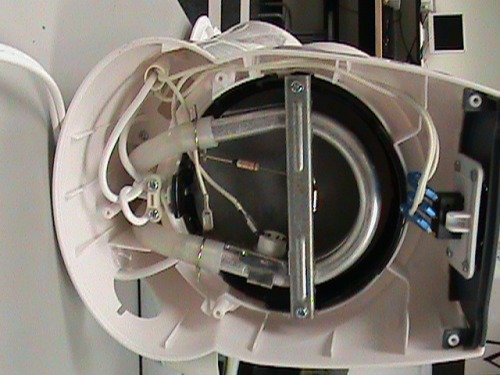
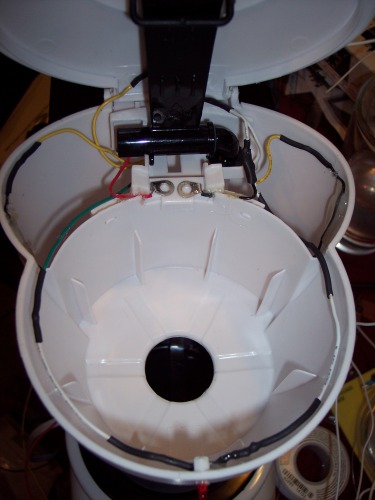
The insides.
The water sensor wires will go down into the reservoir tank.
Another sensor will be set under the basket to make sure it is in place before the heating element is activated.
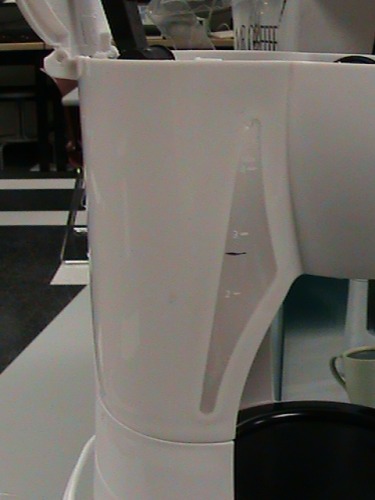
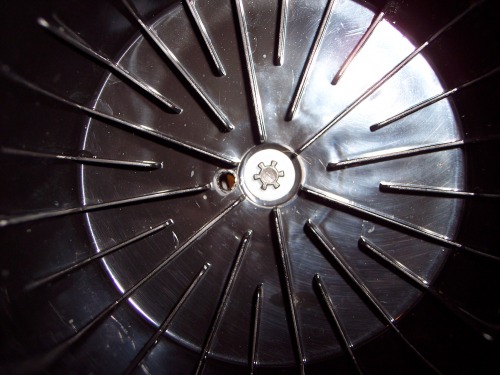
Measuring the maximum amount of water the brewing basket can hold.
I was surprised it could hold so much!
As long as there is no programmable interface (i.e. just an on and off button), coffee machines are quite simple on the inside.
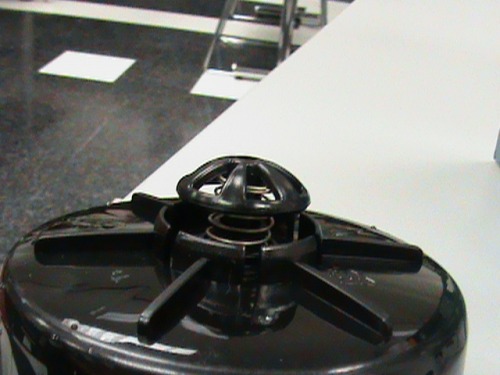
The coffee machine had a stop and pour feature, which we will use to our advantage.
Basically when the tea is done steeping, an arm will come up and release the tea.
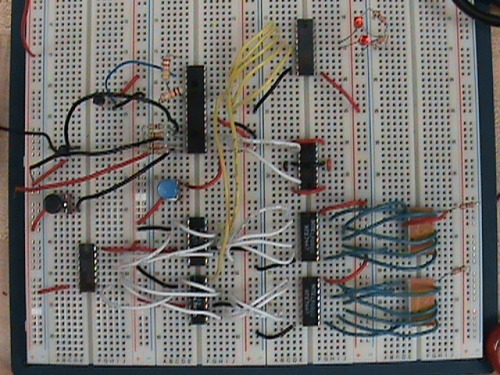
This was the proof of concept.
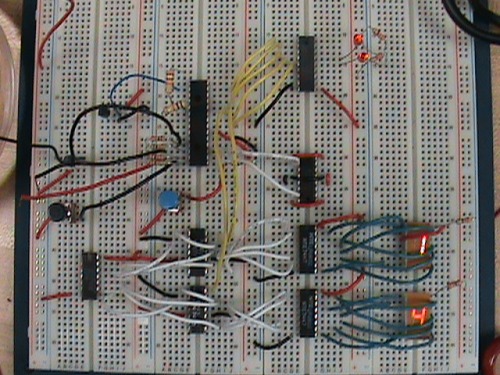
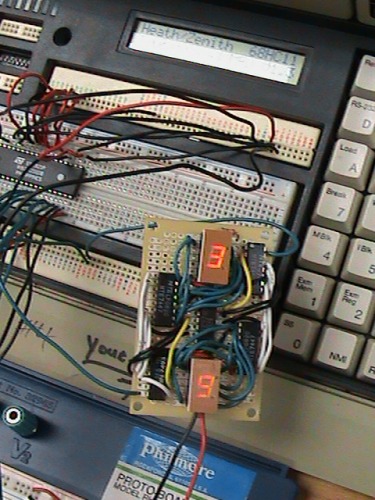
Breadboards are quite useful. It's a lot easier to build on a prototyping board before having to solder everything together.
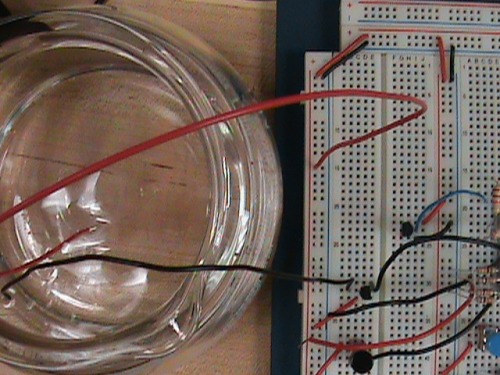
Testing the waters...
Since we are using the basket in the tea machine for steeping, we needed to make sure that people didn't overfill the water compartment, causing overflow in the basket. All it does is complete the circuit when both ends of the wire touch the water.
It's safe, I promise!
In action!
Well, not really. I have a video of this. Essentially it's testing that when a button is pressed, the microprocessor sends a signal to the display module (bottom half of the board) to increase the appropriate number display by one.
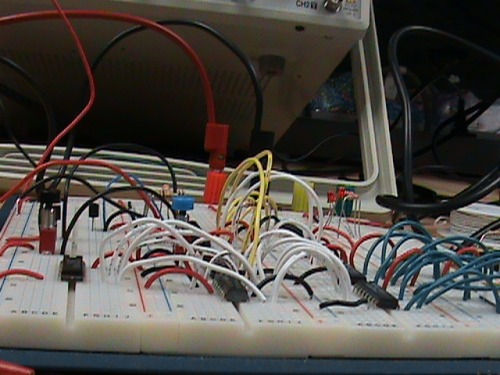
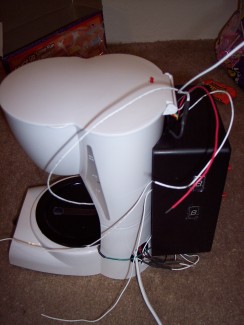
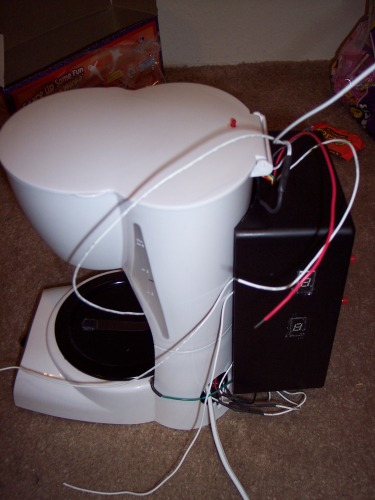
A sideways view of the mess of wires.
It's a jungle in there!
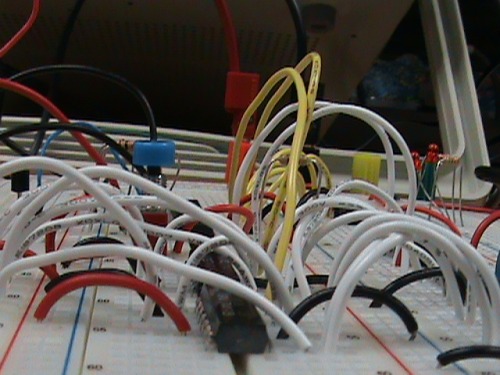
A closeup of the mess.
I swear, this mess of wires could raise a family of birds.
This is the bane of my existence.
It's great how everything looks perfect in code, until you actually hook things up and run it.
I am so freaking proud of this.
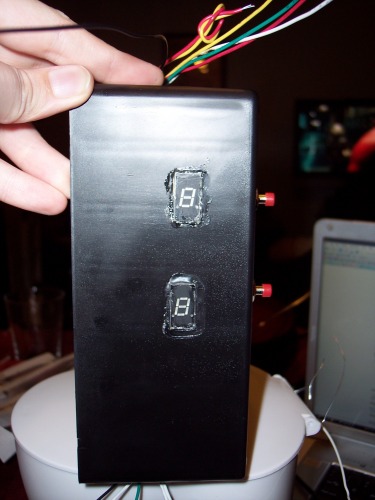
This is the bottom half of my breadboard condensed into a 3rd of the space.
You can't see it, but I used IC sockets for the 7 segment displays to raise them so that I can mount the whole thing inside a project box, and have the displays come out through pre-made holes.
Ain't it pretty?
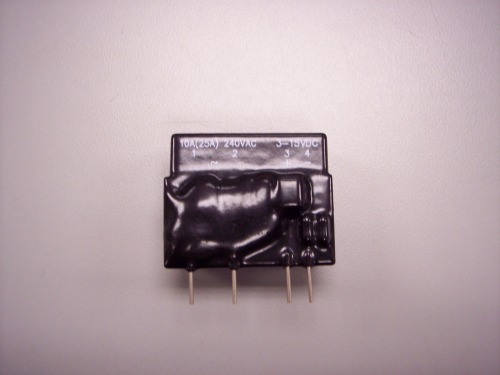
This is the relayt I'm using to control the heating element. This baby can run up to 240V at 10A with no fans, or 25A with fans running. It has a built in heatsink, and all I need is 8A, but this was the same price. It's controlled by 3-15VDC.

All nestled in cozy-like. There's a small cavity in the back of the machine that I used to put the relay.
A safe way to keep it from the picaxe and other chips.
Shaping the project box to fit the round shaped back of the tea machine.
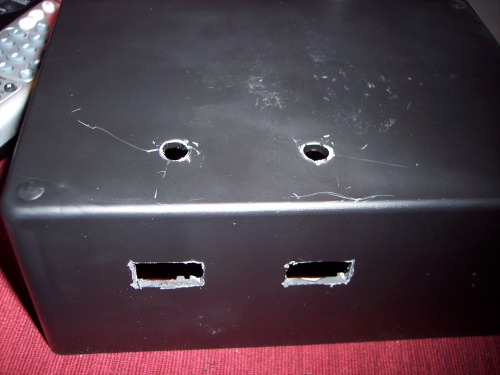
Drilling holes for buttons and LED display.
Note to self: Wear long sleeves when cutting plastic with a Dremel. I had bits of hot black lava all over my arms. It's kinda cool feeling until you get a large chunk of it on you.
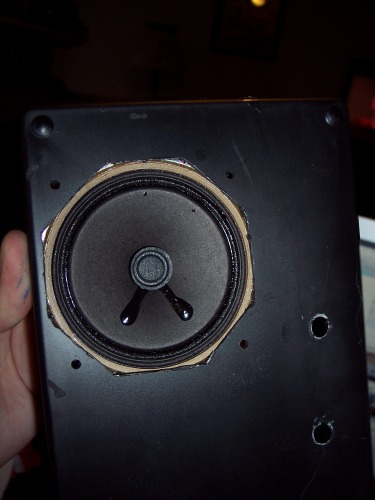
Drilling out the back and fitting the speaker.
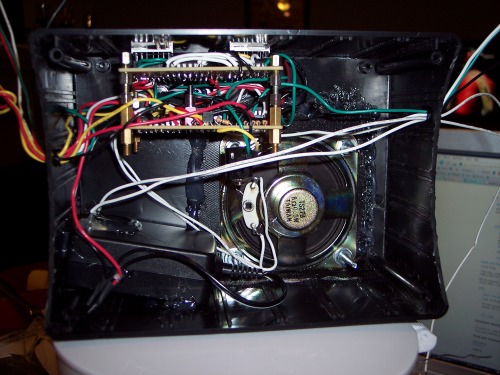
The insides.
I tried to make it as organized as possible. But with wires hanging all over, it was nice to hide it all in a project box.
The box in the lower left is an old 5V cellphone charger I scavenged.
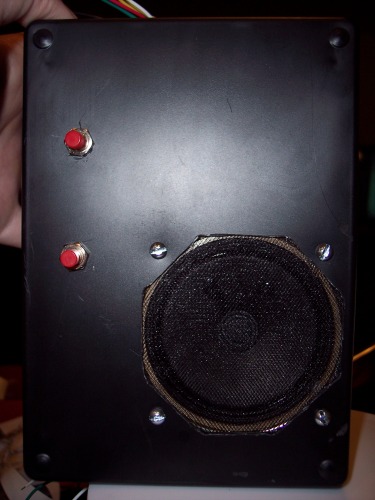
Lights and buttons all fitted in.
...And the back.
I wanted something to protect the speaker, but didn't have any old ones to salvage covers from. While we were at Wally-world shopping, I picked up 4 inches of tuille folded about 4 layers and secured it between the box and the speaker.
I needed to make a switch that not only registered to different types of cups, but also didn't make the cup tip either way, so it wouldn't spill over.
I hot-glued the switch to the back and glued a strip of thin plastic to the lever over the momentary switch. It was just a matter of testing the right amount of tension to give the strip so that it easily tripped the cup switch.
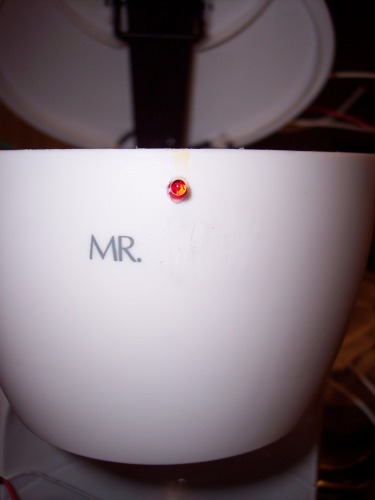
We scraped off the "Coffee" part on the machine, intending to go to a scrapbooking store and buy some rub-on letters.
It looks sort of sad with it just being Mr.
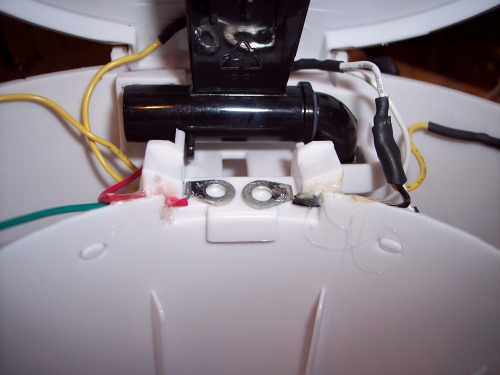
This is the circuit for the basket sensor. Basically I just have a +5 lead and then a lead to my corresponding pin, the basket has a raised piece of metal on this tab that was a part of the basket.
I swear, this machine looks more and more like it was designed to be modded.
A closeup of the inner-wiring.
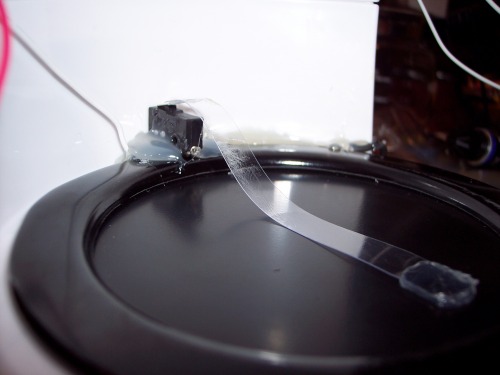
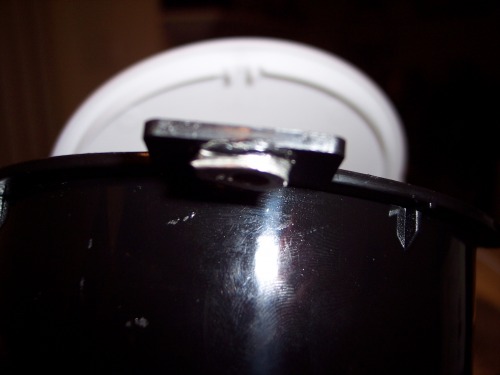
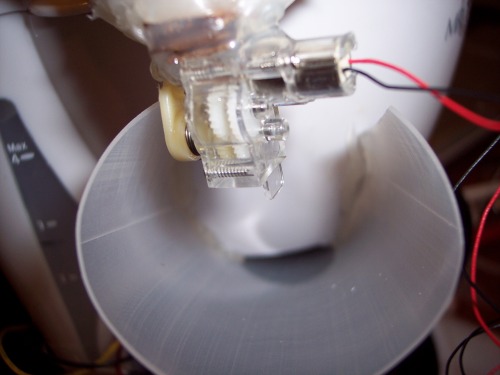
The stirring arm, unfortunately does not have any clearance room between the basket and the cup, so I'm improvising by boring a hole through the basket, and running the stirring arm through some leftover tubing from sealing the temperature probe.
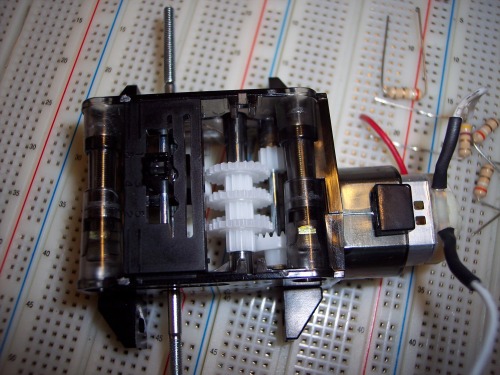
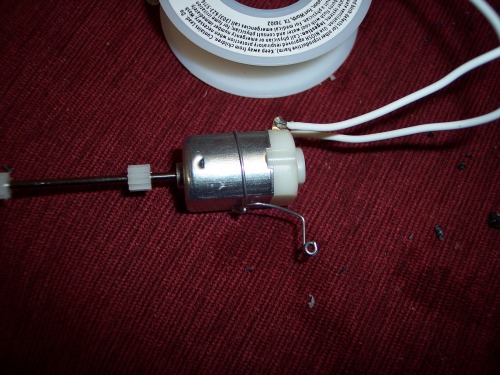
A super find! This is a multiple gear ratio motor I found at my local "candy store". Only one problem: Whenever the motor ran it lowered the total amount of voltage that the BCD counter triggered. I tried one resistor, but the load on just one was too much. I even tried a 1 watt resistor, but it wasn't as specific as I wanted. My fix?...
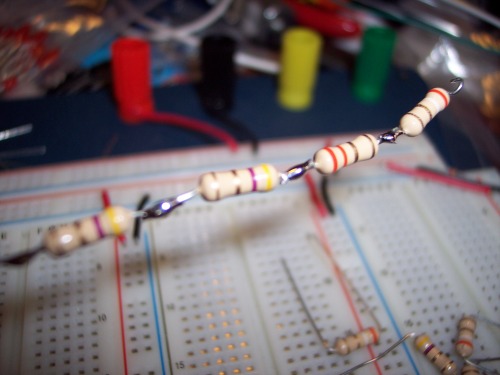
Resistors in series!
I know it's a cheap fix, but each resistor can handle a quarter of the load, and I can make it more specific. The magical number? 16.6 ohms. It still gets the motor started, and as long as I don't let it get to full speed, the counter doesn't trigger.
BRILLIANT!
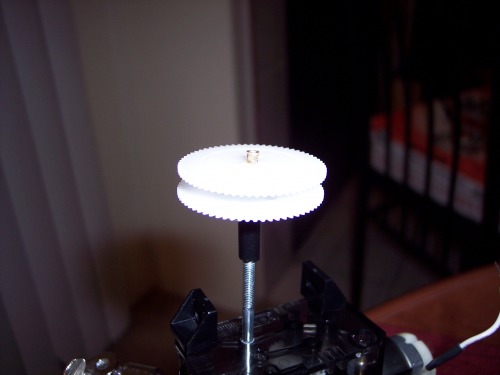
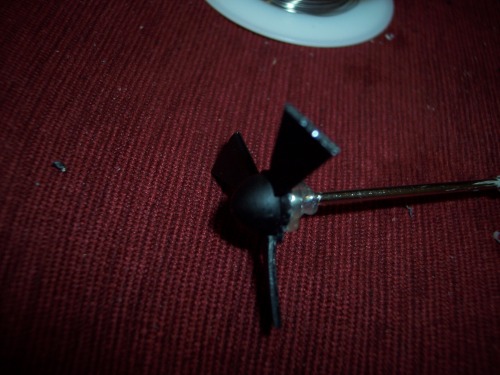
The motor turns this modified pulley I fashioned out of two gears. between each gear is a wire that attaches to....
The stirring motor!
The stirring motor just has one job, to stir. I had to play around a bit to get the right length. The stirring motor connects to...
This! It was a lot larger, to be used as a fan, but I clipped the ends off and sealed the back of it with non-toxic water/heat proof seal.
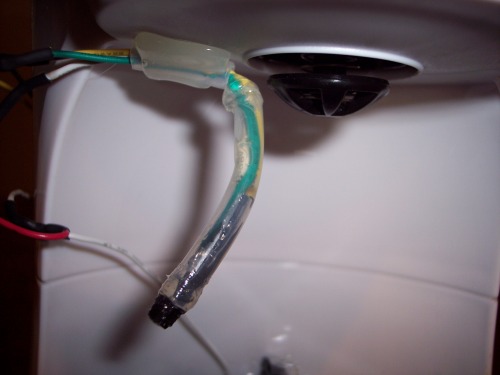
This is the temperature sensor. I sealed the wires in a heatproof tube. I needed some way to get it submerged into the tea, but able to pull the mug/cup out without haveing to tip it, so I glued a piece of tube to the underside of the basket holder and ran the wires through there. The probe swings easily, but always stops in a down position.
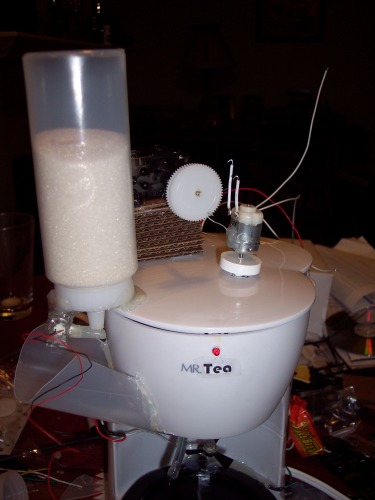
And here's my baby so far...
Beaut ain't she?
Whee!
Slide for the sugar to go into the cup without making a mess.
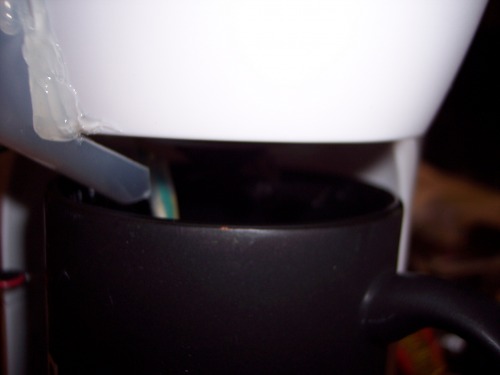
Really not that much clearance for your standard coffee mug...
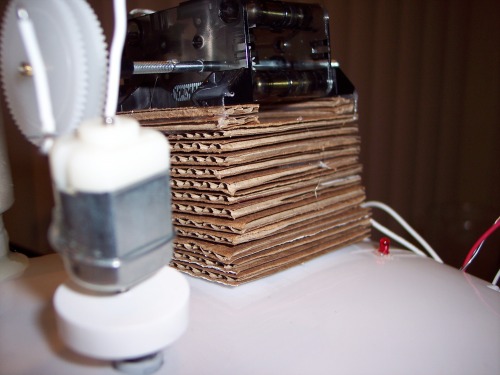
I was pressed for time, and had already sunk enough money into the machine, so I had to ghetto-fy it a bit with some cardboard risers for the arm motor.
Oh yes, you get more beautiful with every picture....
Almost there!!!!
That's all for now.
Stay tuned folks!
I pity the fool who don't like my tea!
- Actuators / output devices: some motors and MAN 7 segment displays I found in my toolbox
- CPU: Picaxe 28x1
- Power source: 5VDC regulated supply for circuit, 120VAC for element
- Sensors / input devices: momentary pushbuttons, water sensor, LM35 temperature sensor, pressure sensors
- Target environment: kitchen, home, tea fanatic