


Mousey
 15-Nov-08
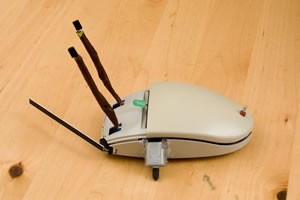
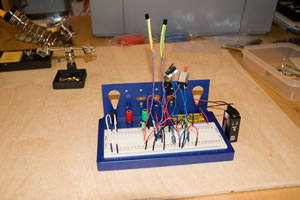
Still a work in progress, this is the Mousey project from the Absolute Beginner's Guide to Building Robots. It's taken about two hours of building to get this far, but I was being helped by my 10-year old so there was a lot of education going on to - from what the parts are and what they do to wire stripping and soldering. The amazing thing for me is that the prototype seems to work. The motors spin; covering one 'eye' and shining a torch on the other causes one motor to stop; and closing the 'whisker' switch seems to make the motors reverse. I'm not so sure about the last bit as the motors spin so fast it is hard to see or feel which way they are turning.
16-Nov-08
Found that I had no less than eight old mice around the house. Chose a Logitech one to rip apart. There's a little board inside dated 1988, so the mouse is 20 years old. I didn't realise they had been around as longs as that. There's a IC on the board with an ID of 42C40P1924. Having seen today's thread on commercial use of PICs I thought I'd look this up. There's a few for sale on the web, but no spec sheet so I've no idea what it is yet. Mounting the on/off swicth should be simple as this old mouse has two screw posts side by side. But, the front edge below the buttons is very low, and I'm not sure how I'll fit the whisker.
There's a lot of plastic to cut out of the mouse body, and I'm a bit stumped about this as I don't have a Dremel - which is the recommended tool. I didn't want to fork out for a tool I might not use much, but couldn't see an alternative. In the end I ordered one from Amazon (on offer at GBP 30). So that's probably it for this week.
08-Dec-08
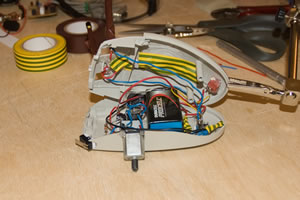
He-he! It works, it works, it works!
The Dremel arrived after about a week (so much for "in stock") and I spent a couple of hours clearing away excess plastic inside the mouse shell. The day job then took over for a while, but I did manage to acquire a glue gun. Finally this weekend I started to transfer components from the breadboard to the mouse. Several hours of squinting at minute components; cursing the awkward third-hand and realising that I just couldn't do without it and I was ready to test. Motors didn't touch the floor. Cut away the glue, refix and try again ... and it works!
Ooh I'm pleased! 8]
Heads towards the light, backs off from obstacles
- CPU: Op Amp
- Power source: 9V
- Sensors / input devices: 2 x IR emmiters, bumper switch
- Target environment: indoors