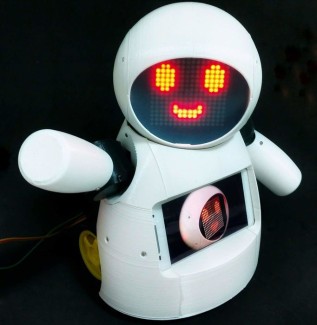
Based on: https://www.instructables.com/id/Joy-Robot-Rob%C3%B4-Da-Alegria-Open-Source-3D-Printed-A/
With all the printed pieces I am receiving the electronic material and assembling everything. As I assemble, problems arise and improvements occur.
Problems detected:
- The holes (especially those at the base) are not large enough to insert the screws. I had to enlarge them with a drill. Also those of the base of the face. When enlarged, the spacer that has some screw holes is usually broken.
- I am trying to invest the lowest possible budget, so I have printed the ball wheels suggested by another user. Problem: They don't fit in the holes in the base, I'll have to sand them. Anyway I think I will have stability problems.
- Everything fits very well in the housing, with little space for future improvements. In places like the base it could have become a little more spacious, so that the components fit better.
- It is difficult to desolder and re-solder the pins of the led arrays. At the moment I have not succeeded. This weekend I try again.
Apart from other minor problems, but still, it is still a great design that I like a lot once assembled.
Upgrades that I will value implementing:
- proximity sensor on the front of the robot to detect obstacles or people.
- distance sensor on the bottom of the robot to detect if there is soil.
- Leds or lcd screen to show status information of power, wifi, battery, etc ...
- 18650 battery charge module.
- connector in housing: battery charging, micro-usb arduino programming, etc ...
- possibility of controlling: the camera, the speaker and the microphone of the android mobile from the control PC. With the loudspeaker we could make him speak, with the microphone voice recognition and with the camera recognition of objects, people, etc ... (software that I already have implemented for a robot prototype that I have parked).
- modified arms adding hands (not functional).
At the moment these are the novelties that I have imagined. They will occur to me more. I find that this robot is a good base for extensions and experiments. I will report the progress.


