


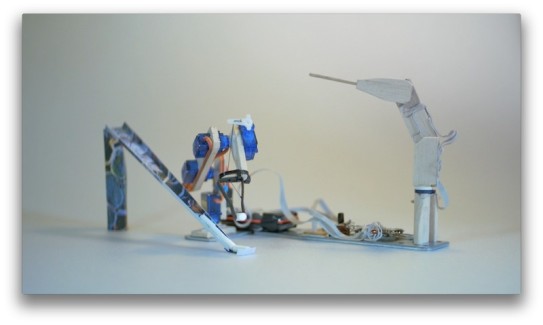
Micro Servo Robot
4 axis robot arm with a small gripper and teach function. (In fact: it is a 3 axis robot)
This robot can follow. This robot can learn. And this robot can repeat endles. And he lost all his memory if the batterys are low. This makes it new all the time he is powered again. - The idea for this project is taken from https://www.robotshop.com/letsmakerobots/node/21633 - Stoerpeak made me do it! -
Arduino mini pro 5V/16MHz
4 micro servos 180degrees
4 22k potentiometer
NmH Battery 4.8V
Wires, Button, Switch
Balsa wood, Metal, Plastic
Zip Ties and Glue
Teach mode: After a reset the robot arm follows the teach in arm while simple mapping the analog inputs every 25ms to the servo motors. Pressing the button stores each servo position in a array
Play mode: Double press the button switch to play mode. The sketch reads the array step by step and and moves the robot arm. For cool loocking movements i added a routine calculates different micro steps for each servo to have moving start and end sync on all axis. Also added a ramp for soft increase/decrease velocity. Shorter travel distances the robot does slow, longer distances with faster speed. Its all about timing so my thoughts in this moment
Play Mode version 1.1 The gripper input is used to set the delay (0,1,3,15,60,300 seconds) after a loop is done. The switch (it was left from the project start) pauses the robot
08/2015 i added the same code 1.3 but i try add english comments
10/2015 flowchart for the code and electrical diagram. (make sure you use a pullUp resistor at input 4,6 / change the code for input 4. This should fix the 'slow running problem' often happend)
Hey people!!: If u share my code please keep decency and give me credits. And dont forget Stoerpeak!