Makeblock Robot mDrawRobot Kit--mScara
Recently, I have received a gift mDrawBot kit from
Makeblock. the mDrawBot kit has already started
crowdfunding on the Kickstarter.#mce_temp_url#
According to the author’s usage experience, the mDrawBot
will be a popular project on the Kickstarter and the
facts proved this product is popular among people.
OK, let’s take a look at this kit and find some interesting
parts.

In the mDrawBot kit, there have almost 50 components except the screws, nuts and some small parts, the most attractive still is
the exquisitely aluminum alloy parts. As a fan of Makeblock lover, the author found in the aluminum alloy parts there has a component
did not appear in the Makeblock official store before.

A aluminum sheet is full of holes and slots, looks like the classic doublehole beam of Makeblock, just remove the
thread groove and the threaded holes of both ends. The assembly manual did not show the name of this component,
perhaps it will be a new series of the Makeblock components. According to the BOM lists and checked each component,
the author found many small parts have packed the necessary redundancy, even if lose a few screws and nuts during
the assembly process also won’t affect.
Read the official introduction before assembly, this is a 4-in-one
drawing robot kit, it can be assembled into 4 different drawing robots: mScara, mCar, mSpider and mEggBot.
However, the author feels these components can achieve more functions, two step motors add some small parts can play more tricks.
OK, let’s see the most interesting SCARA mechanical arm, official named mScara.
mScara
First assemble the “pen up device”. Give you a tip when split the acrylic board of the pen up device,
there have a “M” shape small part needs to separate, if no plier can be used, it can use screw to remove it.

After finish assembling the “pen up device”

The installation steps of mScara are not complex, it just needs about half an hour to complete if go smoothly.
During the assembly process, the author has met a problem: the length of the synchronous belt of the test sample is incorrect,
its shorter than the sample in specification, and the screws of M3 were lost, but that’s not a serious problem, the finally shape
of the mScara just has a slight difference compared to the specification, because of the synchronous belt is little short.

Full view:


The drawing scope is relatively large of mScara, about half of the shape of the ring. Before starting use,
let’s see the corresponding software of mDrawBot, it called mDraw. This software is specially developed for the mDrawBot,
it can import *.bmp and *.svg format picture in PC, and then control mDrawBot to draw the picture. The usage of the software is not complex,
basically is mouse operate, import picture and drawing also are one-click task.
The drawing area of mScara is almost the top half of the ring form, it might be larger at both ends.

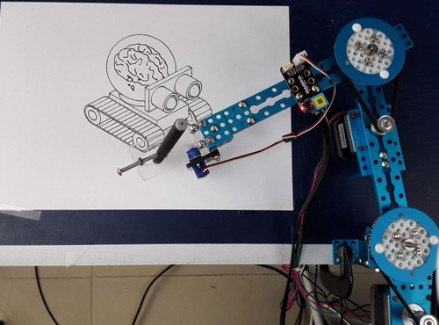
So this is the drawing effect:

RAmen!
The *.svg format picture is derived by the format *.bmp,
The algorithm used of mDraw is drawing the outline of the graph,
so the author in the final use pencil to filling, perhaps this characteristic can be used for making the mapping game.
When drawing curves, the line is smooth.
But then found it will be shaking when drawing some lines. In the figure below, the levels of certain lines will have serrated deviation,
the curves and the vertical lines are better.

After several repeated, analysis the reason may have the following points:
The synchronous belt is too short, it leads the center of gravity away from the shaft and make jitter increases.
(solution: in the normal kit can be improved)
The screws are not tight, the gap of the mechanical structure is too big
(solution: check each screw and reinforcement)
The greater the friction of pen and paper, jitter will be more intense. (solution: choose a light and write smoothly pen;
adjust the steering angle when the put pen to paper , make the steering and paper can support the weight of the pen.
Due to the author’s desktop is not smooth, so it’s hard to adjust)
After adjusted, the jitter problem has improved greatly. If use the correct synchronous belt, jitter should be smaller. In addition,
official recommend to use rubber band to connect the pen and holder, this can reduce the jitter problem when drawing picture,
but it can bring the traces of subtle when pen up and put pen to paper. Therefore, the author removed the rubber band.
Finally, after manual full filling, the picture is shown below:

mDrawBot has four shapes, in this article the author evaluated one of them temporarily --mScara. The other three shapes, the author will write a follow-up assessment after receive the missing components, it will coming soon.
Conclusion
Advantages:
The usage experience of the software is great, easy to use.
Assembly process is not complex, the DIY lover can complete assembly in half an hour.
A dozen major components can build four kinds of robot, I believe that the double step motor can play far more than these four.
The official give the play methods even include the laser engraver machine, add an MPU6050 based on mCar shape should be
transformed into a self-balancing vehicle.
Components are high flexibility.
Aluminium alloy structure is very stable.
Disadvantages:
Drawing speed is slow.
Need to pass some debugging that can achieve high precision drawing.
At present, the software still has some small bugs, it should be able to get rid of it soon.
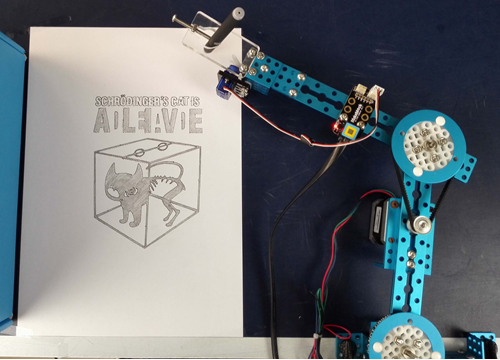
In the end, put up a logo drawing by mScara.

For more information, please visit the website:
https://www.kickstarter.com/projects/1818505613/mdrawbot-4-in-1-drawing-robot
http://www.makeblock.cc/


