


LMR Logo Bot
This is my first attempt on building an 'arty' bot.
I didn't know before I started, that this would be the most time instensive robot I 've ever build. But I've learned a lot of new things like: painting, polymorph etc.
As the name suggested, it should look like the robot in the LMR logo. I am not sure if it looks similar, but ok, this is my first art work, so be patient with me.
Controller:
As usual, an Arduino clone has been used for the electronic brain. To hide most of the electronic stuff, a brain from Polymorph has been created.
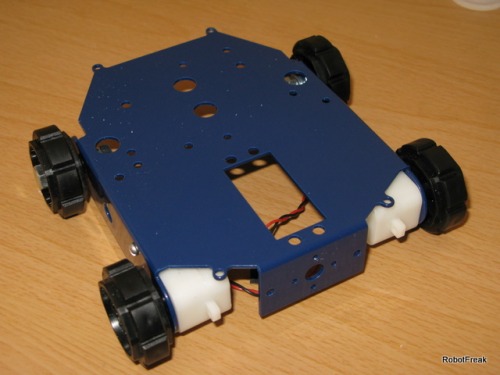
Platform:
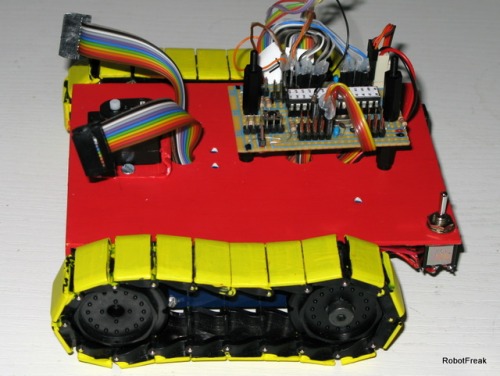
The robot platform is the Robot Rover for Arduino from Robot Shop, decorated with sheets of Polystyrene. The most difficult part was to color the black tracks into yellow.
Sensors:
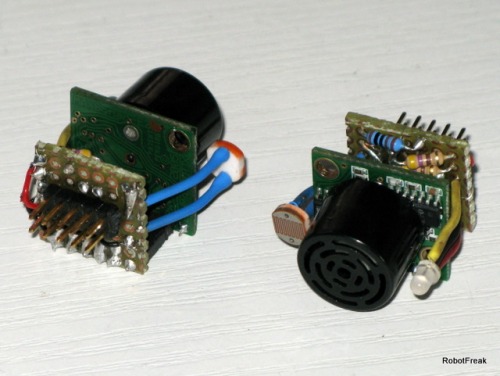
- 2 Maxbotix EZ1 ultrasonic sensors for obstacle avoiding. They fits perfectly into the 35mm film rolls I've been using as robot eyes.
- 2 LDRs for ambient light detectors
All sensors has been put together with the Duo LEDs into the film rolls. See my blog post about howto connect 2 ultrasonic sensors.
Actors:
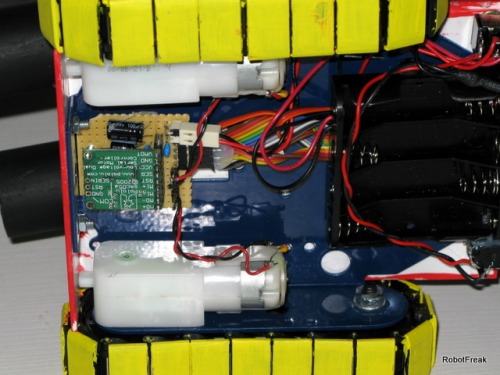
- A LVDSMC from Pololu has been choosen as motor controller for the GM9 1:143 geared motors. Build with FETs it brings the most power out of 4 AA cells for the motors.
- 2 Duo LEDs (red/green) as distance indicators. No object in sight meens green LEDs are glowing, in a middle distance of 30cm the LEDs glow yellow. Near objects are shown red.
- A BlinkM RGB LED will illuminate the Polymorph brain, to indicate the robots emotions.
Update: 05.03.2010
A POV (persistence of vision) display has been added to the LMR Logo-Bot. Now the robot can write messages of light into the air. Because of the low speed of the robot the messages can only be seen by a bulb exposure taken with my digicam. In the second video you can see the POV display in action.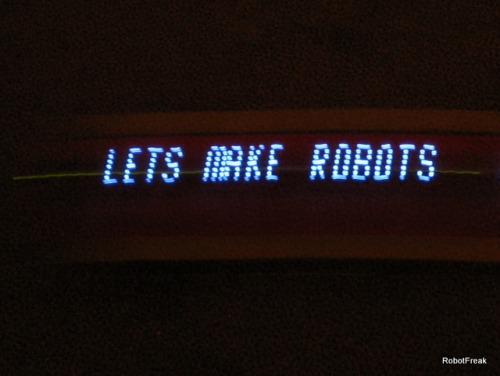
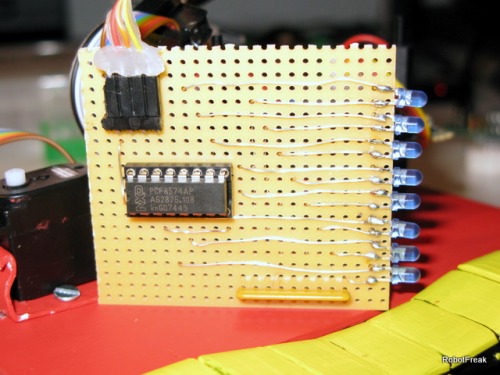
The POV display is made out of 8 blue LEDs. Because I don't have enough free ports a PCF8574 I2C port expander chip has been used to connect the POV display to the Arduino.
Further work:
- the front servo needs to be move a little bit, to give more place for the POV display.
- I've ordered some RGB LEDs for the brqain illumination
- Hack the GM9 motors to add wheel encoders
Navigate around via ultrasound, detects light sources
- Actuators / output devices: 1:143 GM9, 2 Duo LEDs, BlinkM RGB LED
- CPU: Arduino clone
- Power source: 4 AA cells
- Programming language: C++
- Sensors / input devices: 2 LDR, 2 Maxbotix EZ1
- Target environment: indoor