


Little 8
Edit: Check out this nice clone: https://www.robotshop.com/letsmakerobots/node/8386
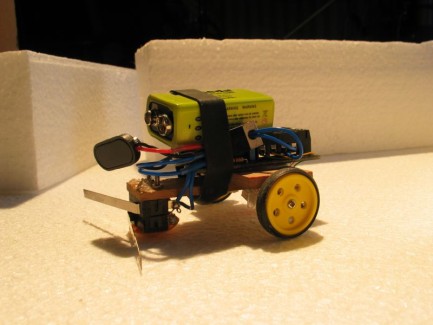
From building big, nasty, with large shovel, 2 cores, multiple sensors, soundsystem etc, I got tired of that.. and decided to see what fun I could have with a little Picaxe 8 on a board ($16, total prize for robot is about $40).
Version II of this fella here: https://www.robotshop.com/letsmakerobots/node/101
I have since recieved some interest in how to build this extremely easy and cheap robot, and so I hereby transform this post to a small and simple tutorial:
Shopping list:
Can be bought from Picaxe:
- 1 axe023 Is just plu'n play all in one, no soldering needed, just a screwdriver, use the manual that comes with the board.
- 1 USB Download Cable if you do not have one allready.
- 1 (free) Programming editor
- 1 5V Voltage regulator Read more and see how to connect here
- 2 "bumper-switches"
You can get this from anywhere:
- 1 9V battery
- Some sticks and something to cut them
- Screwdriver
- Soldering iron and led
- Some pieces of wire and something to cut it with
- Some different types of glue or tape etc
- a table-tennis ball and a knife to cut it
I like the challenge of only having 8 pins and 128 bytes of code etc. But be aware; you get a funny robot, but it is blind, can only sense a bumper in front, and you really do not have much memory in it etc.
What I did after building this, was i set it up with Easy Radio serial wireless input on the only pin left for anything. This made it possible to control this little robot by another robot, which opens new windows etc.
Some friends and i in our local club also had a contest of making it draw the number 8 on a piece of paper with a marker glued to its back.. Good fun little fast and chep robot!
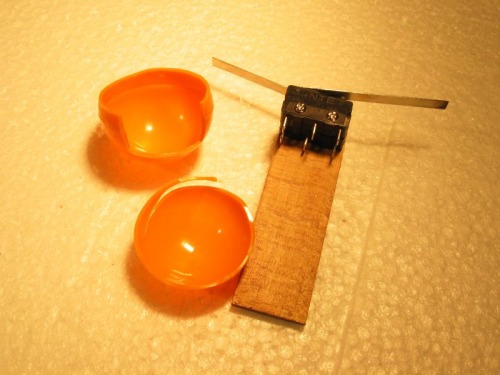
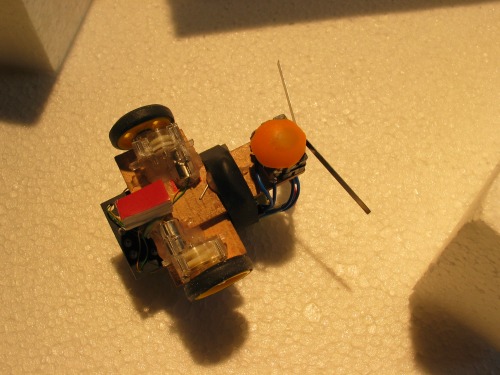
A stick, some switches, and a sliced up table-tennis-sized ball for "the third wheel"
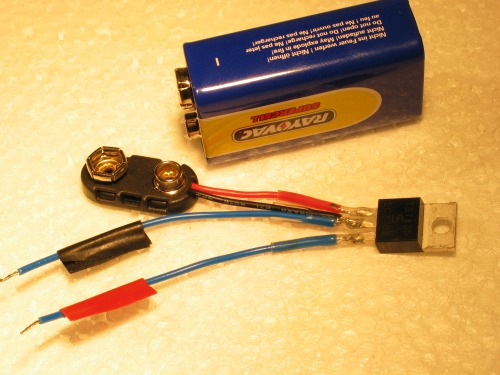
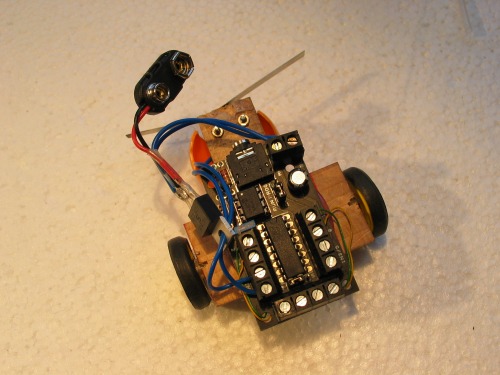
To get the 9V down to 5V, I use a voltage regulator.
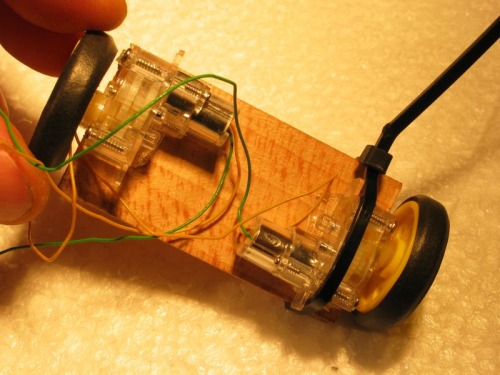
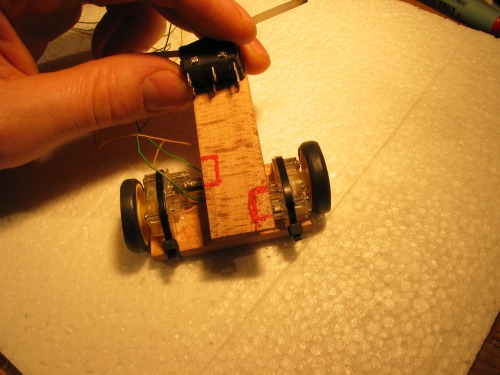
I was just mounting with some glue, the strips just tohold things in place..

An angle grinder may look like an extreme tool for such a small job - but I use it quite often. Just turn it on, hold it steady against something, and anything you stick in there is just vanishing, nice and smooth - compared to cutting such small parts. I also use it for acrylic (Plexiglass), again it is perfect to make little cuts and markings.
Just follow the instructions that comes with the board - it cannot be more simple, hook up the 2 motors.
The motors I recomend are incredible! Fast and strong, even though I only feed them 3.5V due to the 1.5V drop from the Motor Driver. So I actually had to make a "tale-bumper" (red square) as it was lifting the front a little too much :D With the bumper on it turned out quite cool, as it is just as capable of navigating on only the rear-wheels.. there is nothing else but a glider in front anyway.
All needed now is some code and the battery.
TIP: Get rechargeable batteries (and a recharger) - Or you will soon have used as much on batteries as on the Robot itself!
REMEMBER: If you make anything like this, to take a picture and show me :)
Here is the code used in the robot on the video. Don't mind that the names of the sub-routines does not make sense to you. Fact is that nothing in this code makes much sense, it was just the fun I had at the time when I shoot the video :)
I will have a closer look at this soon, but on request, here the code from the video:
symbol fw = 20
symbol bc = 200
b0= 175
''''''
dav:
random w5
for w3 = 0 to w5
if pin3 = 1 then
gosub bum
end if
next w3
b0= b0 +1
random w5
if b0 < w5 then goto hest
random w5
if w5 > fw then
high 1 low 0'ForwardRight
endif
random w5
if w5 > fw then
high 4 low 2'ForwardLeft
endif
hest:
random w5
if w5 > bc then
high 2 low 4'ReverseLeft
endif
random w5
if w5 > bc then
high 0 low 1'ReverseRight
endif
goto dav
bum:
w4 = 32212
return
high 2 low 4 high 0 low 1'Reverse
pause 300
if b0 > 175 then
high 1 low 0'ForwardRight
high 2 low 4'ReverseLeft
else
high 4 low 2'ForwardLeft
high 0 low 1'ReverseRight
end if
pause 300
b0 = 175
return
Very cheap but fun little beginners robot. It think' it has a brains within a Picaxe 8
- Actuators / output devices: 2 tiny motors
- CPU: picaxe 8
- Operating system: Picaxe
- Power source: 9v battery, 5v regulator
- Programming language: Basic
- Sensors / input devices: 1 switch (2 paralel coupled)
- Target environment: indoor, in scenes and rings