


Lexi: Archery Participant
I just finished the new hardware on my Lexi(Boe-bot on picaxe). After I created the code I will enter Lexi on LMR Olympics: Archery. I always wanted to equipped Lexi with a weapon to guard itself from curious 3yrs old cousins. MUWAHAHAHA!. Hehe. I just like to do a little bit like the bullybot by TheCowGod. I always like mideval weapon with steroids(semi- to fully automatic). This will be my first realm on automating my weapons using a microcontroller. The $20 is for Lexi's new brain and some cheap stuff i used. Everything else is reused junk.
Lexi's vital stats:
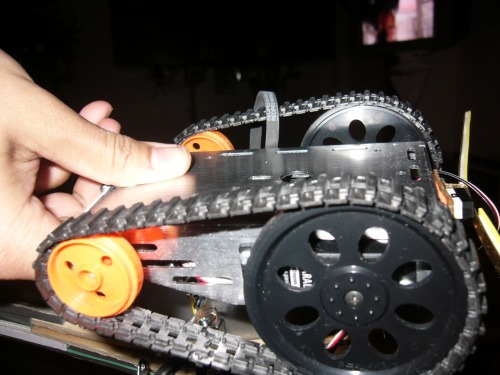
For the robot body I used the boebot chassis turn it upside down to lessen the vertical length and put a tamiya tank threads using the 2 servos included in the boebot kit. for the back guide wheel I bought a 3/4 inch screw and bolt. I forgot the size. The pre-drilled holes is great for the guide wheels. This creates a lower center of gravity with lower height to fit underneath debris. I always see Lexi searching trapped survivors. The downside is that I can't make a configuration that will encase the chassis inside the circumference of the tread. Whenever she tries to climb a steep angle the tread will lose traction because the chassis is touching the ground on the back. I want my her to climb and roll without any part other than the tread touching the terrain. Before, the huge Board of Education PCB(redundunk?) which is the board that house the BS2 puts the components high and in front on my new chassis which messes up my circuit whenever Lexi tumbles.The smaller picaxe kit gives me more space which I can use for additional battery. I am using an usb downloader to program my picaxe and XP pro on Virtualbox on debian.
Something's fishy on this pic. Can someone find what? :)
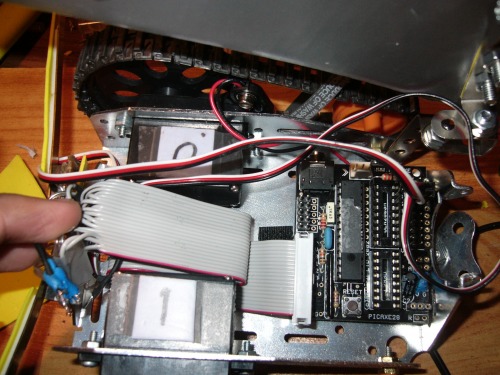
I used the rubber tire for traction on the tread but I lost the one on the left. The right rubber is hanging on the pics ready to be taken out. The metal on the back beside the picaxe board is from a old meccano set stopping the Lexi doing a backflip on steep climb.
Archer equipment:
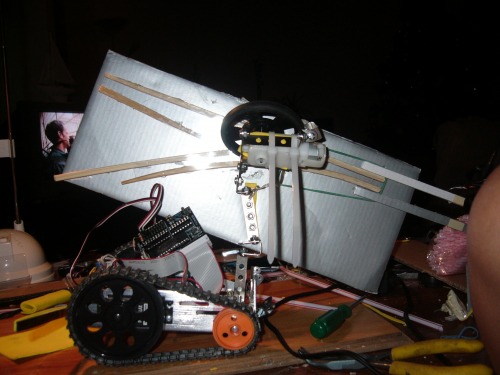
Bow and feeding mechanism:
This would be my 2nd prototype for a bow and arrow configuration. I want to make an automatic, self-feeding crossbow something like Van Helsing's. This version is not self-feeding and can't be aimed. Aiming is just based on the Lexi's left and right movement. I used chop sticks for the path of the bow. Bamboo is more flexible and easier to work with than packaging plastics. I used a cardboard for the flat surface which is silver on the picture. For propulsion of the arrow I used a rubber band(blue). GM9 gear motor with wheels for the feeding mechanism. The cardboard and motor is held by mechano like metal, which I found on a cheap children's store for $2 per pack. The pack would create a small car or a small crane, for me it's a handful of metals with pre-drilled holes, nuts and bolts, mini screwdriver and mini wrench for $2!! What a bargain!! LOL. All of the path of the straw is covered with packaging plastic except the part where the wheel touch the straw.

Arrow:
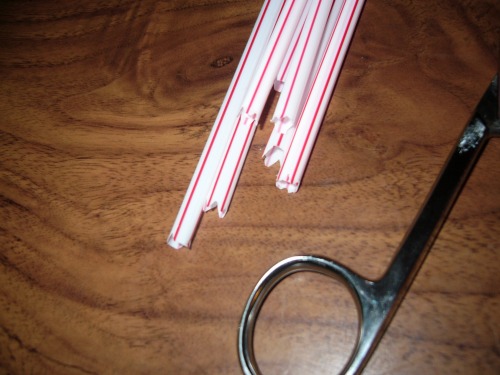
I use straw with little slit on one end to catch the rubberband as it is feeded by GM9. Some straw fail and fold rather than bend evenlly, I insert another straw inside every arrow giving it more stregth. Cutting the inside straw to open up to loop will help it fit inside the arrow. I also cut one end of each arrow to have a 4 pointy thing like a crown to catch the rubber on the end of bow.
Release Mechanism:
The release mechanism is describe on my 3rd video. The feeder is a bended. I took advantage of the straw's flexibility as the release mechanism. Near the end of the straw touching the wheel, the wheel will loose grip for a moment and the straw will snap straight out of reach of the wheel and the rubberband on the back will propel the straw out of the barrel.
I'm entering Lexi on LMR Olympics. Hope we are up for the challenge.
Comments are welcome. Long live LMR!
Waiting for contenders...
- Actuators / output devices: 2 servos, 1 GM9 for bow mechanism
- CPU: Picaxe 28x1
- Sensors / input devices: 2 Bumper switches