


Leo 1.2
Why Leo 1.2?
I decided to name this robot Leo in honor of one of my heroes, Leonardo da Vinci. Plus, I thought it was a really cool name for a robot! I called him Leo 1.2 because I actually designed him and started working on him 3 years ago (Leo 1.0). Then life got busy and I put it aside for a while. I picked it up again about a year ago and worked a little (Leo 1.1), but I boxed him up for a move and all but forgot about the project. Finally, I decided to buckle down and finish him (Leo 1.2) and this is the robot I'm presenting here.
Scope
I wanted to build an autonomous roaming robot that avoids objects using an ultrasonic sensor. I also wanted it to be small; something that could roam around the house. I've built several kit bots before, but this time I wanted to build something completely from scratch using inexpensive parts and my own ideas.
Leo's Brain
I selected the Parallax Basic Stamp HomeWork Board (USB) because it was cheap and easy to program. Also, at the time I started designing him 3 years ago, it was a very popular chip. If I was starting over today, I would probably use an Arduino.
Leo's Head and Eyes
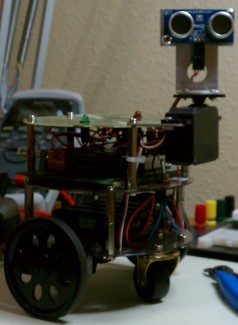
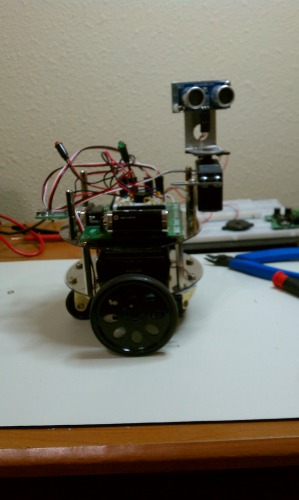
I selected the PING))) Ultrasonic Distance Sensor because it integrates easily with the Basic Stamp Homework board and it's transmitter and receiver look like eyes on a face. I attached the Ping sensor to a standard servo that allows him to turn his head left and right.
Leo's Body
I decided to use 3 CDs for Leo's body. I stacked the CDs in 3 layers using 2" spacers between them. The bottom layer contains the servos and wheels on one side and a 6 volt battery pack on the other. The middle layer contains the Basic Stamp Homework board and the top layer supports the green and red LEDs and the Ping sensor.
Leo's Behavior
- Moves forward looking straight ahead (green LED blinks to indicate clear path)
- If he senses an object in his path, he should stop and look to the right. (red LED blinks to indicate blocked path)
- If the path right is clear, he should turn right and continue moving forward.
- If the path right is blocked, he should look left.
- If the path left is clear, he should turn left and continue moving forward.
- If both left and right paths are blocked, he should turn completely around.
- If his path is clear after turning around, he should continue moving forward.
- If his path is still blocked after turning around, he will beep 3 times and then shut down.
Construction
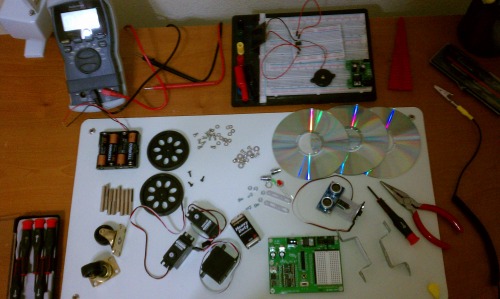
Let's Get Started! These are all the parts and pieces of Leo before I gave him life.
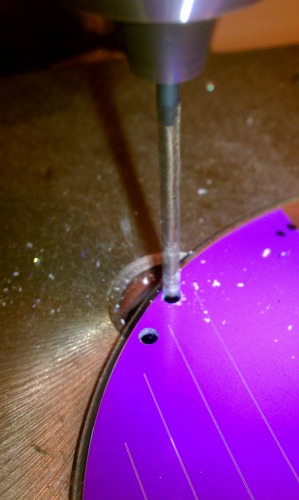
Drilling holes for spacers, wires, motor mounts, etc.

All 3 CDs drilled and ready.
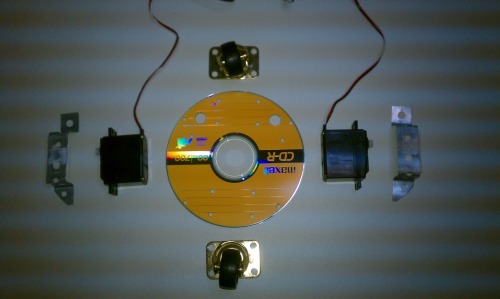
Layed out the parts for the bottom layer. I used servos for left and right wheels and casters for front and back.
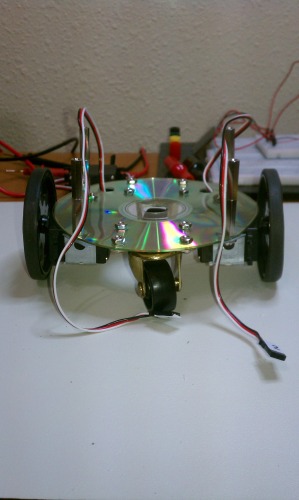
Assembled Bottom Layer
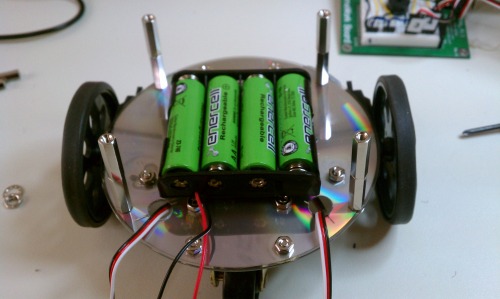
Added 6v Battery Pack
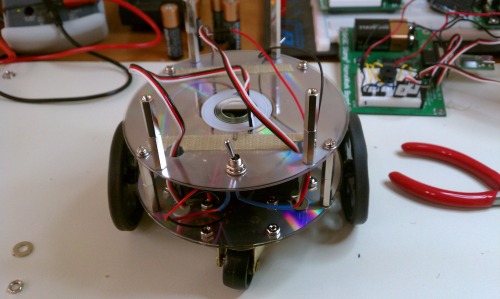
Second Layer Mounted. Ready for his brain!
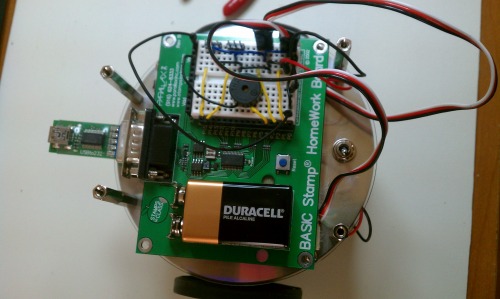
Mounted the HomeWork Board
Leo is coming to life!
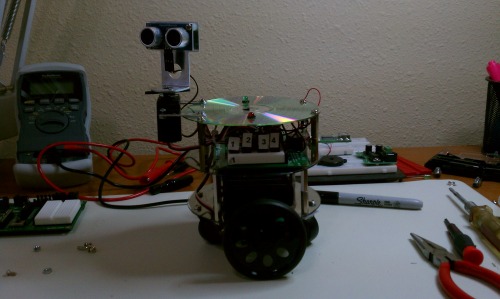
Here's Leo!
Leo navigates around a room autonomously avoiding walls and other objects.
- Actuators / output devices: 2 x Parallax Continuous Rotation Servo and one standard 180 degrees servo.
- CPU: Basic Stamp 2
- Power source: 9v battery for logic and 6v battery pack for servos
- Programming language: Parallax Basic
- Sensors / input devices: Parallax PING))) Ultrasonic Distance Sensor
- Target environment: indoors mainly, relatively flat surfaces