


Junky - my take on a junk bot
I have been a stalker here for about a year, absorbing all the great ideas, information and inspiration that i can get my hands on. I have learned a lot, and am soo glad that i found LMR.
So, I saw the challenge, and all the cool stuff offered for an "entertaining" video. I just had to get in on it. So,I started "Junky". Junky is my own take on a cardboard based robot. I kinda cheated, as i am using a Modern Device Bare Bone Board Arduino clone to control him, but I did build an h-bridge of my own cardboard based design. And, I have also built his base out of cardboard, an xbox 360 box to be exact. May be the single most expensive base I have ever built.
Junky is just that, junk. Basicly, I already had the barebonesboard for a tutorial I wrote for another website, on I2C communication. Wheels, left overs from a robot project last year. Head, :) well, the head came from a Roboquad that got stepped on. Motors came from a robosapien that fell off a table and lost an arm. So, he is a junk bot, in the true sense of the word. (Gotta admit though, the head looks sexy sitting up there!)
Here's a shot of all the parts that went into making junky:
My first step was building the hbridge. This is a basic design, which was really meant to just test and see if i could do it. And, I did. The h-bridge is based on an L293d ic. In the pics, notice there are no capacitors in the system. That was a mistake, as you will see in the videos. Also, I have since updated my design, added two ports for controlling servos, and also added capacitors to the system. I now have it on a proto board and am using it in another robot I am building.
Here is the schematic:
Here are a couple of shots of the top and bottom of the finised h-bridge:
Next, i started the task of building the base, about two minutes later, I was finished:
Add a ping pong ball, battery from an old rc car, complete with blue tape that held it in the last project it graced..
Flipping it over, i hot glued a bread board and my servo to the top, i actually poked a couple of holes in the base, with a phillips screwdriver, and put a couple of bolts, with a pen cut into pieces to act as a stand off. Also, at this point, i had taken hot glue and totally encased the back of the hbridge with hot glue, hence protecting it from shorting out, and blowing up all 2 dollars worth of chip.
Here is a shot of the top of the base:
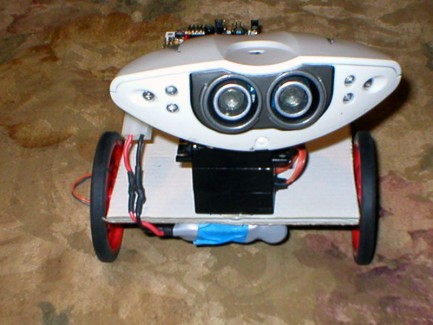
And a couple of the top with the head on:
After actually wiring in the servo, the ping unit, and connecting up all the wires for the h-bridge, i realized my breadboard was just not big enough, i needed to add a voltage regulator, and still have room to play with sensors and such.. so, i put a bigger board on, and rewired yet again.
The first test run was not really that great.. he more or less just set there and spun in one place, while the head did a really slow pan, not what i expected. So, after reprogramming, and rewiring yet again, I ended up with a fully functionaly robot that has a slight nervous tick in his head and neck movements, remember those capacitors i left out? That's why you put capacitors in. Also, it could be that I have a burned out servo, cause it was a left over.
I am still trying to get my video sorted out, I put all my brain power into designing and building him, never gave a thought to the video. Video will be forth coming though, I have my kids thinkin on it.
Tomorrow I hope to be able to post a video or two, I don't think the video of him solving my maze of obstacles is that entertaining, although I will throw it up here for the heck of it.
Hope you enjoy my "Junky" junk bot.
Roams around right now, also can find his way out of a maze of obstacles pretty well.
- Actuators / output devices: Motors scrounged from a deceased robosapien
- Control method: autonomous
- CPU: Arduino Diecimilla
- Power source: 7.2V NiMH
- Sensors / input devices: Parallax Ping
- Target environment: indoors mainly