


JAR5 bot
This is my first robotic project, I already have some programming background (had some basic VB.net, java and (plc) step7 at school) which is very usefull.
These are the parts I'm going to use:
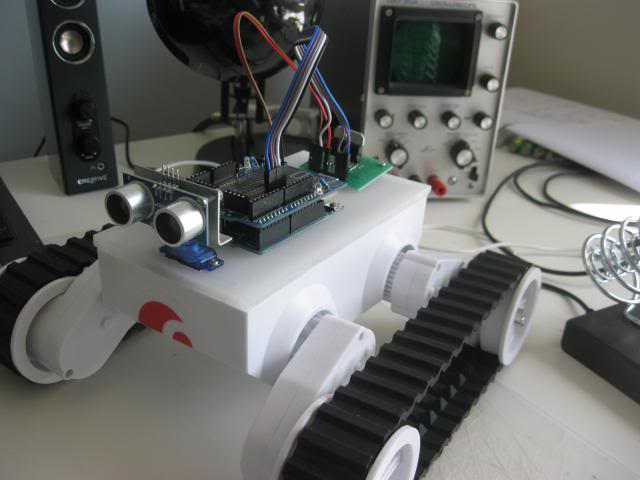
- Dagu rover 5 (with 2 motors and 2 encoders)
- 2x ultrasonic sensor
- 5g servo (HXT500) to controll one of the ultrasonic sensors
- arduino uno
- l298 to controll the motors
Yep, this will be one of the many object avoidance robots, which is good to begin with. I'll probably add some features later (bluetooth control via pc interface + ip cam).
I'm not sure about the battery but I'll probably use a 2S lipo (7,2v) which is ideal for the motors and in combination with a 7805 it will also supply my arduino.
It will take a while for the next update 'cause I'm still waiting for some parts and I will first test all the sensors/actuators individually.
-----------------------------------------------------------------------------------------------------------------------
So today I tested the encoders, I've read the explanation from Oddbot but I didn't need to know whether it's driving forward or backwards (maybe later I'll change this) so I just needed one of the two signals. When I read the values from A0 I get 1023 and 5. I first wanted to use AttachInterupt() on a digital input but that wasn't an option since it didn't recognize 1023 as being high. So I made this small program for testing purposes (it's not perfect, but it works good).
int value = 0;

void setup(){
  Serial.begin(9600);
  attachInterrupt(0,count,HIGH);}

void loop(){}

void count(){
  value++;
  Serial.print(value);}
(changed the code because I found the bug in my attachInterrupt, more reliable now too).
I'll check how much encoder counts I need for (f.e.) 10° and use these calculations in a subroutine TurnDegrees(intDegrees)
-----------------------------------------------------------------------------------------------------------------------
I just received a package with my ultrasound sensor and a breadboard to test some stuff.
The ultrasound sensor worked great using the "NewPing" library, with this library I can use just one pin for the trigger and the echo.
I also tried the l298 and it works great, I can change the RPM by pwm on the enable pin. First I had a problem I tested with a 5,2V powersupply but this didn't not work, the voltage of the powersupply has to be at least Vih + 2,5.
-----------------------------------------------------------------------------------------------------------------------
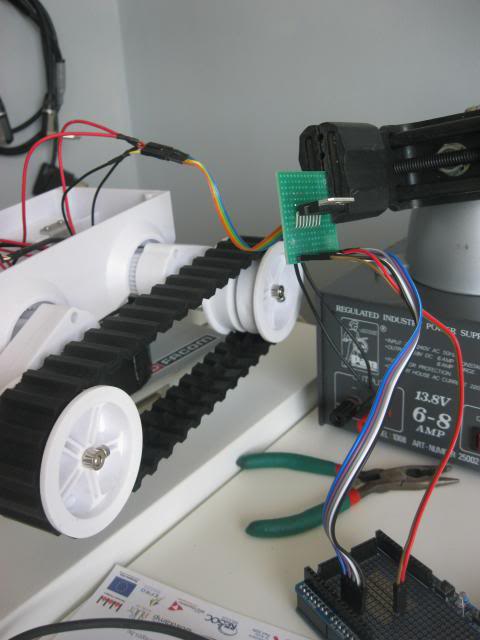
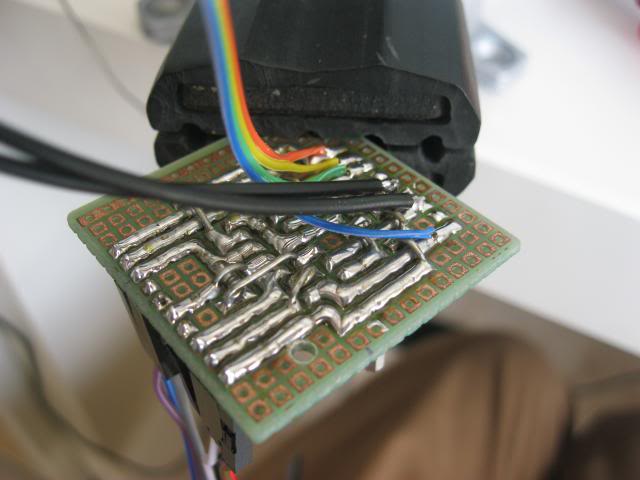
Finally a new update, I made a little print to make the connection from the l298 to the arduino easier.
I will probably make the cables (which are still outside of the robot) longor so I can put them inside the robot.
So I only have some small soldering-work left, and then I can start programming :)
Regards from Belgium :)
Object avoidance
- Sensors / input devices: Ultra Sound
- Target environment: indoor