


Insect Bot - powered by capacitor
The insect bot is simple to make, and uses a vibration motor as its head, which is powered by a capacitor as its abdomen, which I salvaged from an old toy plane, with specification - 2.8V 5F, you can get one of ebay for a couple of dollars.
Use diodes for the Legs and Antenna , you can also use resistor. All these components are then soldered together on a small etched PCB which forms the thorax of the insect.
Now since we are using a super capacitor to power the insect bot, we will use 2 AA batteries to power it up as shown in the video above.
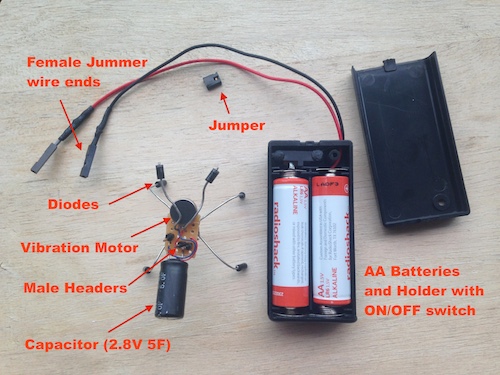
In addtion Soldering Iron/Solder and a helping hand ,the picture below shows the components you'll need to complete the build.
The Circuit is pretty simple
- Connect the -ve to vibration motor to -ve of capacitor and also connet this to a male header pin
- Connect +ve of the capacitor to mail header pin
- And the +ve of the vibration motor to the other header pin
- The jumper acts as switch once the capacitor is charged
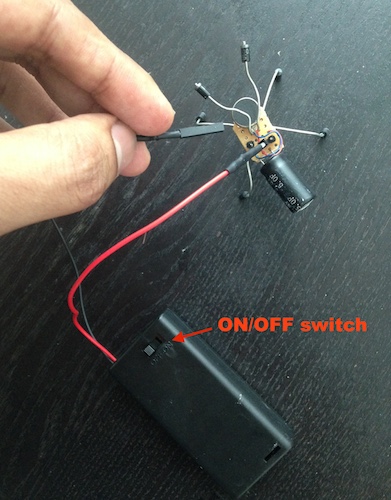
Charging the insect bot is simple , use a 2 AA batteries and connect the +ve pin(red wire in the picture) to the header pin connected to the +ve of the capacitor and the other wire to the -ve.
Once done hit the ON button on the AA battery holder and count to 10 as shown in the video above..
This is my first post here , please feel free to leave a comment and let me know if the description was to much or to little/any other suggestions .. Thanks