Guajardo Robot

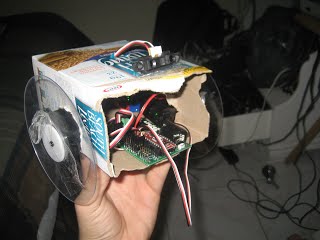
I had no supplies to build chassis. So I had to improvise using the following objects:
- Protein cardboard bar box (by the way very delicious)
- 2 DVD protectors that come at the top of the stack when buying DVD's
After:

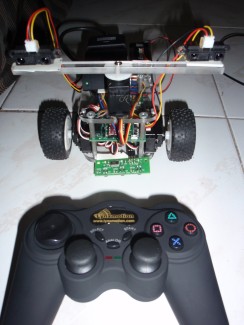
After some time, my buddy Heriberto Reynoso, a UTB student, helped me build the chassis. Using plexiglass as a medium, and mainly a bandsaw, we were able to make the overall chassis and the result is seen in the image above. To see materials used visit: Materials Page.
Functions:
At first, the overall programming of this robot was quite puzzling. I was unsure of which pulsouts made the servos spin left or right, I did not even know how to debug the program, but after trying many times, I was able to get the hang of it. My first program made the robot advance forward until the IR-Senor detected something. When it did detect something it would stop. (I did not design the program that way; nevertheless, it did work.)
After testing the programs many more times I was able to start making complexer programs. Eventually, I learned I could use the three buttons on the Bot Board II to execute several programs instead of just one. I took advantage of this and created several programs which can be seen in the videos below.
Up until now this is the list of functions:
- Obstacle Avoidance
- Obstacle Following (Sumo-bots)
- Line Following
- Wireless Control using a PS2 controller
By pressing the A button on the Bot Board, I get to choose from the first three functions. I made it this way to have all the autonomous programs together. By pressing the B button; however, I can control the robot using a PS2 controller. For example, if I wanted to choose Line Following I would Press the A button since it is an autonomous program, and then I would press the C button as it is the third program.
Here are videos of the robot in action. If you need any help programming yours just e-mail me at [email protected]
For more information visit: http://sites.google.com/site/jaimemguajardo/home/
:)


