


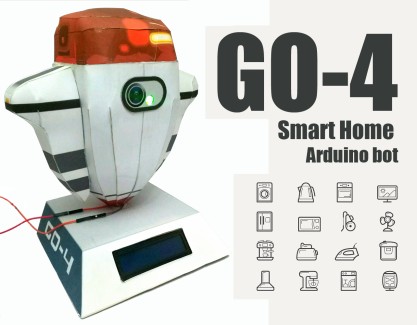
GO-4 SMART HOME ARDUINO BOT
In this project I will show you how to will build a Smart Home Bot using the IOT technology to control you home appliances remotely through the Internet.
But before we start let’s talk about this technique as we used to…
What is the IOT?
The Internet of Things (IoT) is a system of interrelated computing devices, mechanical and digital machines, objects, people that are provided with unique identifiers and the ability to transfer data over a network without requiring human-to-human or human-to-computer interaction.
A thing, in the Internet of Things, can be a person with a heart monitor implant, an Irrigation systems in a farm with a biochip transponder, a vehicle that has built-in sensors to alert the driver when tire pressure is low or any other natural or man-made object that can be assigned an IP address and provided with the ability to transfer data over a network.
So let’s say that the IOT is a huge system over the internet that embraces every single machine using a unique ID calls IP address.
How can I become a part of this world using Arduino board?
There is a small technological marvel device called ESP8266 and it is a great tool for enabling your project to access the internet. You can plug it into an Arduino easily as shown and allow your project to communicate through the internet. To control it from anywhere in the world via IP address!
Specifications of the internal controller:
· The Espressif processor is 32-bit and 80MHz and can be upgraded to 160MHz.
· 64KB memory bootloader.
· 64KB Quick RAM memory dedicated to the microcontroller.
· 96KB random access memory.
*note (1)
the ESP8266 device is usually sold without any module, and in my personal opinion I prefer to use its ESP-01 adapter to make it easily to connect to Arduino board.
Build the Project
We need some required materials to done your project:
Robot model
Arduino Uno
ESP8266
ESP-01 adapter
Four ways relay
lcd 16x2
LED with 220 ohm resistor
Jumper wires
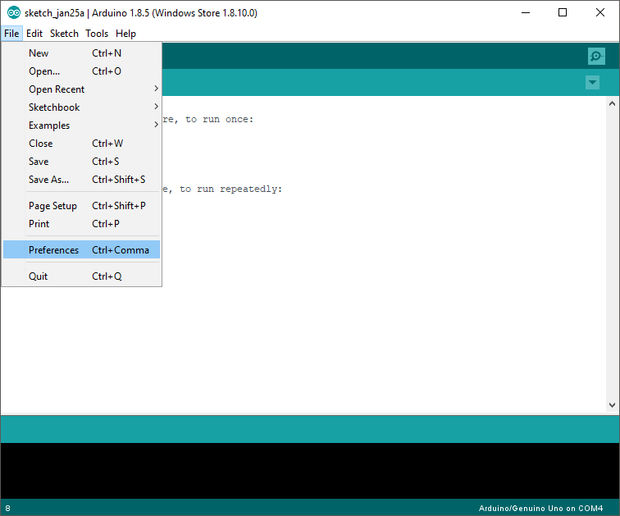
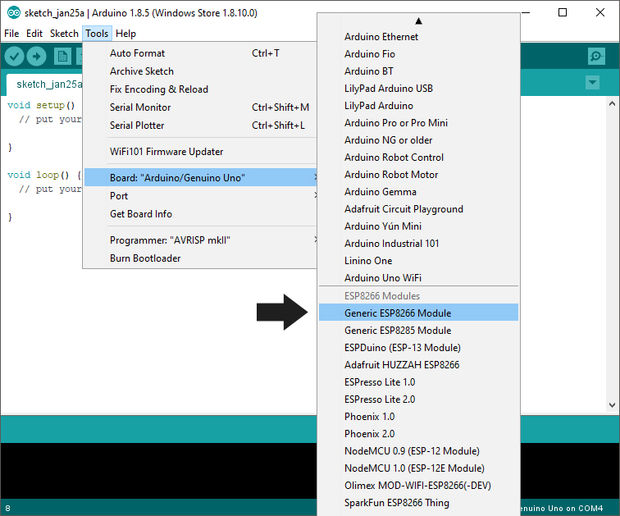
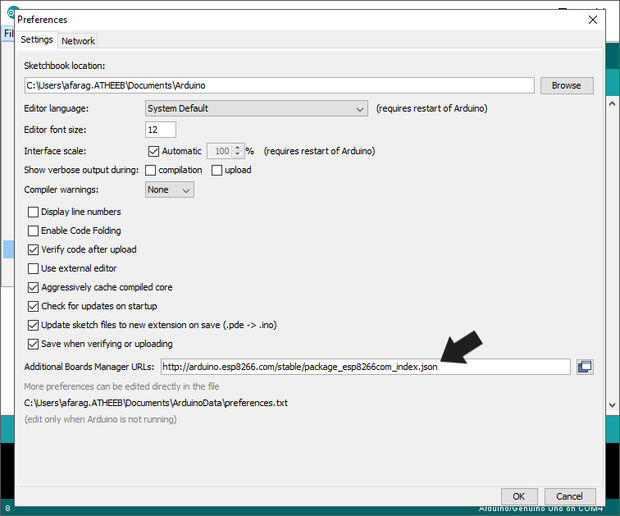
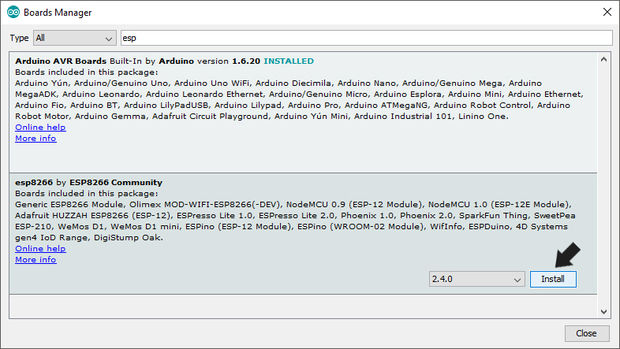
Step 1: Installing ESP8266 module
Unlike the rest of other components ESP8266 module needs to be setup before using, because it’s stand-alone module and there are many methods you can follow to upload the code to it.
*note (2)
The robot is accessed through the local Wi-Fi network only. In order to control it throw the internet, you may have to do port forwarding on your router.
For more details about this subject:
https://www.pcworld.com/article/244314/how_to_forward_ports_on_your_router.html
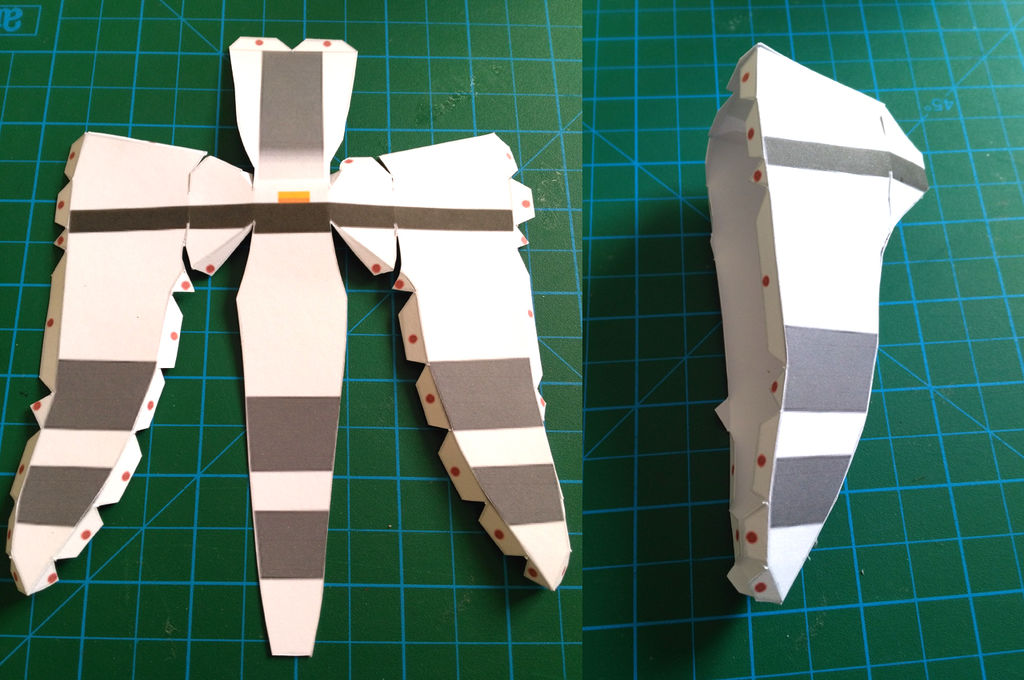
Step 2: Assembling the robot base
At this time I choose a simple model that can be assembled in couple of hours.
Download the Model from here:-
http://paper-replika.com/index.php?option=com_content&view=article&id=63
Assembling this base is pretty simple it also allows you to fix the whole circuit inside without any messy wires look, so I fixed LCD 16*8 display module in the front of it to facilitate dealing with robot outputs and I will explain it later.
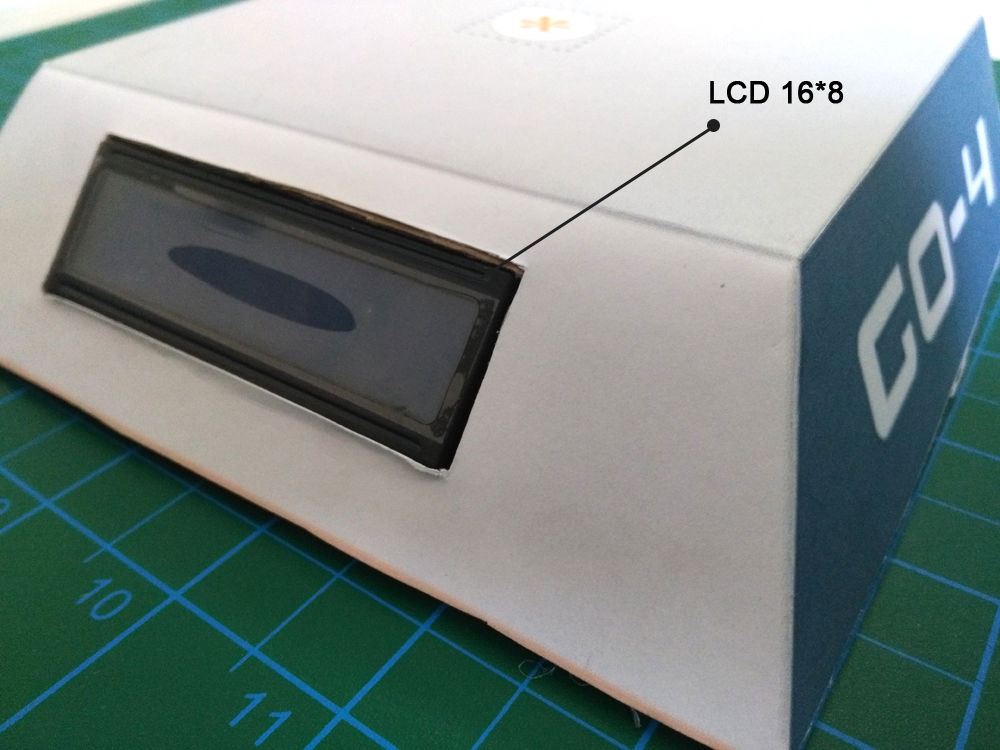
In this link you will learn how to use lcd display module
https://www.arduino.cc/en/Tutorial/LiquidCrystalDisplay
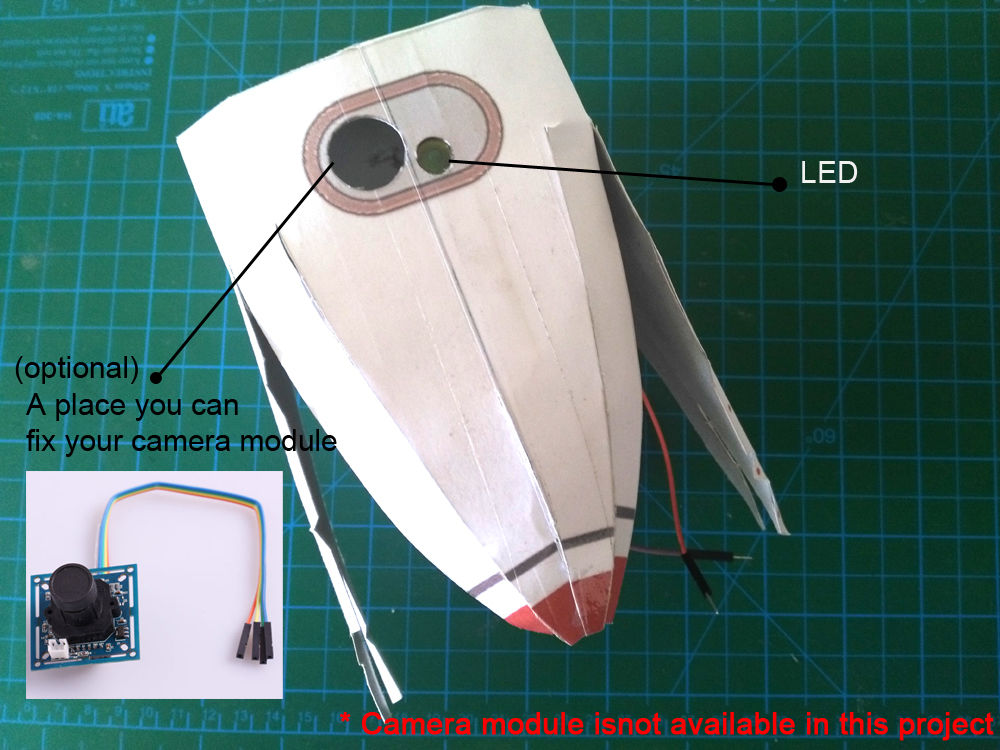
Step 3: Assembling Torso
The robot torso consists of a single piece, and there is two holes in the front so you can fix your LED flasher and camera module if you want to.
Step 4: Robot Head and wins
These pieces are very basic and it doesn’t have any wires or circuit inside.
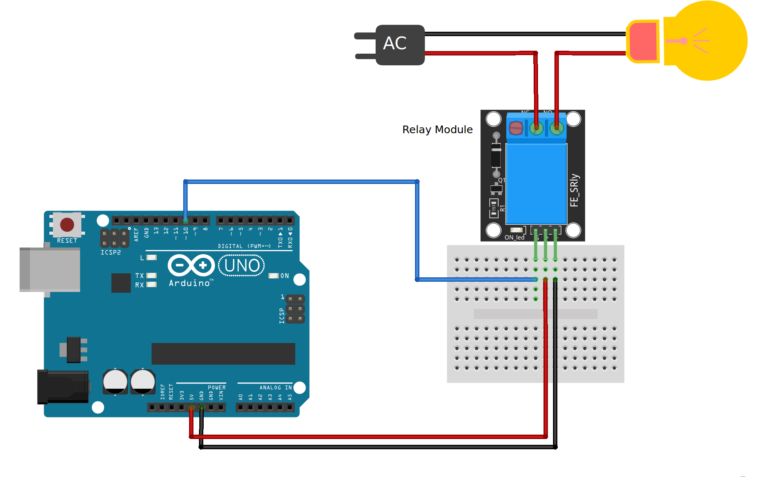
Step 5: Relay Circuit
HOW TO ADD RELAYS TO ARDUINO
This is the type of relay its able to use to switch mains powered devices. These relays will handle most devices used in homes except the highest powered ones like room heaters, stoves, and motors. Make sure the VA (Volts x Amps) of the device you are switching on/off is less than the relay rating.
Warning: Always be very careful when experimenting with AC, electrical shock can result in serious injuries.
Relay module from bottom side is open when AC is connected do not touch the circuit.
For the DC part of the circuit:
Arduino digital pin 10 –> module pin S
Arduino GND –> module pin –
Arduino +5V –> module pin +
Step 6: Tips and Tricks
In developing your own projects with Arduino, there are a few ticks that are helpful to keep in mind in case you get stuck.
· Make sure you included the correct library #include <ESP8266WiFi.h>
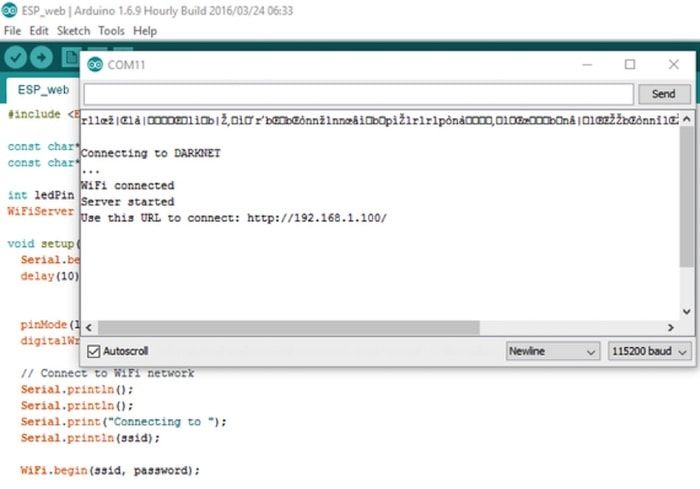
· Make sure you’re reading off the right port in Arduino 115200 instated of port 9600 Serial.begin(115200);
· The project doesn’t need any extra power source.
· Also, make sure that use write down the correct SSID and password to your local WIFI network
const char* ssid = "YOUR_SSID";
· const char* password = "YOUR_PASSWORD";
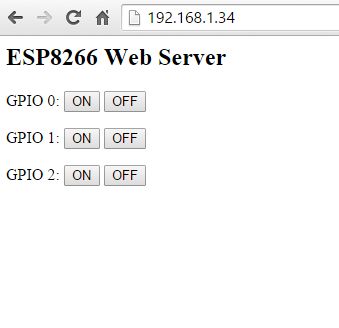
· Once you open the serial screen make sure that the URL is showing like this:
Use this URL to connect: http://192.168.1.100/ , copy the URL and paste it in your web browser.
IOT Robot
- Operating system: Arduino IDE
- Power source: 9 Volt for powering the board
- Programming language: C++
- Target environment: indoor