


General Blackbeard
Like so many other posts, I'll start this one off with the worn out statement: This is my first robot. I have some past programming experience in a few languages and some soldering experience, but never the two together in one project. I blame my 8 year old son for this one. He got interested in the robots a year ago and while researching Chrstimas gifts for him I discovered the world of DIY robot kits and got intrigued. I'm an engineer at heart that likes to build things so building a robot really interested me as a knew hobby. Like most people I can't spend much money on a hobby, so we'll see how far I can take this. So far I've been pleasantly surprised by how inexpensive a lot of the parts can be.
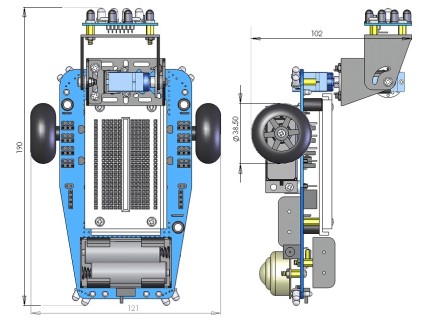
After some researching I settled on the Mr. General kit as a basis for my first robot. It sounded challenging enough, yet not too much so and looked to provide a good base to add to and experiment with, both in coding and with new gadgets and sensor add-ons. Among the ideas I have I would like to add an LCD display for feedback, a focus light source that will beam on the moving object he tracks, additional LED's (because blinky things are cool, and an Ultrasonic sensor to complement the IR sensors in object detection and navigation. I purchased a Picaxe 40x2 for the brain of Blackbeard, but also a 28x1 to experiment with on a standalone breadboard.
I bought the the kit, cable and 28x1 off Ebay from Dicksonhamshop and the 40x2 from Peter Anderson.
Wish me luck!
-------------------------------------------------------------------------------------------
Jan 31, 2011
Here are the results of steps 1 and 2:
1) Not so good. The USB to Serial cable did not work for me. Or, more accurately I should say the Driver for the cable didn't work for me. I tried it on three different systems: Windows 7, Vista and XP. None worked. I rebuilt the circuit twice so I'm pretty sure it's the cable/driver. So much for going cheap. I'm about to submit my order to Peter Anderson to the USB to Stereo cable.
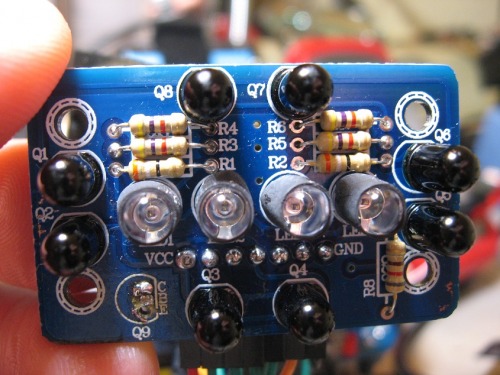
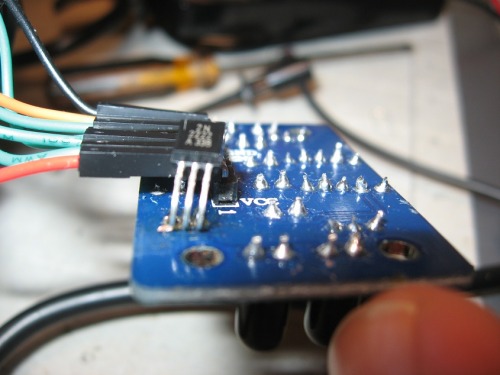
2) Pretty Good. I only had time to build the Compound IR eye. Here is a picture of it:
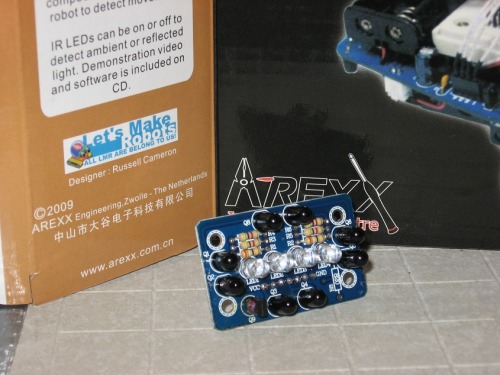
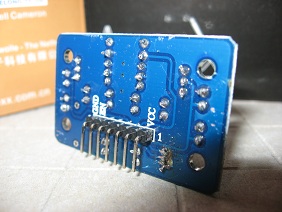
I did have one question while building the Eye and that was which way the 7 pin header should be oriented. I decided in the end it probably didn't matter so I picked a direction and went with. The alligator clamps on my board holder scratched up the paint some, even though I wrapped them in tape. The transistor was a little tricky for me since the holes are so close together. I had to wick out my first solder attempt and do it again. You can see the results in this picture.
Hopefully this week I'll get a chance to build the main PCB. I'll post a picture of it when I do.
--------------------------------------------------------------------------------------------------
Feb 2, 2011
Slow Progress
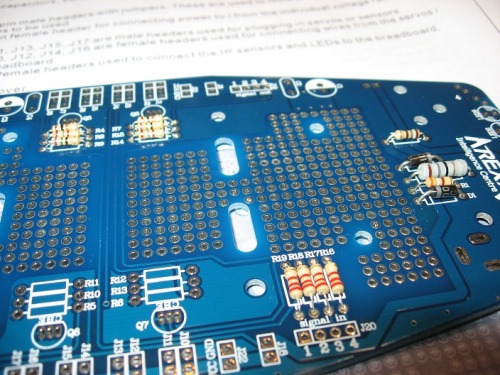
Had a little bit of time this evening to solder on most of the resistors and the diodes.
----------------------------------------------------------------------------------------
Feb 2, 2011
Had a few minutes to fire up the iron and add the last 6 resistors (the 6 slots missing the bottom left of the picture above). Hope to have time to finish the board this weekend.
-----------------------------------------------------------------------------------------
Feb 3, 2011
Got my new AXE27 Picaxe USB cable in the mail! Assembled the little AXE29 breadboard adapter for the stereo connector and downloaded and installld the driver. It works! My little blinking LED circuit worked! Also connected up the Compound IR Eye and wrote the program to callibrate it. It worked! They eye works and is ready to go.
BTW - I have a trivia question for you - in my picture above the assembled Eye, can you spot anything missing? I did after my first attempt of connected it up. :) Oops.
-------------------------------------------------------------------------------------------
Feb 6, 2011
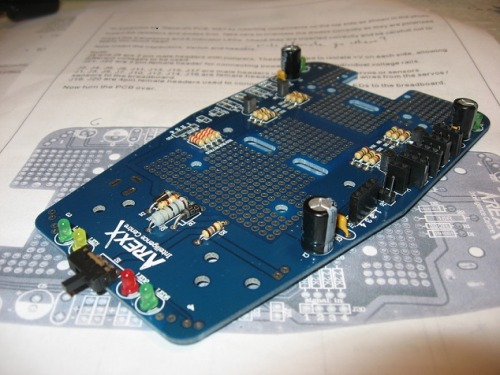
Completed more of the main board over the weekend, but didn't have time to finish it. My soldering skills must be rusty. I found soldering the transistors and the headers a little difficult and spent some time cleaning up solder that accidently crossed contacts a few times. I need to add the headers for the other power rail, the corner IR sensors and the recharge jack. Here's a picture of where I'm at now:
----------------------------------------------------------------------------
Feb 10, 2011
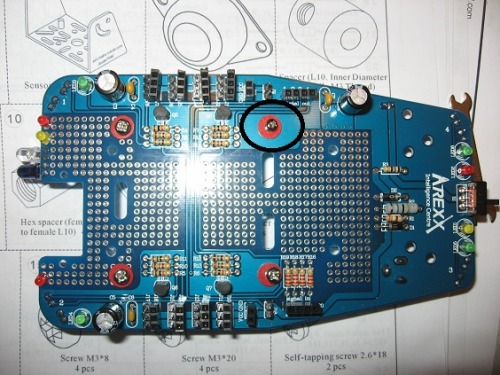
Finally made time to finish the board for General B. For my first modification I decided to simply add a few more LEDs that would be triggered by pan and tilt movements and IR activity in the eye. I also added another IR LED/phototransistor pair looking forward since I decided to use the corner sensors for edge detection. I started to put the standoffs on for the the wheel servos, but found that one of the four screws supplied is different. It's the right length, so I know it's the one meant to be used, but the head and threads are different. The nylon nut doesn't engage on to it. I circled the head of the incorrect screw in the picture. It's not a self tapping and there are no more in the kids this long. Guess I'll have to figure out a work around (aka hot glue).

-----------------------------------------------------------------------
Feb12, 2011
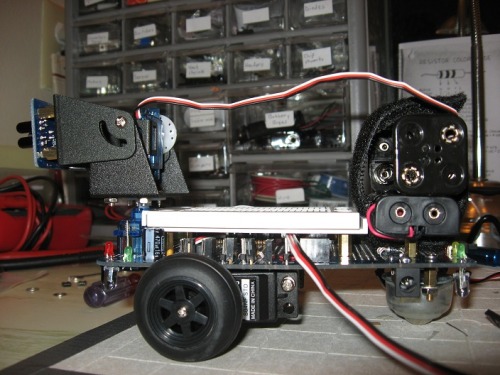
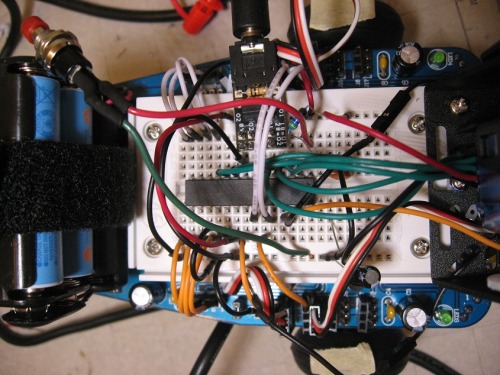
General Blackbeard (GB1) has been assembled. See picture below. The only change I made as to make use of a single 4-AA battery holder instead of the two separately mounted holders in the kit. It doesn't look very tidy right now, but I hope to work on that.
Next step is to wire up the servos and sensors. I plan to set it up first with the 28x1 processor before rewiring and modifying the code for the 40x2. Decided not to change too many variables all at once. I want to verify that the basic Mr. General is working correctly first. Once I verify that I'll do the mods for the 40x2 and also wire up the additional LEDs. After that I'll mod the code for using the additional IR sensor I mounted on the front.

---------------------------------------------------------------
Feb 13, 2011
I'll have to get to pictures/video monday or tuesday, but here is where I'm at. GB1 has been wired and programmed using the 28x1 processor but the initial results of execution not very good. Here is what I see when I turn him on:
1) The power-on LED doesn't light.
2) Corner green LEDs light and the IR Eye goes fully to the right and twitches like mad for a few seconds then stops while the speaker plays happy B-day
3) Once the song ends he does one of two things:
If the background light is low he will twitch about once a second with the eye turned fully to the right. Corner LEDs blink
If the bacground light is high the eye will twitch like mad (instead of once a second) while turned fully to the right. Corner LEDs chase (or seem to).
4) With hand movement in front of him he occasionally will move the eye slightly up ro down, but only a little and not consistently.
5) Wheel servos don't move at all.
When I get some time I plan to recheck the wiring of the servos and IR LEDs to the breadboard, map out what voltages are going to the servos and eye and take some video. I'll also reinspect all my solder joints as best I can. My chief concern is the transistors- they're tricky things to solder with the leads placed so close together.
-----------------------------------
Feb 14, 2011
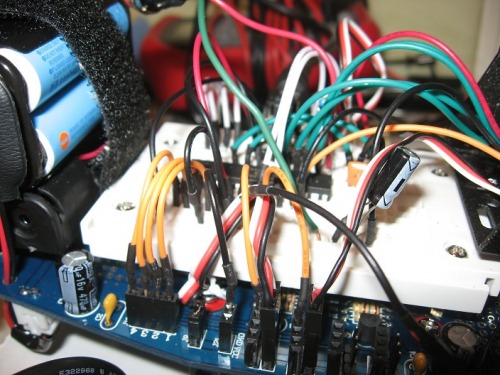
As promised, here are a couple pictures, but video will have to wait until tomorrow. The edge sensors are detecting the edge (all 4 work), but the head only twitches and the wheels only turn on short impulses.
-----------------------------------------------------------------------------
Feb 20, 2011
Getting closer, but still some curious behavior going on here that I haven't had time to completely troubshoot.
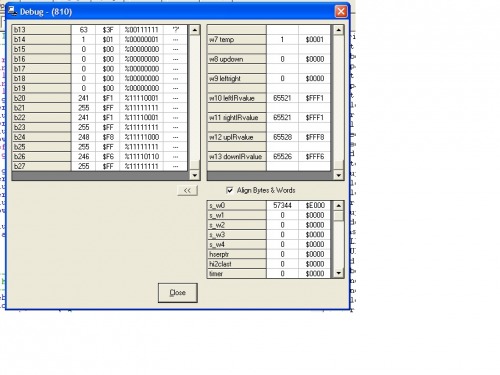
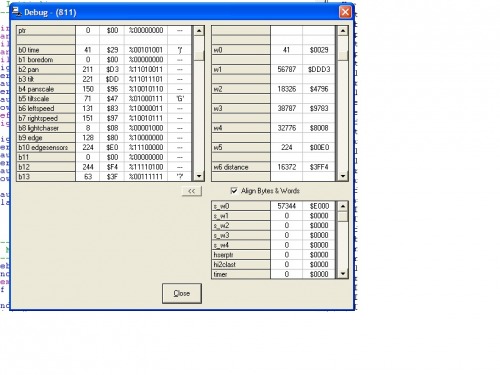
Here are some screenshots of the Debug Screen and a video so you can see what I'm looking at. The IR values are way too hight and the servo control is either going batty because of it or something squirly is going on there too. I added the two LEDs on the breadboard to confirm signals being sent to the servos and the IR LEDs.
The video for some reason is being inserted at the top of blog, but the link is also below.
Video:

- CPU: Picaxe 40X2
- Power source: 4 AA batteries
- Programming language: Picaxe basic