


(ex) Nunchcuk controlled (and now soon to be) rf bot
This is my first robot(arduino based). It is currently incomplete.
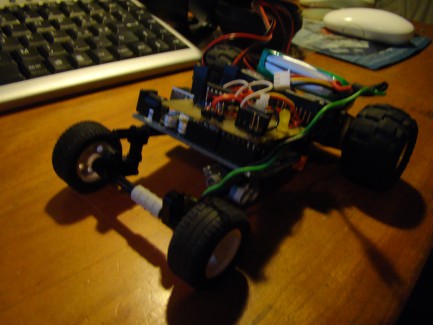
I started by getting some standard hitech servos, and then modifying them by removing both the little tab on the main gear as well as the motor controller and the pot, to obtain two geared motors. I then glued two lego wheels on them as they where the only ones lying around
Next I bought a pack of 5 l293d's from ebay for 5 euros, shipped in a day. After breadboarding the motor controllers and testing them with my arduino, i started to write the code for the wireless 'chuck. It basically takes the values of the x and y axes of the nunchuck's joystick and maps them from 0 to 255, which then gets pwm'd to the l293d on both enable pins. I decided to use a tank steering mechanism, as in the robot steers by sending the motors in opposite directions.
The l293d code is really basic. According to the joysticks position the drivers receive a high or a low signal in order to set the direction of the motors. The 2 enable pins are connected together so both motors go at the same speed. The steering is controlled via differential drive.
The code was written partially by me. In order to interface the nunchuck with my arduino i used some sample code from todbot's blog, so the credit for the nunchuck interface code goes to him and windmeadow. The only problem with the wireless nunchuck is it has a maximum range of 4 meters, but i am going to build an rf transmitter with another arduino using code from here(by Gareth) : https://www.robotshop.com/letsmakerobots/node/12336
All my code does is map the joystick x and y values to set speed and direciton. I added a little dead zone for steering, so if the joystick is only slightly tilted to the side it will still go straight.
I also made a little shield so i don't have to use a breadboard. Shortly i will be uploading a schematic as well as a video of the motors running.
I'm not sure about my battery, i have used a 9v wall-wart and a standard 9v battery for testing. Do i risk burning my motors?
Update 26/8/10
Yesterday I fried my receiver. The project is temporarily stopped. I have uploaded the code. In the meantime, I might as well describe it so you can understand the code.
The l293d is attached to 5v for logic and vin for motor power. Pins 2 and 4 control the right motor, pins 6 and 7 control the left motor. Having connected both enable pins toghether I only need to use 1 pwm pin for motor speed, pin 3. The nunchuck is connected to 5v and i2c pins are connected to sda and scl(analog ins 4 and 5). I left pwm pin 5 disconnected so i can hopefully hook up a speaker to it in the future.
Update 25/10/10
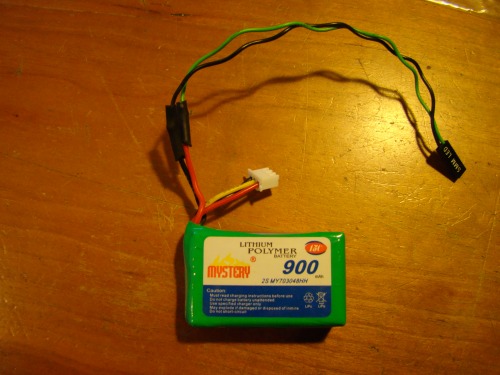
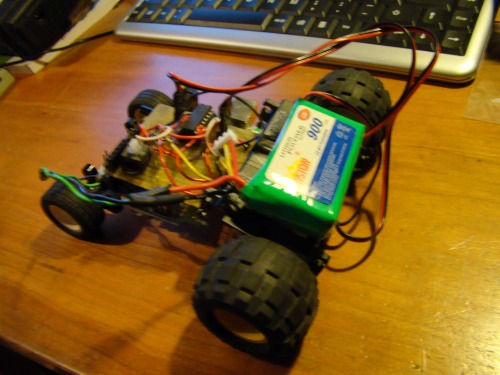
After having fried my receiver my hopes were down. My custom wireless vehicle might have never come to life. But then, i bought a new lipo and after seeing the bot, i decided to revive this bot. I have rebuilt the chassis and added a lipo, removing my heavier nimh. I am removing the nunchuck+bt+i2c control, and i will build a small joystick which transmits with the "cheap ebay radio" modules.
I took it for a test run and i must say it moves well fast. I am proud of my progress.
I have updated my todo list
I need a new microcontroller for the tx,and I was thinking about the picaxe08m. Despite the fact i don't have a picaxe programming cable or picaxe experience, i was thinking about following this guide to program the picaxe(by patrickmccabe), but using my arduino instead of the ftdi adapter since i don't have one, and this code for the tx(by rik).
Any suggestions anyone?
new battery:
from back:
TODO:
1) build the chassis(really need help)
2) upload code
3) make a video of the whole thing working
4) implement accelerometer based steering(started)(no more, maybe in future bot)
5) use omniwheels( no more)
6) more...
Navigates with commands from a wireless nunchuck
- Actuators / output devices: 2 modified servos
- Control method: RF
- CPU: Arduino Duemilanove (328)
- Power source: 7.4v lipo battery 900 mah
- Programming language: Arduino C
- Target environment: Everywhere on earth