


ebaybot
Recently, I volunteered at my son’s high school to be a coach/teacher for their robotics club. It turned into more of a weekly class which ran once a week for 2 hours after school for about 10 weeks where we showed kids how to build their own robots. My hope is next year, we can compete for the Trinity College Robotics Firefighter challenge in the spring of 2017 after kids build on what they learned over the past few months. I learned a few things along the way, broadened my experience and overall had a good time. I feel closer to my son and proud to see him grow into his role as mentor to his peers and helper at these meetings.
We only had four or five kids total (not all kids showed up each week) which actually worked out really well. I had a friend plus my son who helped so the kids got a lot of one on one showing them how to program, solder and put the robot together. We used a lot of hot glue to position parts, hold wires in place etc. The aim was down and dirty with a low cost as the goal. One might notice the expensive switch to turn on the robot which was to push the battery into its holder.
Of course, to teach one must first do, which is what this robot is. I used all of the same parts for the kits to ensure that they worked and that what we were trying to do could be done with what I had bought. I used a number of tutorials which we referenced often while helping kids. I had a lot of fun getting it all working and have to say it is a nice little robot. I have done all of the pieces separately on different robots, but have never had the chance to put it all together into one robot as I have here. It is a nice learning platform.
I found kits on ebay and then purchased separately sensors etc. which allowed me to buy the kits through ebay from China for about $25 a piece. The disadvantage is that you have to wait three weeks to a month for your parts to show up. It always feels like just about the time you think the parts are never going to show, they come the next day. I did get burned on a few small items but mostly everything was good enough quality so it worked out of the package.
- Kit with 2 motors, hardware to put it together, nylon caster wheel, wheel encoders (not used on this build), etc. - $11
- Arduino clone - $3.50/board
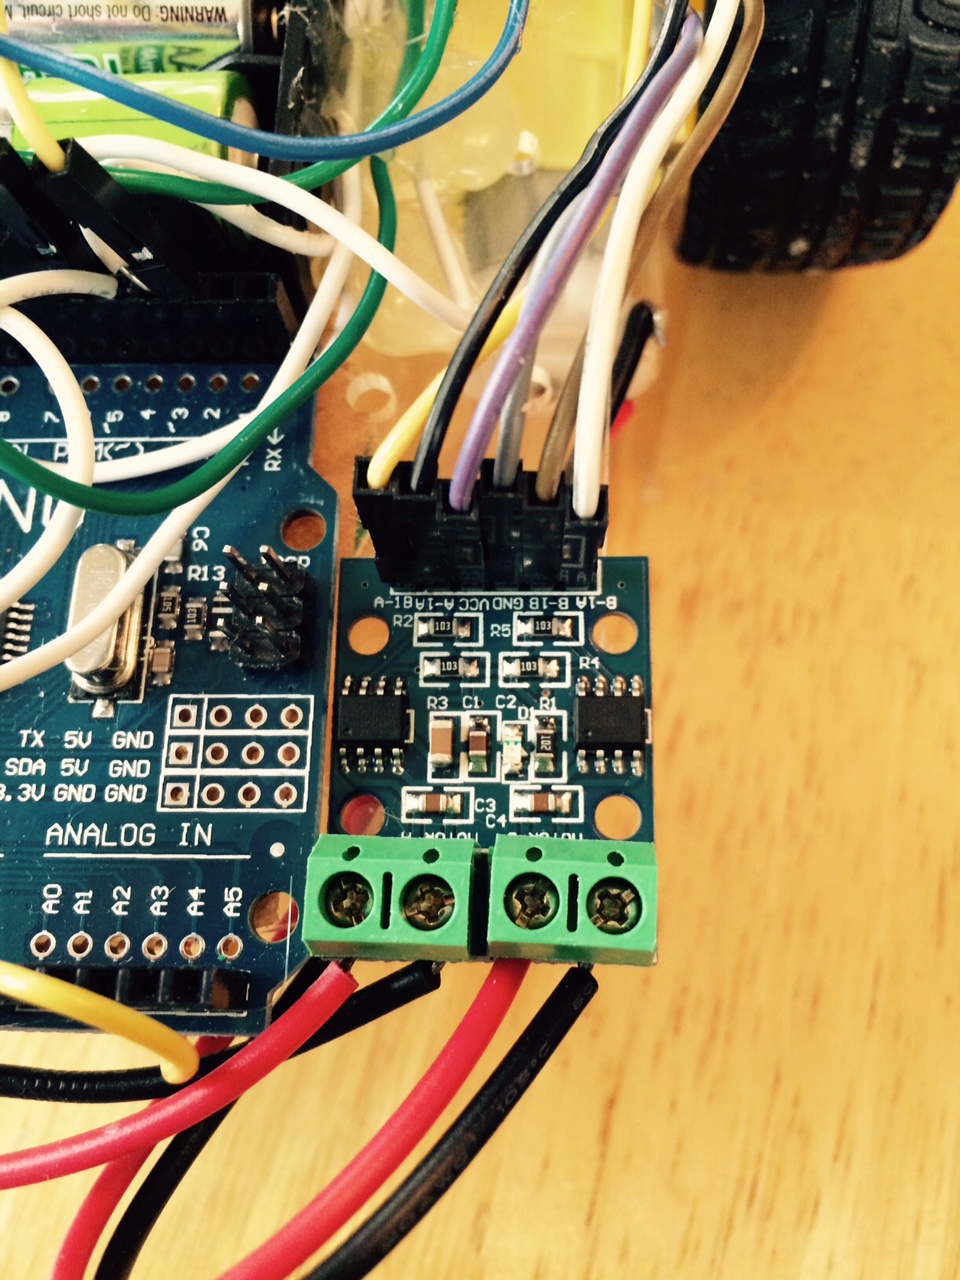
- L9110 H Bridge - $1.50/board – these are rated for .7 amps per channel-allowed more power to motors
- SR04 Ultrasonic Sensor-$2-obstacle avoidance
- LDR- 10 for about $1-used as part of cliff sensor
- LEDs – miscellaneous colors, combo package $2-3 - used as part of cliff sensor
- IR sensors – package of 10 for $2- used with remote to control robot
- Remote Control - $1.50/control-bought from www.icstation.com
- Resistors – I donated the few needed since I bought a bunch in bulk a while back.
- Jumper wires – MM, FF, FM – about $6 for an assortment.
- Mini breadboards – 10 for $5 or something like that.
The end result was an autonomous robot which avoided obstacles, could detect a “cliff” and attempt to stop itself before going over and was controllable through an IR Remote. We used the ultrasonic sensor for obstacle avoidance, the LDR’s combined with a few LEDs as a “cliff” or edge sensor, and the IR sensor with the remote control to control it. The example I have pictures of also included a few limit switches that I had hanging around from another project and donated to the cause.
There are a number of different tutorials that I used to get this robot up and working. I never remember how to wire things so I am always referring back to one or another tutorial to make sure I have things wired up correctly. These have wiring diagrams and the code in the tutorials ended up as the basis for the final code included.
IR Sensor with Remote https://learn.adafruit.com/using-an-infrared-library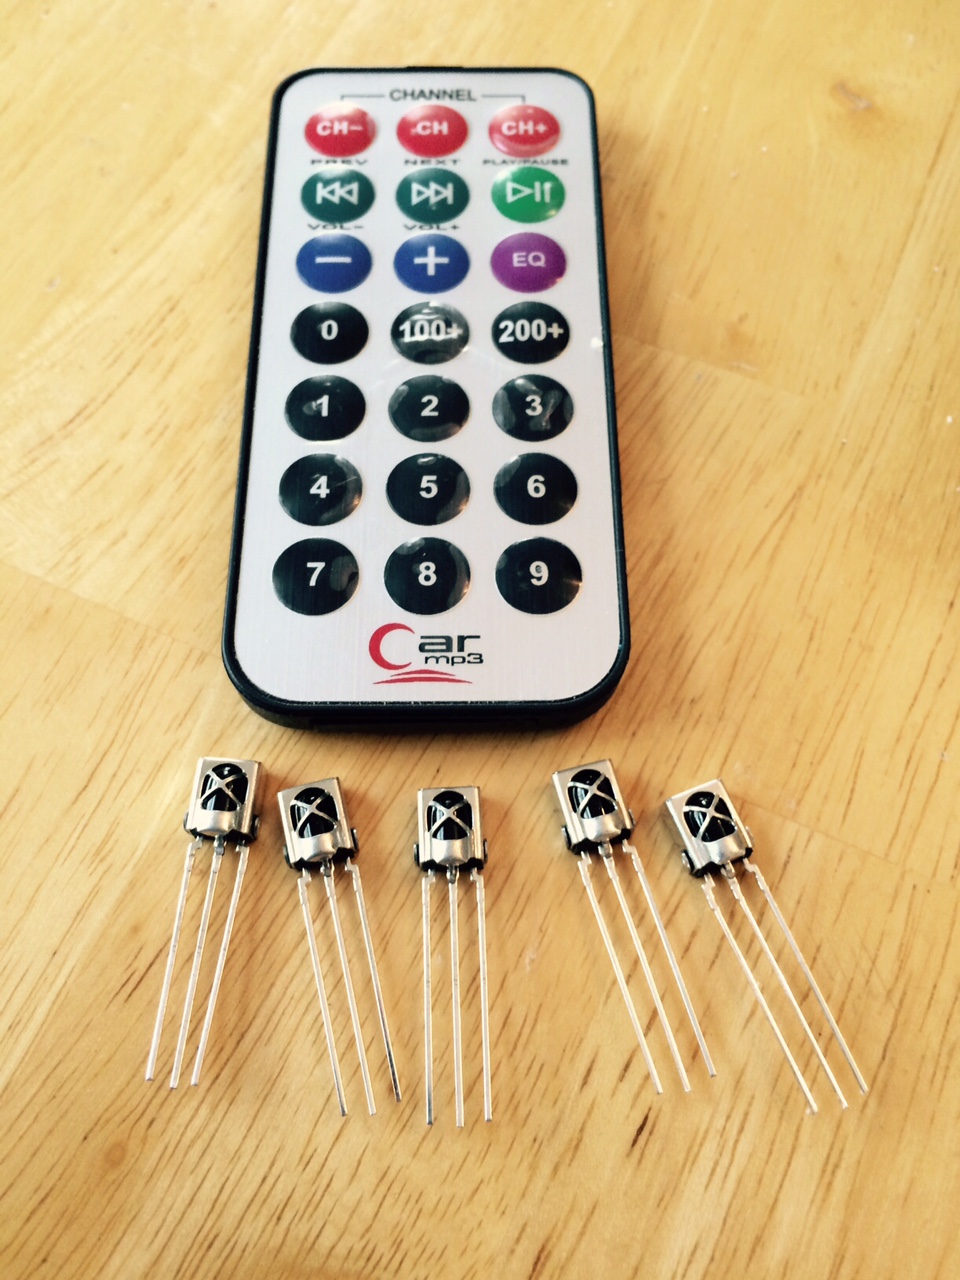
We lucked out that the remote I bought from ICStation.com was NEC compliant. I would include the link to the remote control, but they don’t seem to sell it anymore. The Adafruit IRLib worked right out of the box since it supported NEC IR protocols. The sensors I bought were spotty and not all of them worked correctly. I would buy more expensive TSO38xxx sensors the next time since the sensors seemed to work sporadically and were sensitive to EMF from motors. We used the dump program to figure out what code was being sent with each keypress. Pretty nifty tutorial by adafruit.com on how to do this…
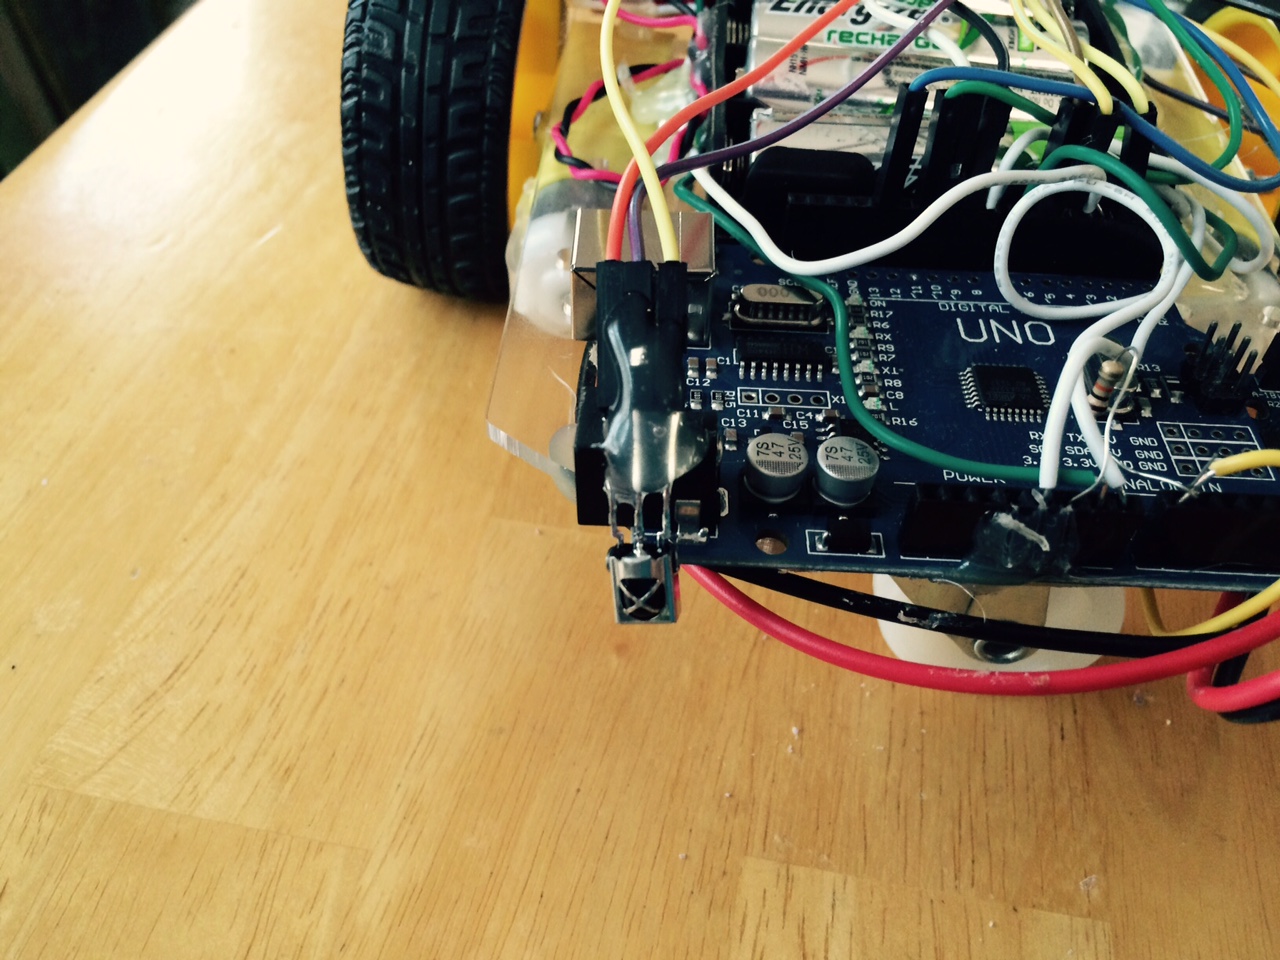
Please note the sophisticated mounting mechanism, ie a glob of hot glue.
L9110 H-Bridge Usage and Example Source http://www.bajdi.com/l9110-h-bridge-module/
Source worked as advertised. If you change the pins, make sure that both pins for each side are PWM pins or the H Bridge won’t work! I like these little H Bridges, and one cannot beat the price. The drop off was something like 0.5 volt (6.5 volt in from alkaline batteries when they were fresh and 6.0 volt to motors).
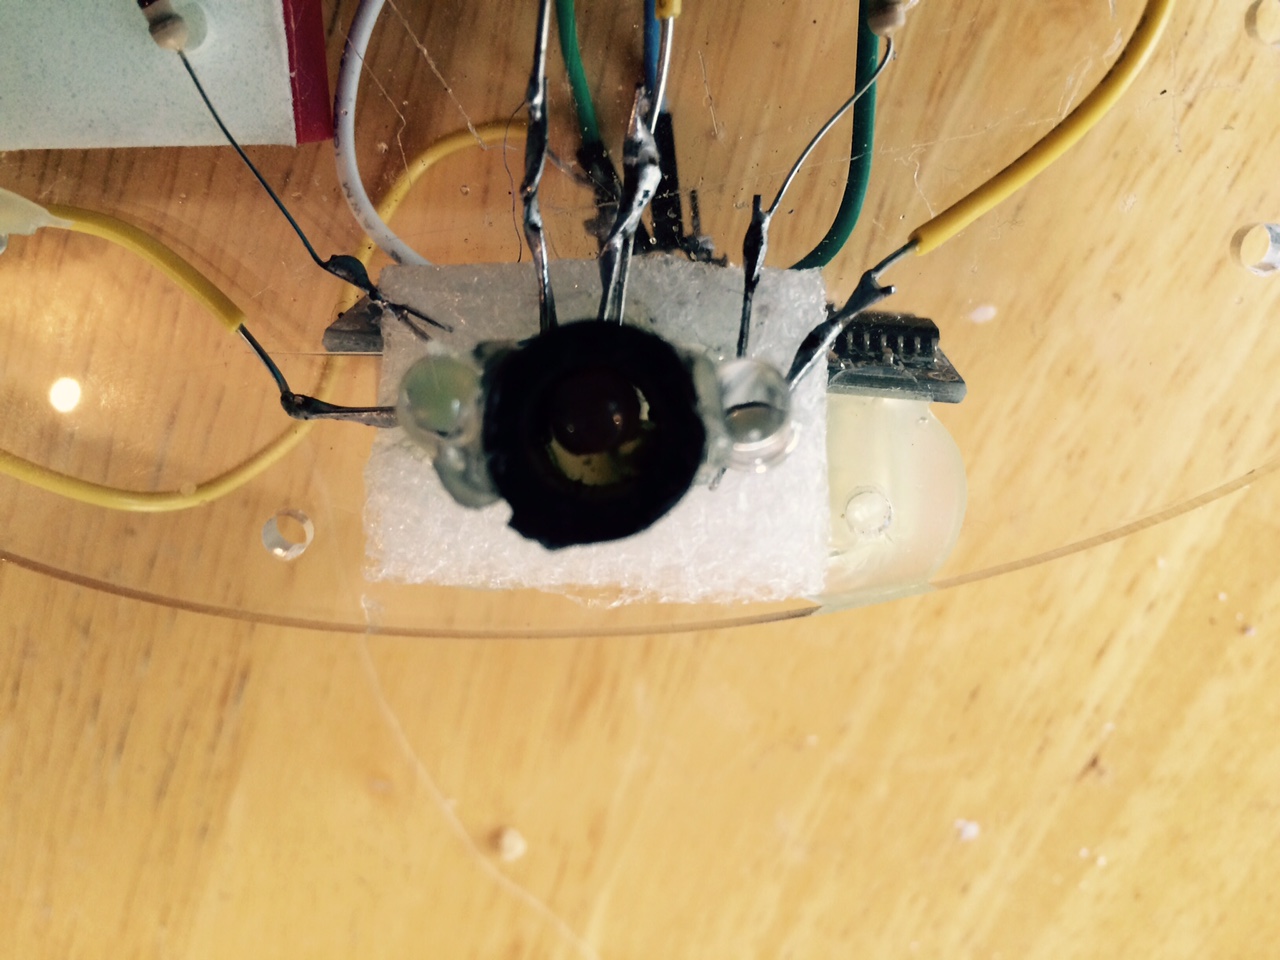
Cliff Sensor with LDR and Two Leds https://www.robotshop.com/letsmakerobots/node/1833
This classic tutorial by Fritz was the basis for what I used for the cliff sensor. I used an LDR with 2 leds to make this work. When in the autonomous mode, the LEDs pulse 10 times/second. The LDR itself I buried in some plastic tubing I saved from something else so that the LDR doesn’t pick up radiation from the LEDs except what bounces off a surface and into the tube. With the lights on, if it sensed more light than the ambient light levels, the robot knew that there was a surface in front of it. If no change in light level, there was an edge so the robot stops. I used hot glue to hold the LDR and LEDs together all together and in place so it won’t move, and I get repeatable results. I glued the LDR, LEDs to a bit of foam I had hanging around to get it closer to the ground so I could get more accurate and repeatable results. I used 100 ohm resistors to the LEDs so could use with the 40 ma outs on the Arduino board. The LDR in the black tube can't be seen very easily but it is there.
I was never able to get the robot to stop before it went over the edge. It would be trying to reverse as it fell off the table since the motors were pretty fast. That qualifies as sort of working I suppose. If I put the PMW too low, the motor wouldn’t move and to keep the robot moving it would go so fast that the cliff sensor didn’t sense the edge before it was too late.
This robot became an inexpensive and great learning bridge on robotics. Not all of the kids completed all of the features, but worked on what they could and were interested in. It was kind of a weekly makers meet where each kid worked on what they wanted to work on and we helped them as needed. I would bring this huge box full of all the kits, the sensors, soldering iron, a couple of laptops kids could use etc, extra resistors, hotglue guns, etc. It was great since kids could talk and work, ideas would flow back and forth. My friend Paul got the idea to build a really cool mobile telepresence robot with his Android phone and an Arduino which he pretty much completed on week three. The kids had a great time running that around until his phone battery ran out!
RobotShop.com donated a Pixy CMUcam5 Image Sensor to our group which we still owe a review to LMR on. I hoped it would turn into a great learning opportunity for the group, but the kids were a bit young and inexperienced. I decided to take over the review and do it myself since they weren't ready. I will be posting that soon. Thank you again to robotshop.com for the donation to our group. I think in the fall, some of the kids will be ready to use it so it won't get dusty.
I am pretty pleased with the resulting robot and very proud of all the kids who came to the robot club. They worked hard and came ready to learn each week. Each child was allowed to take their project home at the end of the course. I hope they continue to play with them, continue to learn and in the fall we can start building our Trinity College Firefighting robot for competition in the spring of 2017. The journey is just beginning, and I can’t wait to see what these kids come up with! It will be fun.
simple autonomous robot with a remote control
- Control method: IR remote
- CPU: arduino uno
- Programming language: C
- Sensors / input devices: LDR, SR04