


Dum.bot
Dum.bot
Recently I bought the brand new Raspberry pi 2. So I had my old pi left and I asked myself what could I do with it ? I decided to try some electronic robotic stuff and started to build my very own Pi robot. The first version was just a moving chassis controlled thanks to a webapp written in Python (used CherryPy framework) and some javascript (screenshot below). Then I added a HC-SR04 which is a well known ultrasonic sensor. I connected it to my Adafruit Trinket which I really wanted to play with. I guess I could have used the ultrasonic sensor with the Pi’s gpios but it was more challenging to communicate with the trinket via I2C and it was a first step for me with Arduino code. My next robot will be entirely based on Arduino boards.
I decided to call it Dum.Bot as it would not be really smart : for a while it could drive (controlled via a webapp I coded) and could detect an incoming obstacle (thanks to the HC-SR04 module) but couldn’t do anything about that and keep hitting walls. Then I started implementing a humble algorithm which can react according to data read from the Trinket. I am now trying to improve that part, I consider all the “manual mode” finished. I can drive Dum.Bot from a computer (with ZQSD keys) or from a tactile device (thanks to https://github.com/jeromeetienne/virtualjoystick.js). I tried to motorize the pi camera with servomotors but it doesn’t work yet. I had some troubles with software PWM, the motors weren’t precise at all. I think I will recycle the servos for another project (maybe a Bob-like bipede, arduino based).
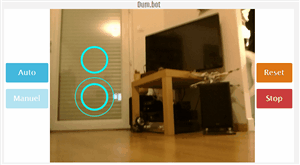
Parts
Raspberry pi B
Pi camera
Adafruit Trinket
HC-SR04
Pololu Zumo chassis kit with 4xAA to power the motors and the Trinket
Micro metal gearmotor HP 75:1
L298N breakout board
USB battery pack 5000mAh (to power the Pi)
2x servo motor tower pro SG90 (yet to implement)
USB WiFi dongle
Some resistances, breadboards and wires

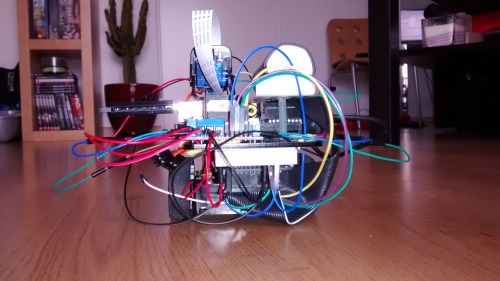
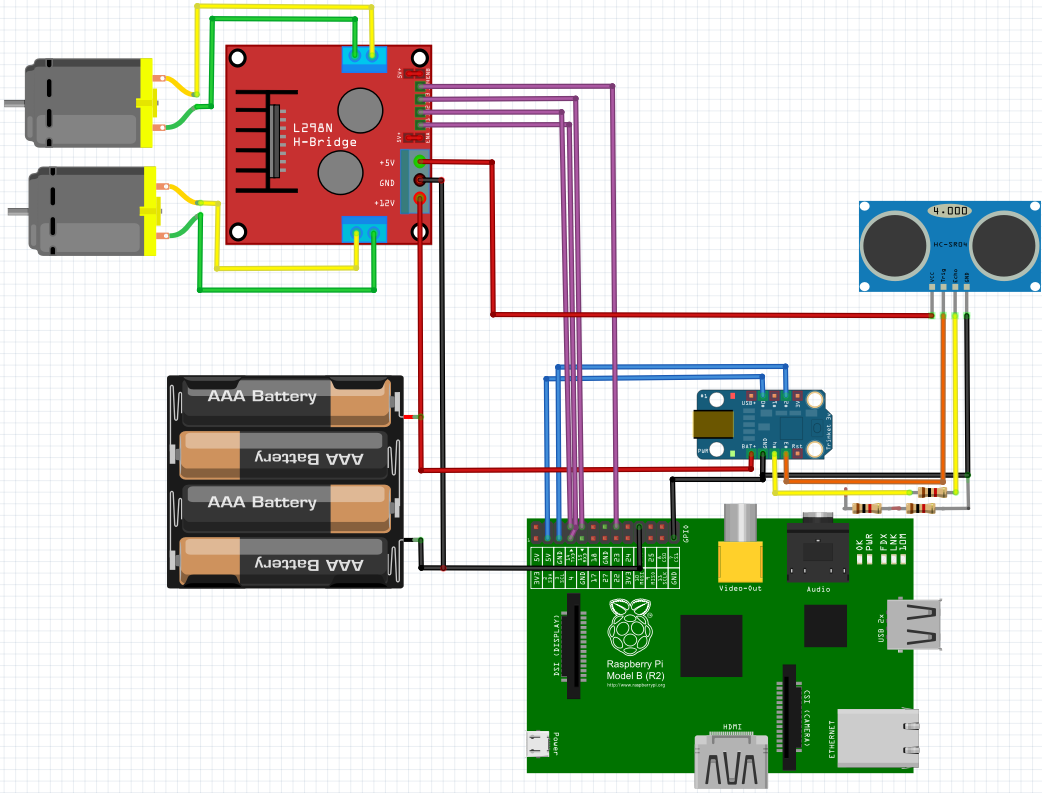
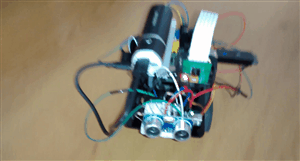
Side view of Dum.bot
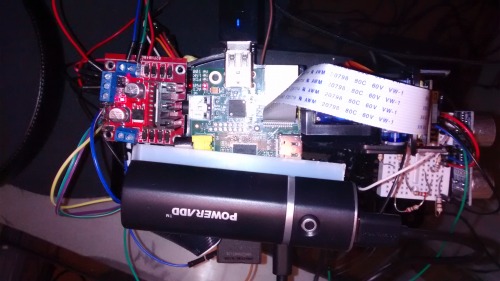
Back
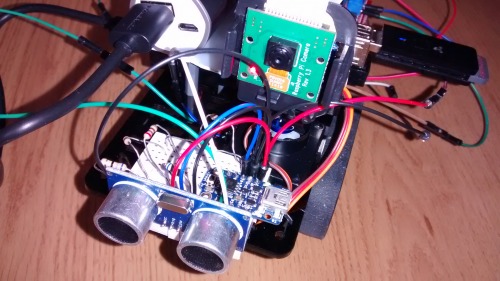
HC-SR04, Adafruit Trinket and Pi Camera.
Top view.
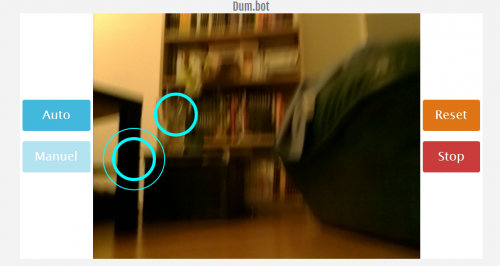
Webapp
Electronic
Software
Most part of source code was written in python. For the webapp I used CherryPy (minimalist web framework) and some Javascript (jQuery) for client side code : ajax requests are sent to activate wanted motors (Pi’s GPIO set to HIGH). A second ajax request is sent when the key or touch screen is released to set the Pi’s GPIO to LOW. It stops the activated motors.
The implementation was pretty easy thanks to CherryPy and jQuery.
RPi.GPIO to control motors via pi’s gpio. For turning right and left functions, I had to use à time.sleep because there was too much lag to have a precise control on turning functions. Now I just turn for 100 m, no matter how long the key is pressed.
Mjpeg-streamer was used for Pi camera streaming (tutos found online). There is a slight lag but it is all devices compatible without any codecs (it is basically an img tag which is constantly refreshed).
Adafruit_I2C library to get datas from the Adafruit Trinket which control the HC-SR04 via I2C.
Arduino code is pretty simple (cf. on github repo). I will add a servomotor soon but the Trinket has no hardware PWM implementation, so maybe I’ll replace it by a Arduino Nano like.
A simple algorithm to avoid detected obstacle thanks to datas sent by the Trinket. Basically, if an obstacle is closer than 10 centimeters, dum.bot goes back for 200 ms then turn left. If another obstacle is detected, it tries left again. If the way is still not clear, it turns right to check it out. To have a more precise value for obstacle range, it reads 5 values, then removes the min and max values and calculate the average from the 3 left.
Source code : https://github.com/maxsoulard/dum.bot
Dum.bot in action
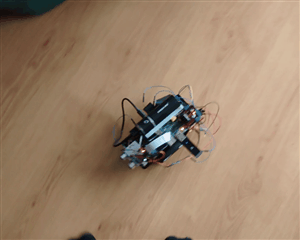
Webapp
Navigate around avoiding obstacles with ultrasound sensor or remote controlled.