


Decascrap: A Three Servo Decapod Prototype
Update: I replaced the two stripped servos! That's right, in my first video I actually had 2 out of my 3 servos stripped (if only I had Oddbot's code sooner, and had used the arduino's ground pin). So I replaced the hip joint and orange leg servo, and I have finally got the bot walking. I have also uploaded two new videos: first is obstacle avoidance, second is obstacle avoidance and encountering "rough" terrain. I can finally call my prototype complete!
This is my entry into the Scrap Bin Challenge, and is my first walker! As you might expect, this project had its fair amount of setbacks (from having to change arduino boards, to having to fix the hip joint, and then stripping out a servo from an external power supply), it was a fun and challenging build. I only wish that the servo was not stripped though, as it cannot turn right and leans left while going forward. If only my extra servos were not so big =/
In the video the sensor being pushed is sensed after a forward cycle is complete, and sends the robot back and then tries to turn (tries, but can't from stripped servo).
Below are the materials I used to make the robot:
Purchased: Servo Push Rod, Servos, Guitar Picks, and Jewelry Box Hinges (I play the violin, and I had a feeling I should not ask to take apart any jewelry boxes)
Free Scrap: Arduino (well, not scrap but from prior project), Toothpicks, Q-tips, cardboard, hotglue, acrylic paint, tape, x2 spare touch servos, pencils, breadboard, jumper wires (thanks Oddbot!), mini ruler, velcro, lego block (raises hip servo).
Here is how I went about making the robot:
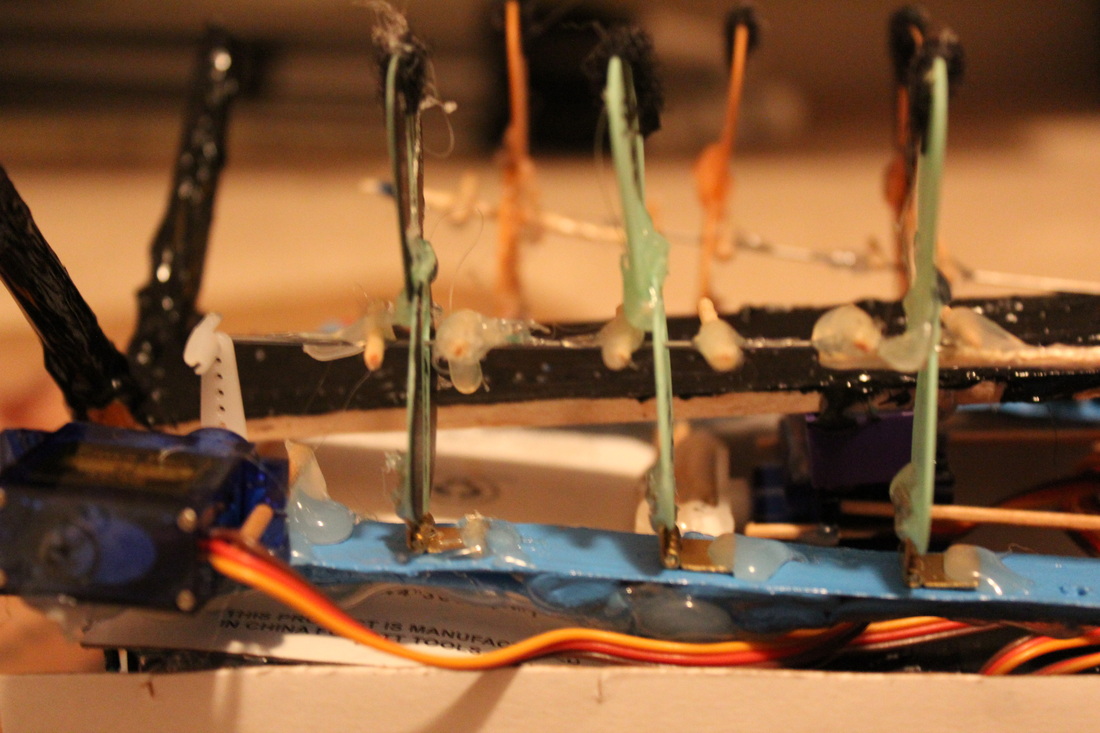
The main base for the legs is a papertowel tube cut apart, and then stabalized with q-tips and hotglue.
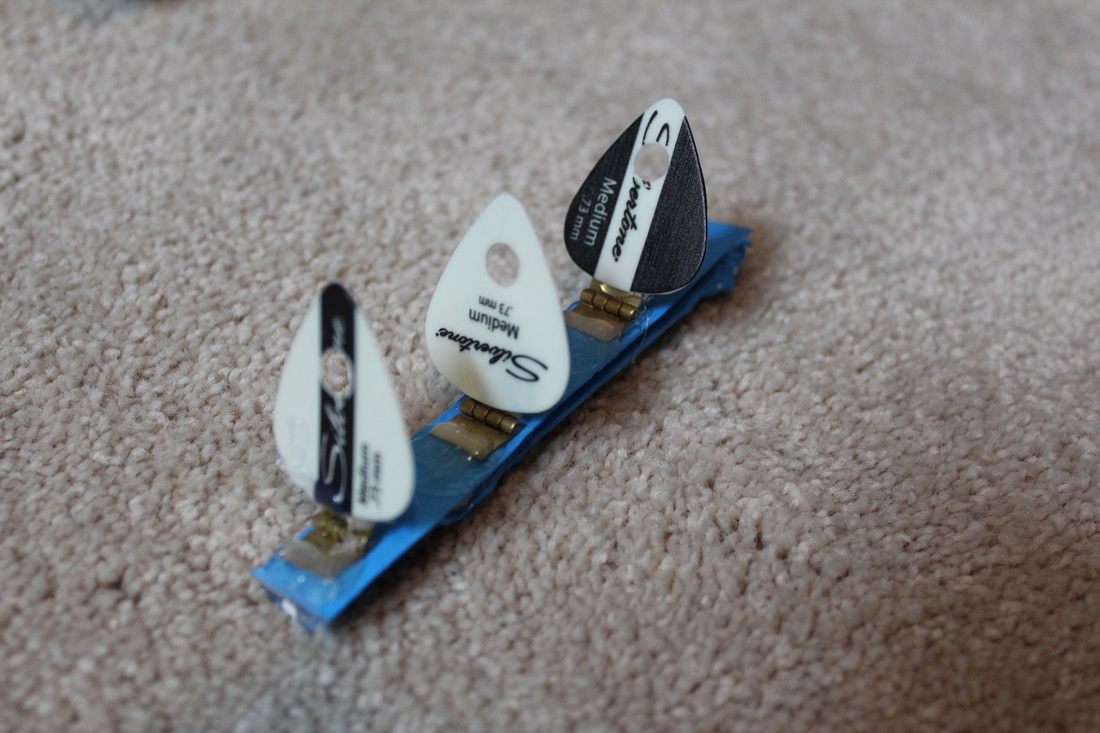
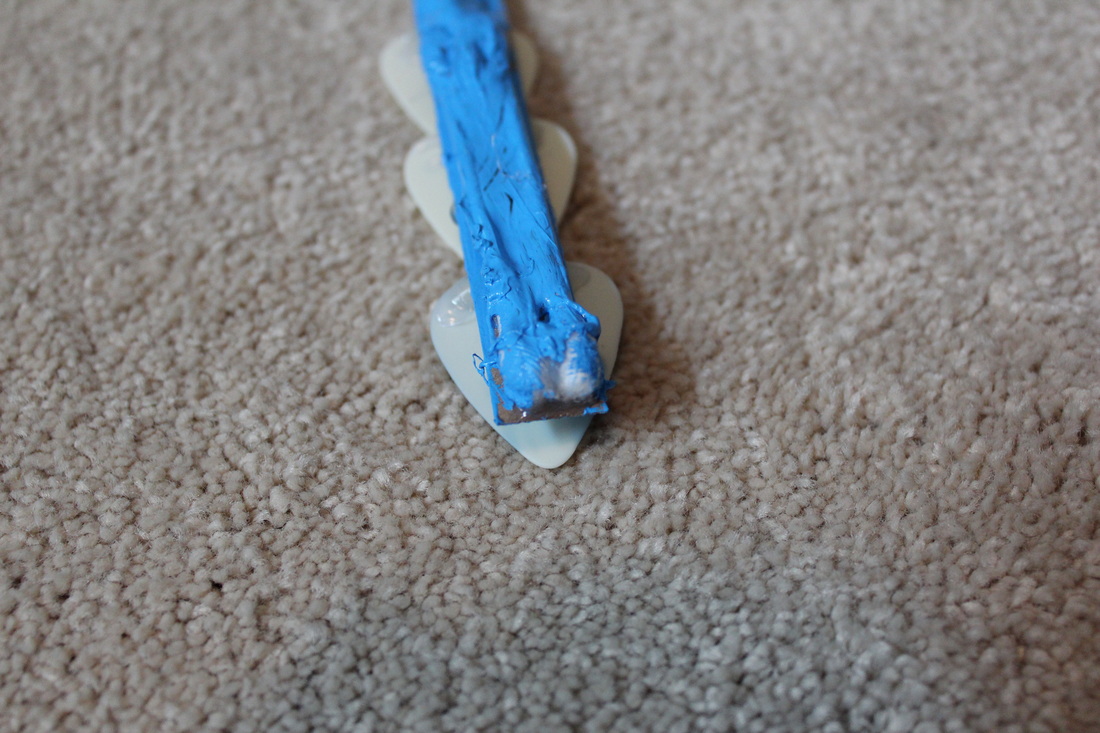
I then hotglued the hinges and guitar picks. I used a hole puncher so the servo push rods could go through.
Unfortunantly, the servo rods were not long enough (and they cost more than a servo!), so I hotglued a toothpick on to the end. I also hotglued toothpick cross sections to allow for the guitar pick legs to move back and forth. Finally, I hotglued other guitar picks to extend the legs and added velcro for traction.
Hard to see, as I did not use my tripod, but here is the servo hip joint. Hot glue and toothpicks for support.
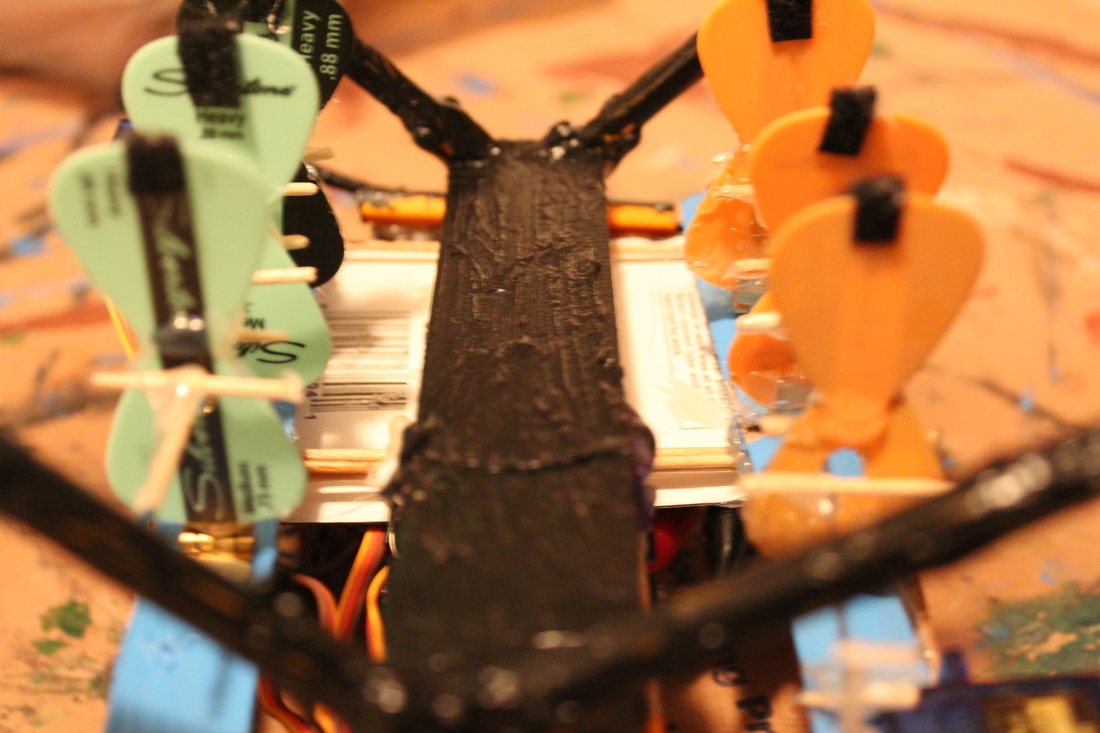
The black piece of wood was actually a spare ruler, and the black legs are actually pencils cut down to size.
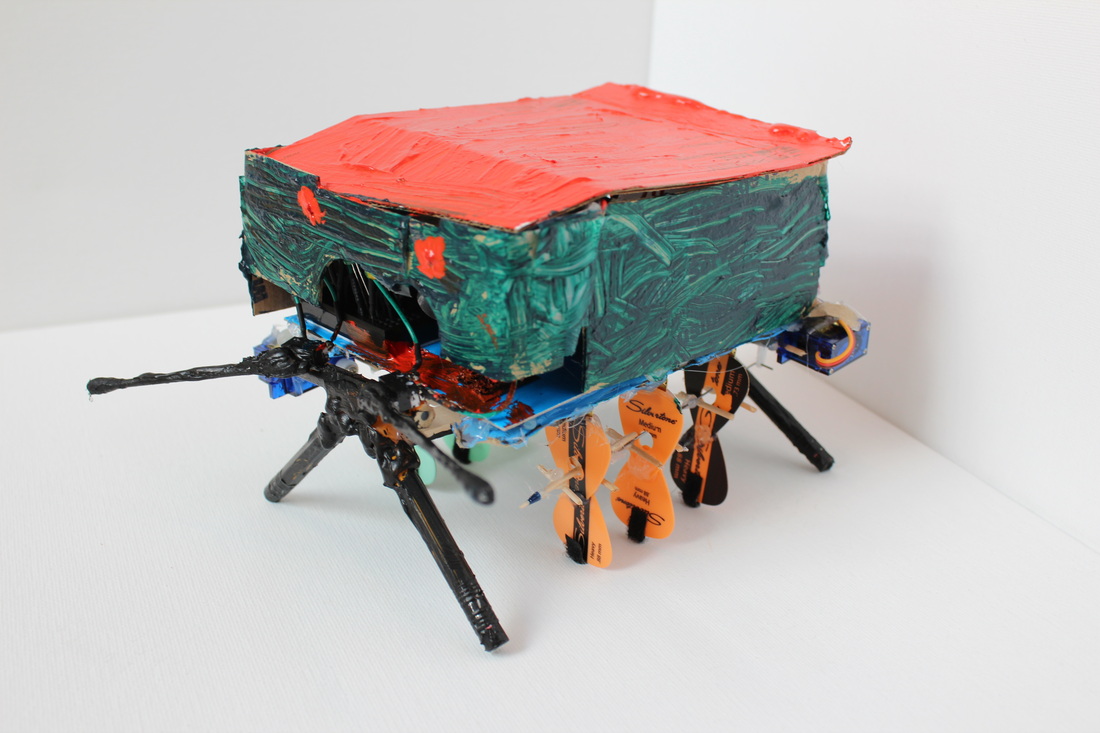
Add some paint, sensors (extended by hotglue and q-tips), electronics inside of the box, and you have the finished prototype! Movement is painstakingly slow, but it proves that 3 servos can be used to build a decapod, or even a walker quite a bit more legs.
From this design I also learned that to increase the efficiency of my walker I should decrease the black leg angles and increase the ability of movement in the hips, as well as re-shape my legs so when the hip is in a resting position they are unable to touch the ground (have them pointed to the exterior, away from the body). This will stop the 2 steps forward, 1 back, repeat that is currently happening. Also, these pointed legs need to be capable of providing the traction needed, as well as be exactly equal in length to ensure all legs are on the ground at once. These changes should greatly increase efficiency, speed, as well as allow the walker to walk on some uneven surfaces (increased hip movement=greater leg clearance). I'll hopefully be able to re-visit this design!
Walks slowly and avoids obsticles
- Actuators / output devices: x3 Micro-Servos
- Control method: Arduino Duemilanove via USB currently
- Power source: USB
- Sensors / input devices: x2 Push Button
- Target environment: indoor flat surface