


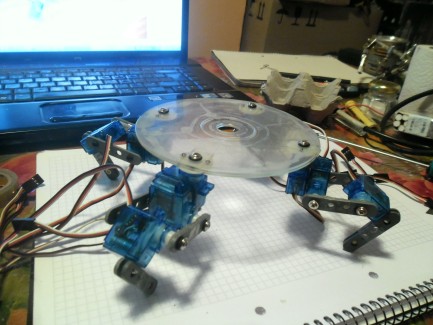
Crap-Crab ... The quadruped
Look maaa', no tools! :D
Well, that's not entirely true, but it isn't far off. I have constructed this robot with a minimum of tools (and materials) , for the simple reason that I don't really have any (nor the skills to use them).
So given that it's a somewhat crappy build, made mainly out of crap I found lying around, held together largely by double sided tape, plus that it looks sorta like a crab, I thought the name Crap-Crab would be appropriate. And besides it does have a bit of a ring to it, doesn't it? :D
To be fair I did use some screws here and there, but ONLY when they could be fitted without doing any drilling or anything "complicated" like that.
So far the tools I've used are:
- A screwdriver
- A pair of scissors
- A 50 cents dull hobby knife
- A lighter (for heating up a bended paperclip)
- A paperclip (for burning screw-holes in the CD)
The materials used are:
- 12 small servos (plus horns)
- A Sharp IR-sensor
- A Two CD
- 4 rubber bands
- 16 32 assorted screws
- Double sided tape (quite a bit)
- Normal tape
- Instant glue
Besides, I used 8 16 of these thingies (see foto below). I have no idea what they are. I was simply walking on the street, thinking about how to construct a robot leg, and I found a bunch of these lying on the ground (near a construction site I believe). They're kinda like meccano-pieces, only made of plastic and weigh nothing. If anyone knows what they are please let me know :)
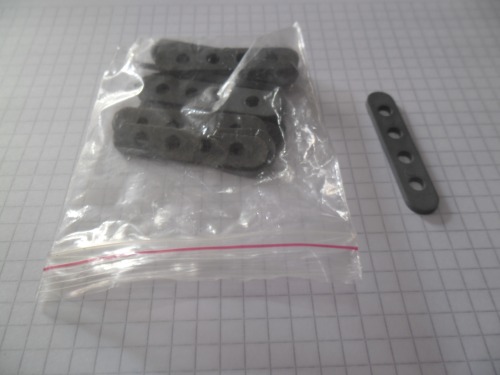
And finally I used 12 28 of these (see foto below) in combination with the screws. I don't know what they are either.

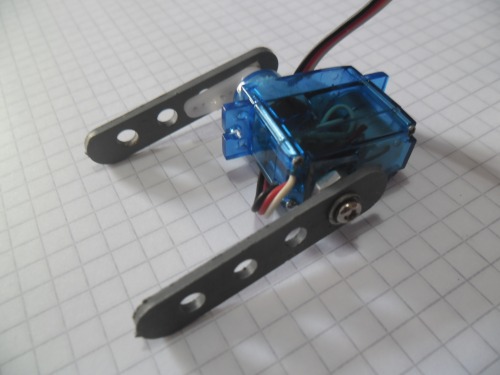
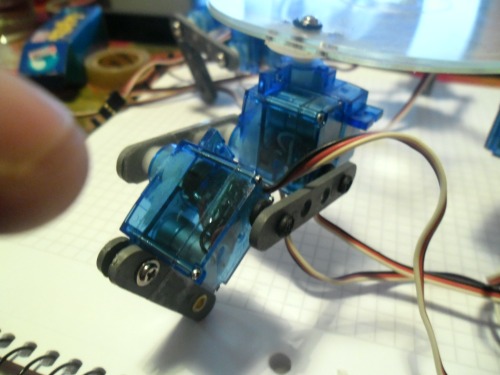
Anyhoo, the legs are a bit wobbly as is, so I'm currently thinking about reinforcing the upper joints with an extra construction-site-thingy. Not sure how yet. I'm thinking the best way would be glueing a nut to the servos on the opposite side of the shaft. I made a demonstration hereof using tape (see foto below). Any ideas here are welcome.
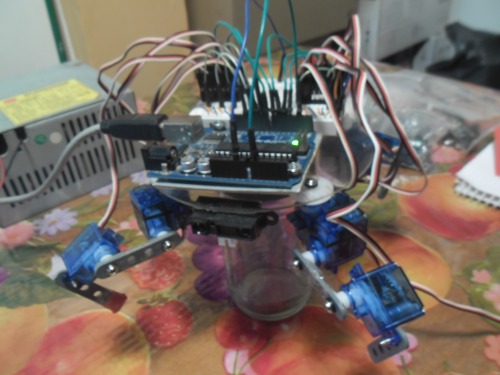
The brains of the robot will be an Arduino (Duemilanove) and a breadboard mounted on top of the CD.
The (main) purpose of the robot is to experiment with adaptive/heuristic walking methods, using various forms of internal sensing (eg. servo feedback) and AI's (eg. neural networks). For instance I would like it to automatically improve it's walking gait by practicing and be able to adapt to walking on uneven surfaces, where a fixed gate would be inappropriate. But I'll get into that later. For now I just wanna finish it and experiment with different types of fixed gaits.
Here are some more pics of Crap-Crab:

UPDATE 26-8-2014:
Not much progress today. Went to several shops looking for screws/nuts suitable for reinforcing the upper leg joints (as mentioned earlier), but small screws aren't that easy to come by it seems. Still open to ideas on this issue.
On the up side... My father-in-law sawed my old breadboard in half, so now I have two small ones (nice!). I also bought som pin headers and prepared the board for the servos, plus I made some jumper cables for the bot. All of which can be seen on the pic below.

So now I guess I have to add my cheap old soldering iron and a nail-clipper (for seperating the pins) to my otherwise spartan tool list. And perhaps a saw too, allthough I wasn't the one wielding it :D
Oh and thanks for the nice comments. Appreciate it. It's good to be back on this website, after a long break from this community and robot-fiddling in general.
Cheers!
UPDATE 27-08-2014:
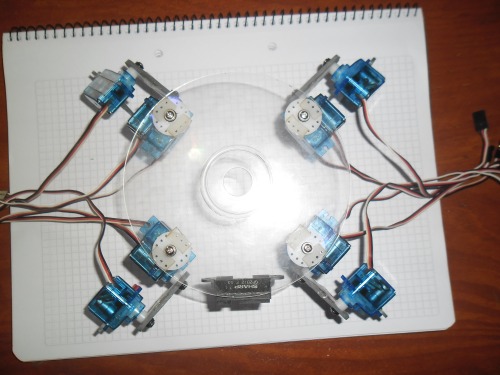
As mentioned earlier I need to reinforce the legs (with an extra "bracket"), as well as the body (with an extra CD), but for now I put that on hold until I figure out the best way to do it. Instead I connected all the wires (see foto below) and started playing around with the leg movements.
But I'm having a lot of troubles with the servos. Instead of posting them here I created a forum topic to ask for help on these issues. If you are able please feel free to give some input on the matter.
I'm also having some problems with the weight distribution, but I suppose that's simply because the Arduino board weighs more than the breadboard, so I should move both back somewhat to maintain the center of gravity in the robots center.
UPDATE 31-8-2014:
As mentioned I had some problems with the servos. Turns out powering 12 servos through a breadboard isn't a good idea (noob mistake). But that left me with a dilema, since I am reluctant to give up the breadboard at this stage, thus leaving little room for experimentation.
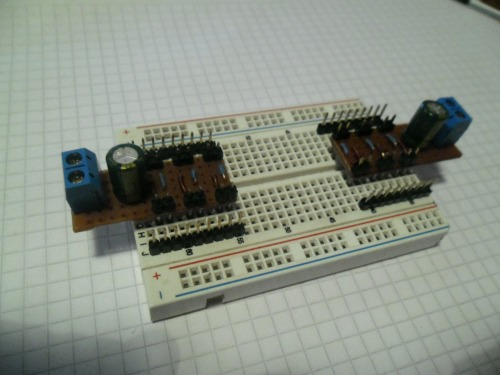
My solution was soldering a tiny piece of perfboard which handles the main supply line for the servos, but then plugs into a breadboard feeding the individual servos. I put on a 1000uF cap for leveling things out a bit. This tiny buggar handles 6 servos, so I'm making one more.
I also bought some 0.1uF, 10uF and 100uF caps for trying out with the individual servos. Additionally I bought a 4017 decade counter to see if I can control the servos with that, as described here, thus freeing up a lot of pins. Started reading up on that.

Besides that, I'm STILL trying to figure out the best way to reinforce the uppper leg joints, which has turned into a bit of a conundrum, given that it's hard to find the things I need, eg. small screws WITH nuts. So again I'll just have to use whatever I have lying around.
For now I've come up with the following... I glued two of these tiny rubber thingies (see bottom left) to the side of the servo (using super glue), and then simply put a screw through the holes in them. At first it was too wriggly but then I put a bit of heatshrink on the head of the screw, and now it's a pretty tight fit. If I also put a tad of glue on the tip of the screw before screwing it in this might actually work, but I dunno...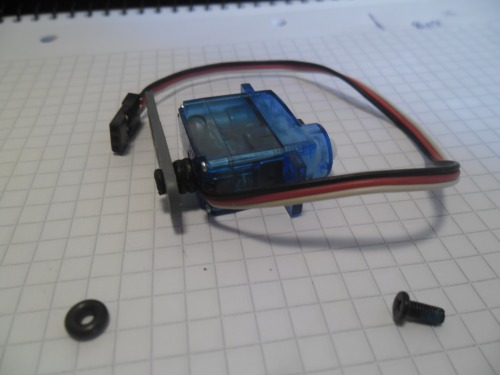
UPDATE 6-9-2014:
Finally got around to finishing Crap-Crab version 2.0 :) Well it looks sorta the same, BUT this is a much more sturdy little critter. Here he is:

The body is now two CDs glued together, instead of one, and I added two tiny screws for attaching the servos horns, where before it was just fixed with the one screw through the servo axis plus double sided tape:

But most importantly I reinforced both the upper and lower parts of the legs with an extra "bracket" each:
Now the critter actually looks like something that could eventually walk without falling apart trying :D Guys I gotta admit... I think I'm a wee bit in love :P
Ah and also I finished and tested the two boards I soldered for providing the juice for the servos:
That's about it for now :)