


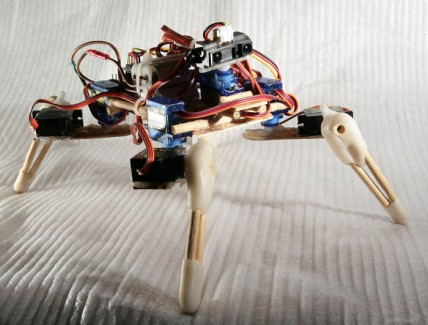
Chopstick Junior 1.0
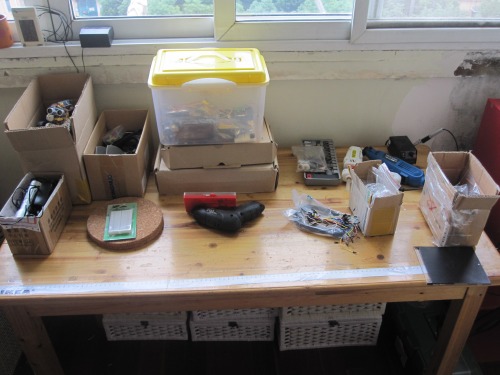
It's been to long that I submitted something here. Now I got my new workplace in our new home...nothing fancy but mine ;-) There is still a lot of things to improve (a rack on the backside, better power supply etc. but I don't want to keep you waiting...you are here to see robots - right?)
UPDATE ON VIDEO: Finally I figured out how to change the aspect ratio. Video is now in 16:9 available ;-)
UPDATE 12.11.11:
- attached a new and more clean PDE file with some comments
- attached new videos
UPDATE 17.11.11:
with my sweetheart outside by friends (tomorrow,
Just to test the working conditions there I put some parts together and let my idea become true. Inspired by OddBot's amazing Chopsticks I decided to follow his steps but a little bit smaller (since I do not have the 28 servos yet),
So I started cutting, glueing and thinking...
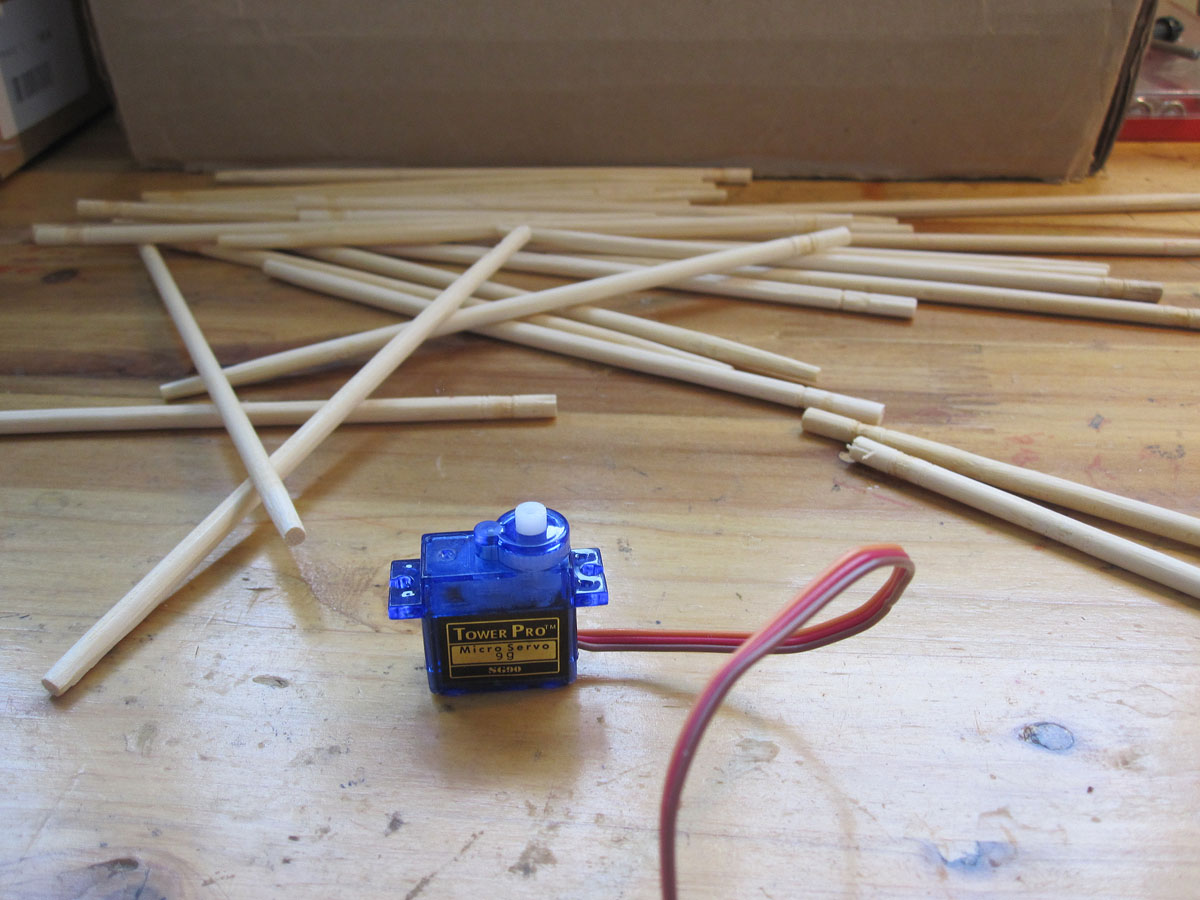
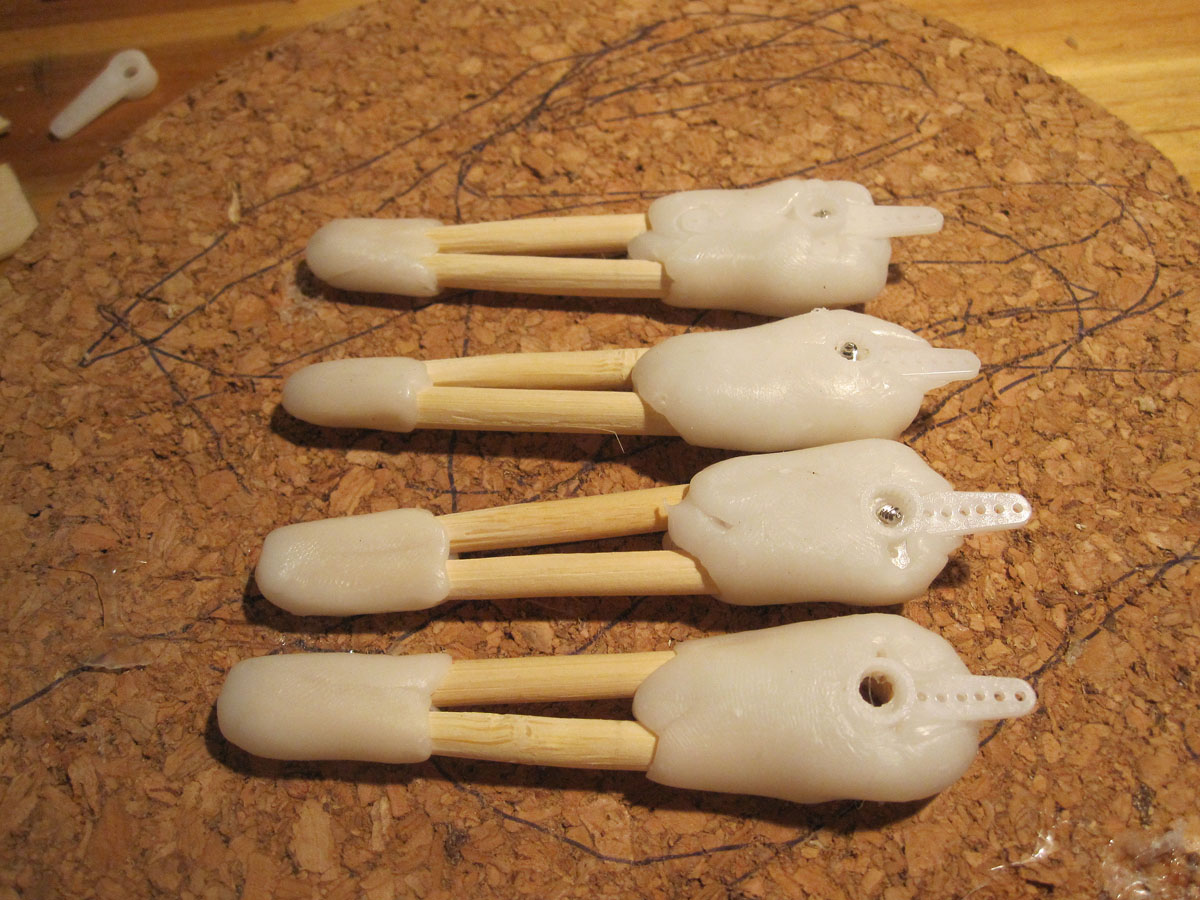
A couple of minutes later the first leg was prepared. Just shortened chopsticks and a piece for between.
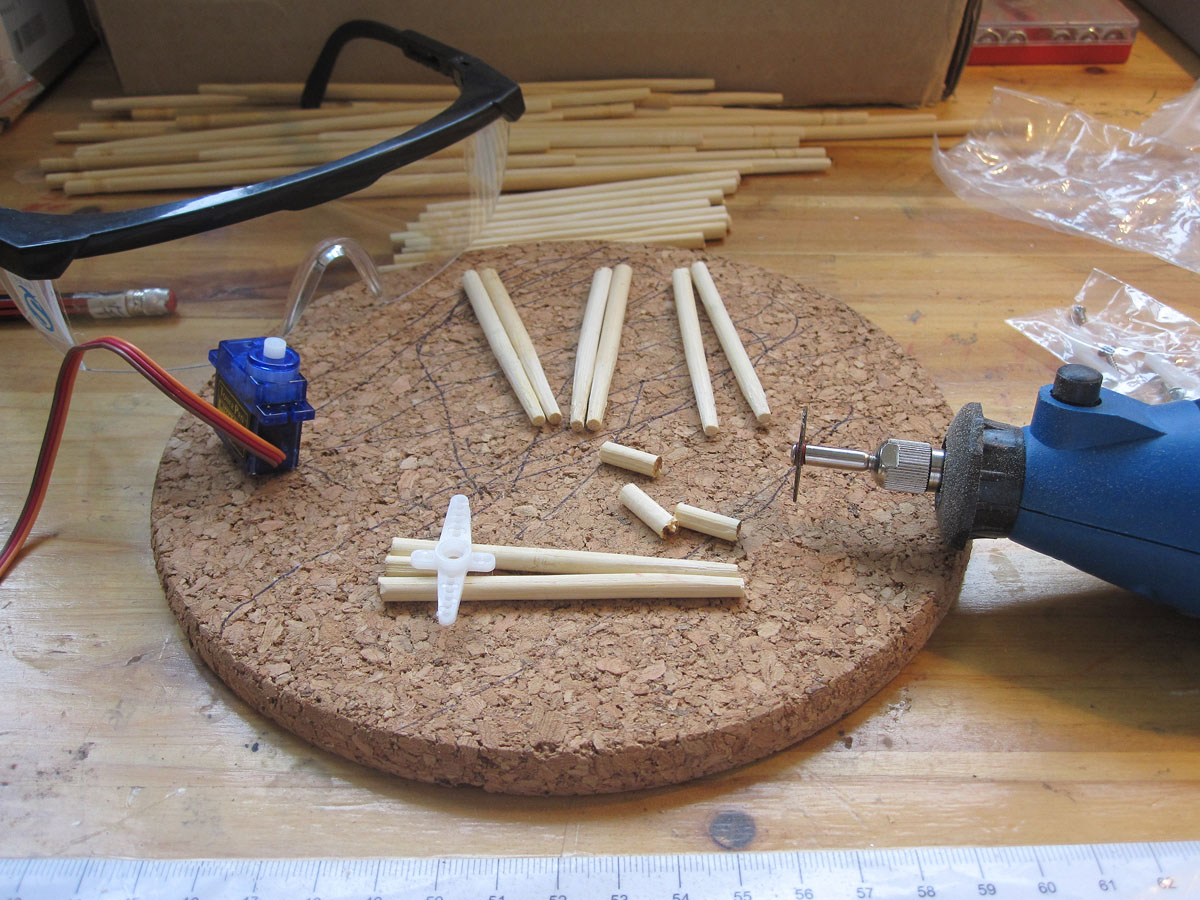
Not it's time to build the chassies where all thoise legs should be attached. I got this done by glueing some of "Fritsl Sticks" together...perfect, lightweight and stable.

As it should be just a testing platform for future projects it does not have to look very pretty. My idea is when it's done on the hardware side to cover it with a customized Polymorph case.
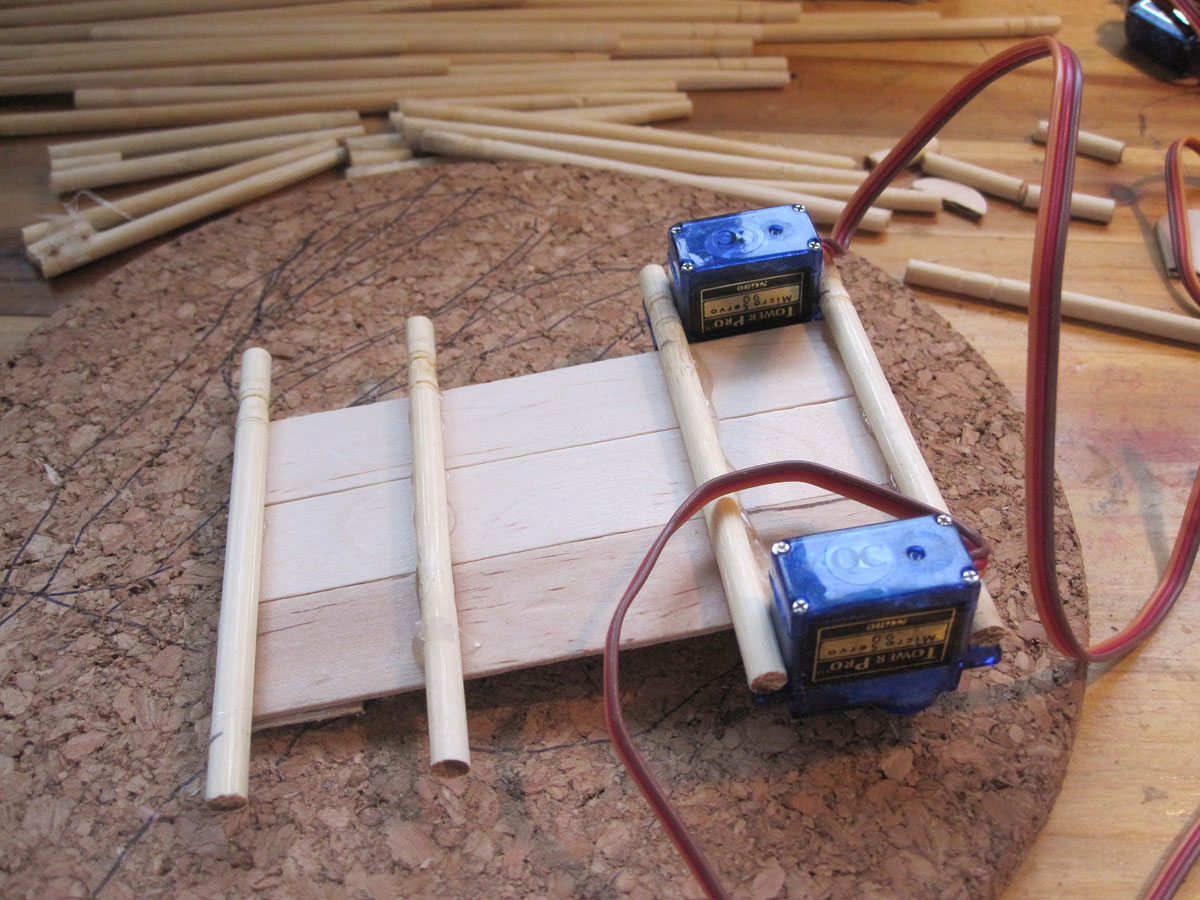
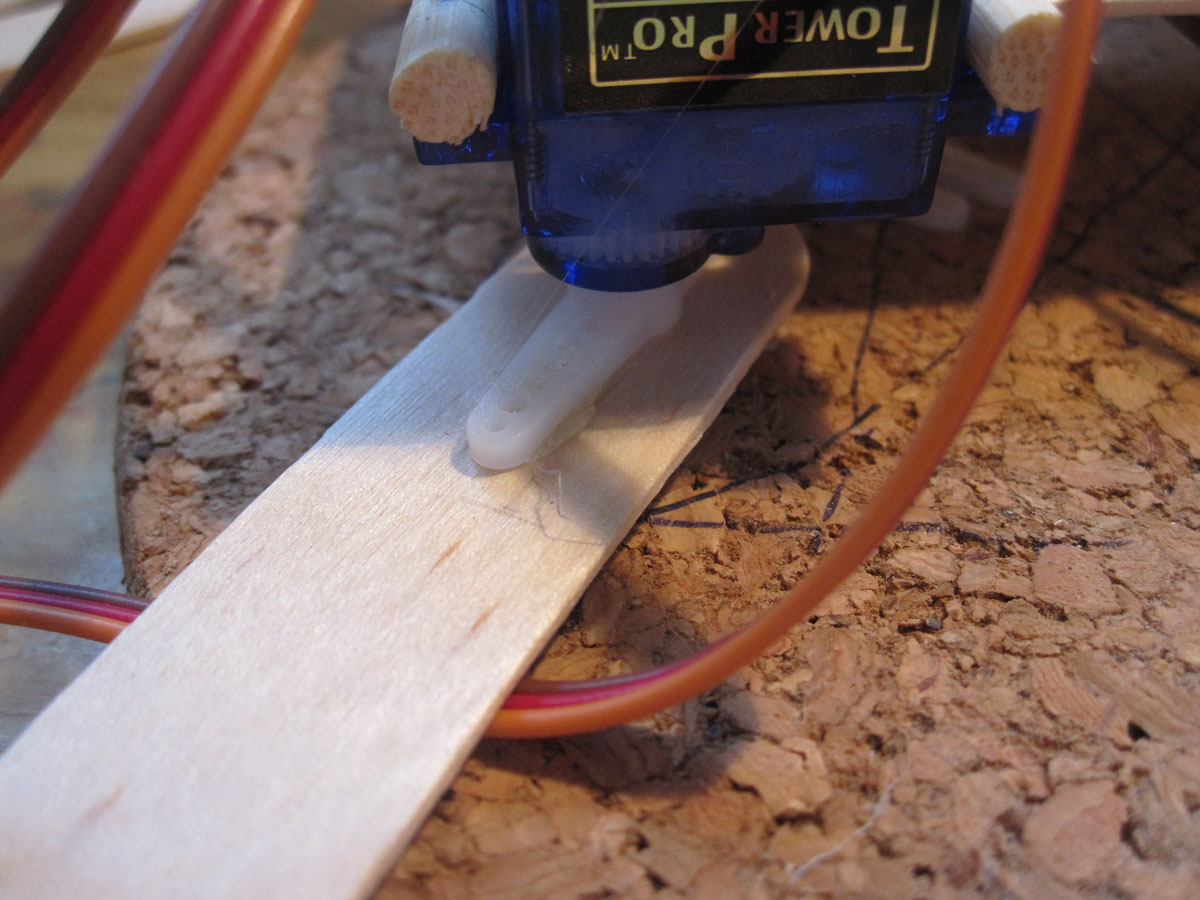
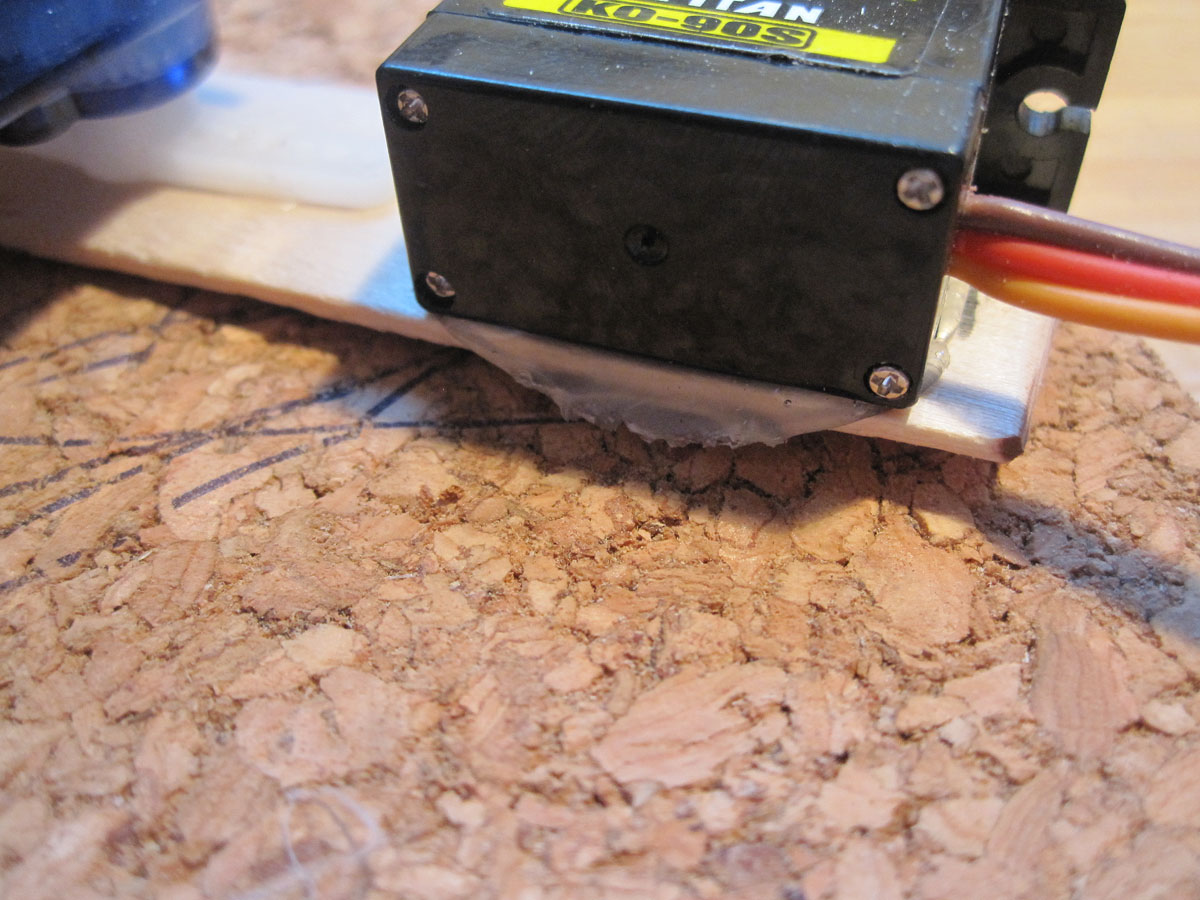
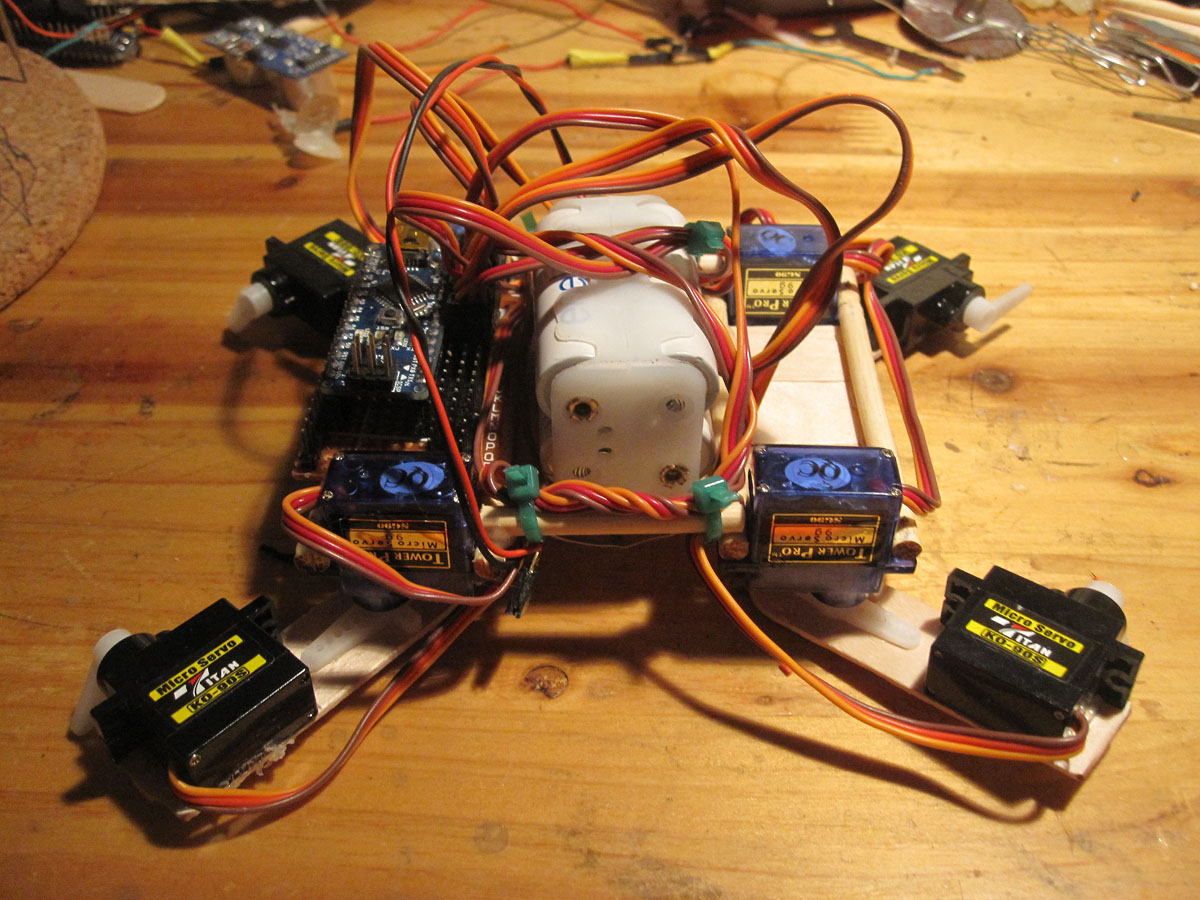
This is how I attached the servos to the base. two chopsticks hotglued on the base serve as "brackets" to keep the servos in position.
Ok, i don't want to hotglue everything....so drilling some holes for the servo screws. Tried without but the chopstick was splitting apart.
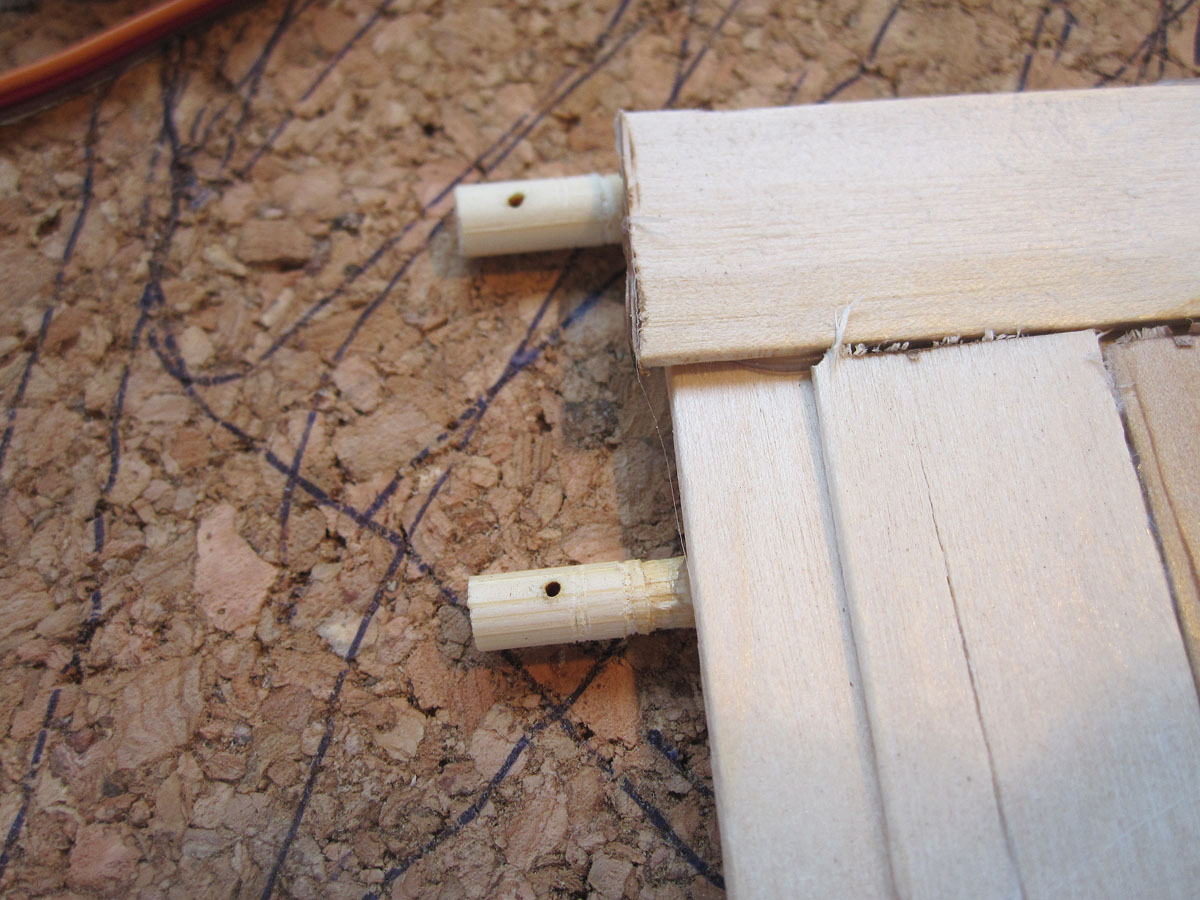
That worked and i got all 4 hip servos attached to the base, each fixed with two screws on the chopstick. If you watch carefully then you can see that the sticks still being splitted...anyway...not the big deal...hotglue will fix this too...
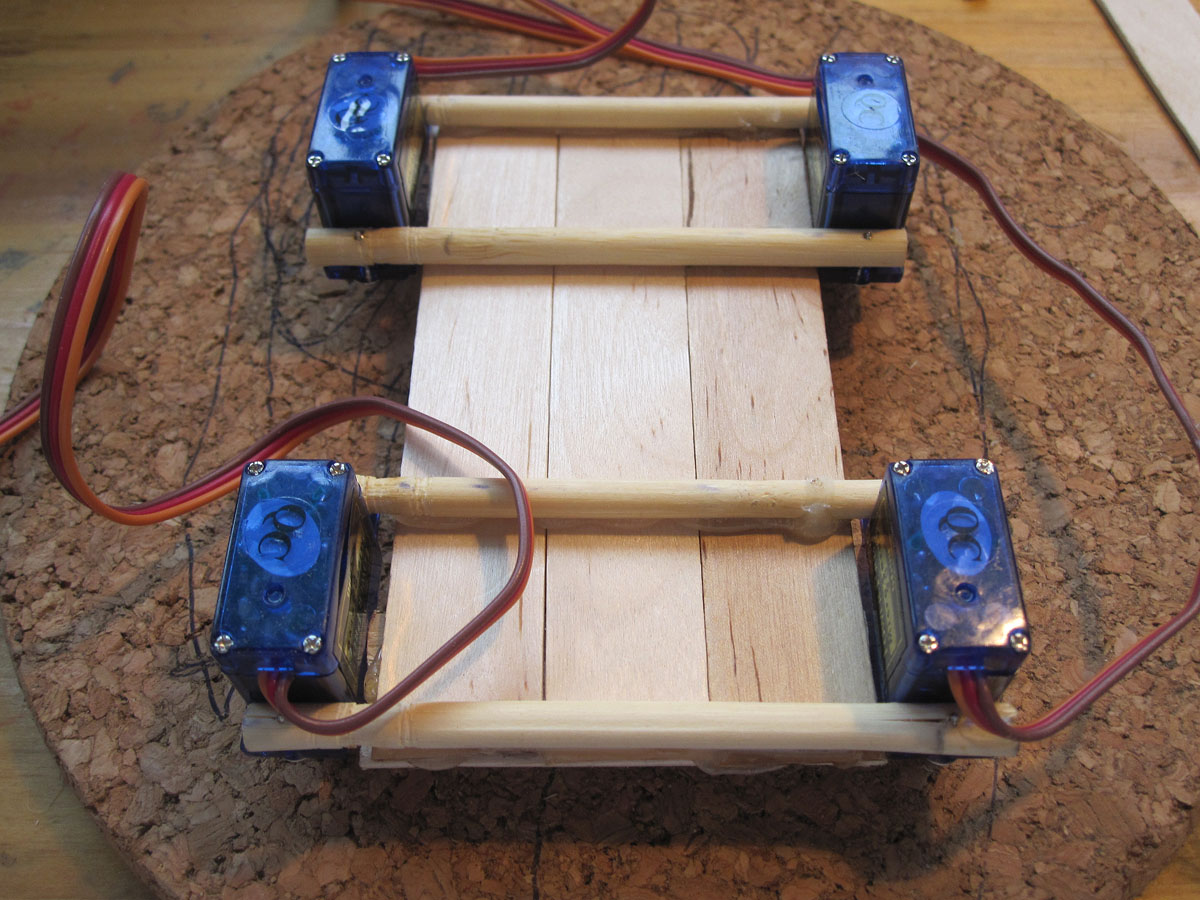
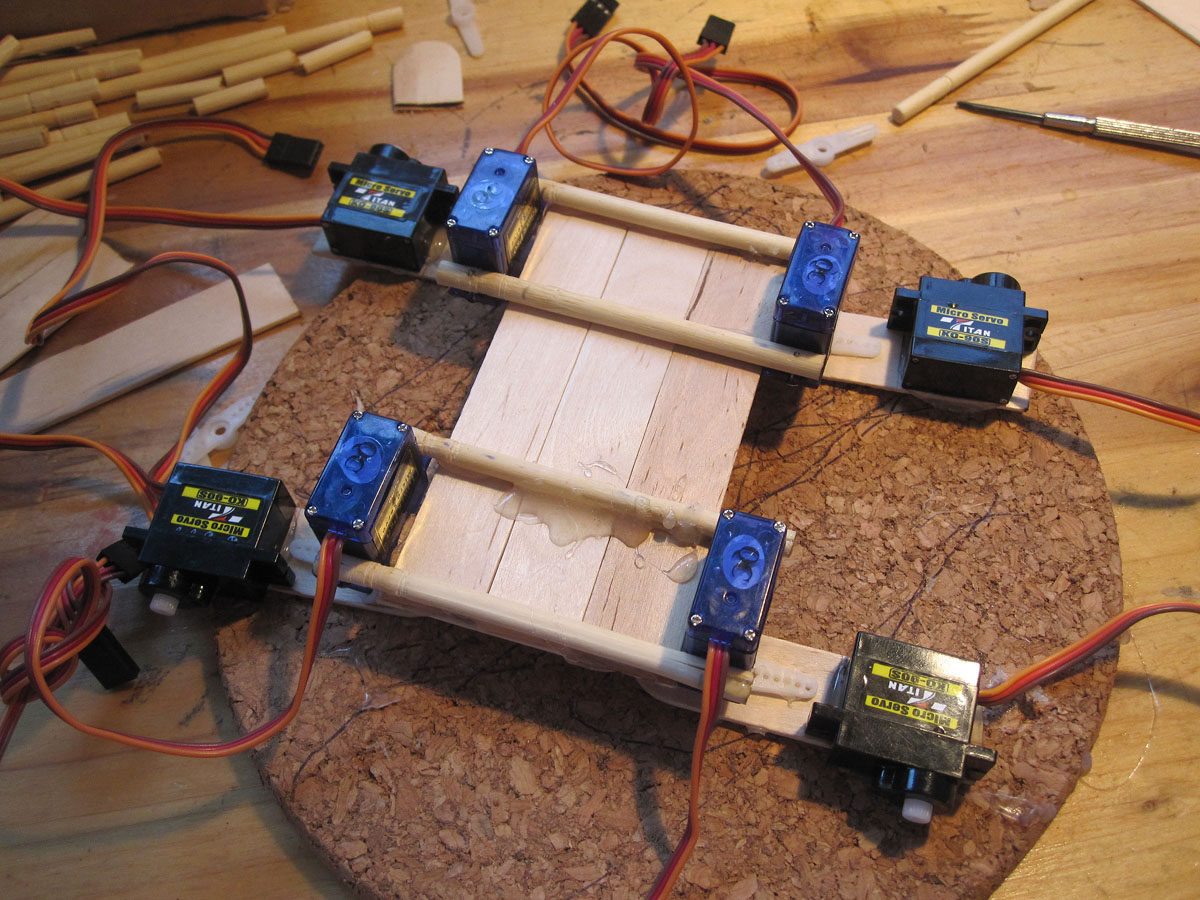
Ok, the hip servos are attaced, now we need some thighs. Last week i placed an order in taobao (a kind of chinese ebay) to buy sme small things. among these things (solar panels, ball bearings, LiPo bateries etc.) was two pack of those wooden spatulas with which your doctor is checking your throat.(I could not find how Frits'l call them) but I am sure you know what i mean.
Ok, attaching the thights on the hip servos. It's just a shortened wooden spatula with a hotglued servo horn on it.
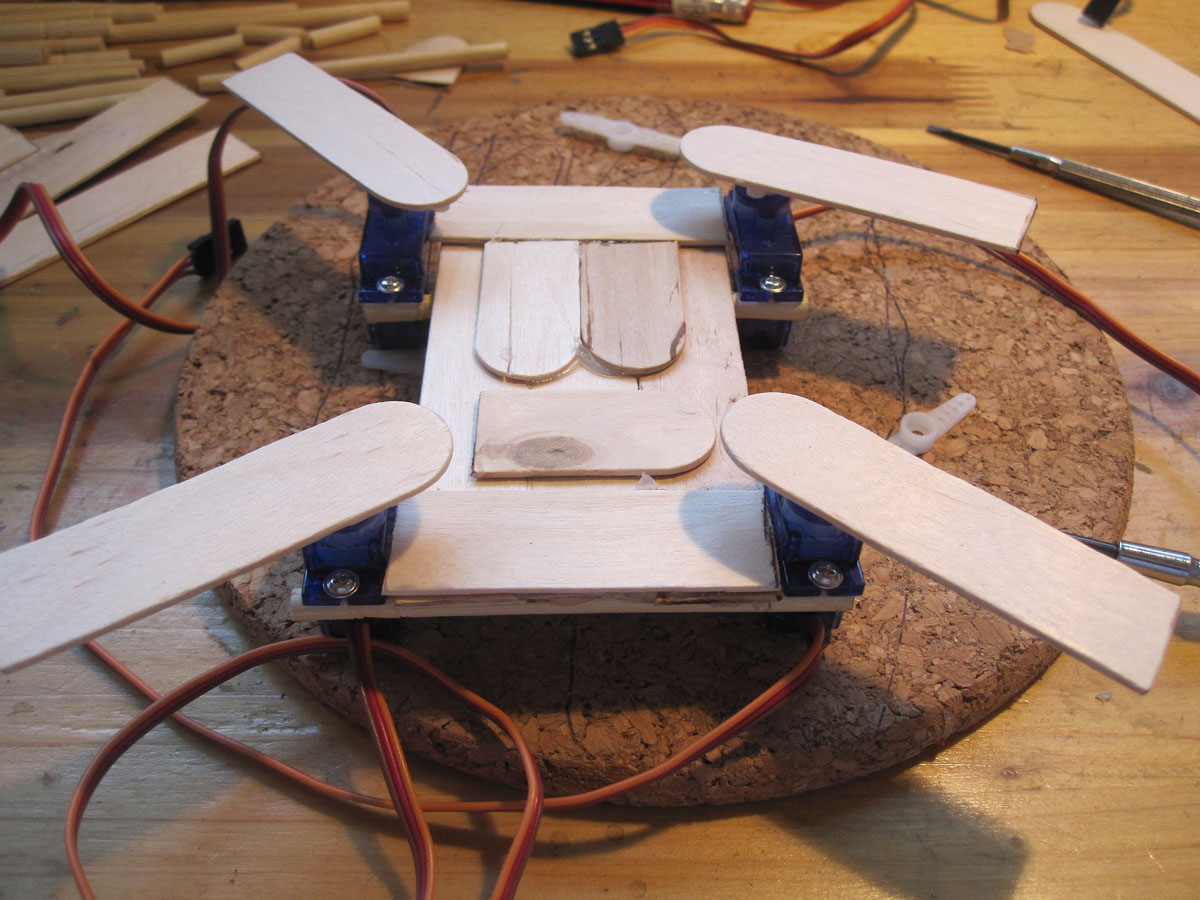
On the thights I hotglued (yes shame on my but without any brackets I saw no other way to finish this) one micro servo on each for the legs.
The result was this. the base with four attached hip servos. On each hip servo attached a thight with a knee servo for the lower leg.
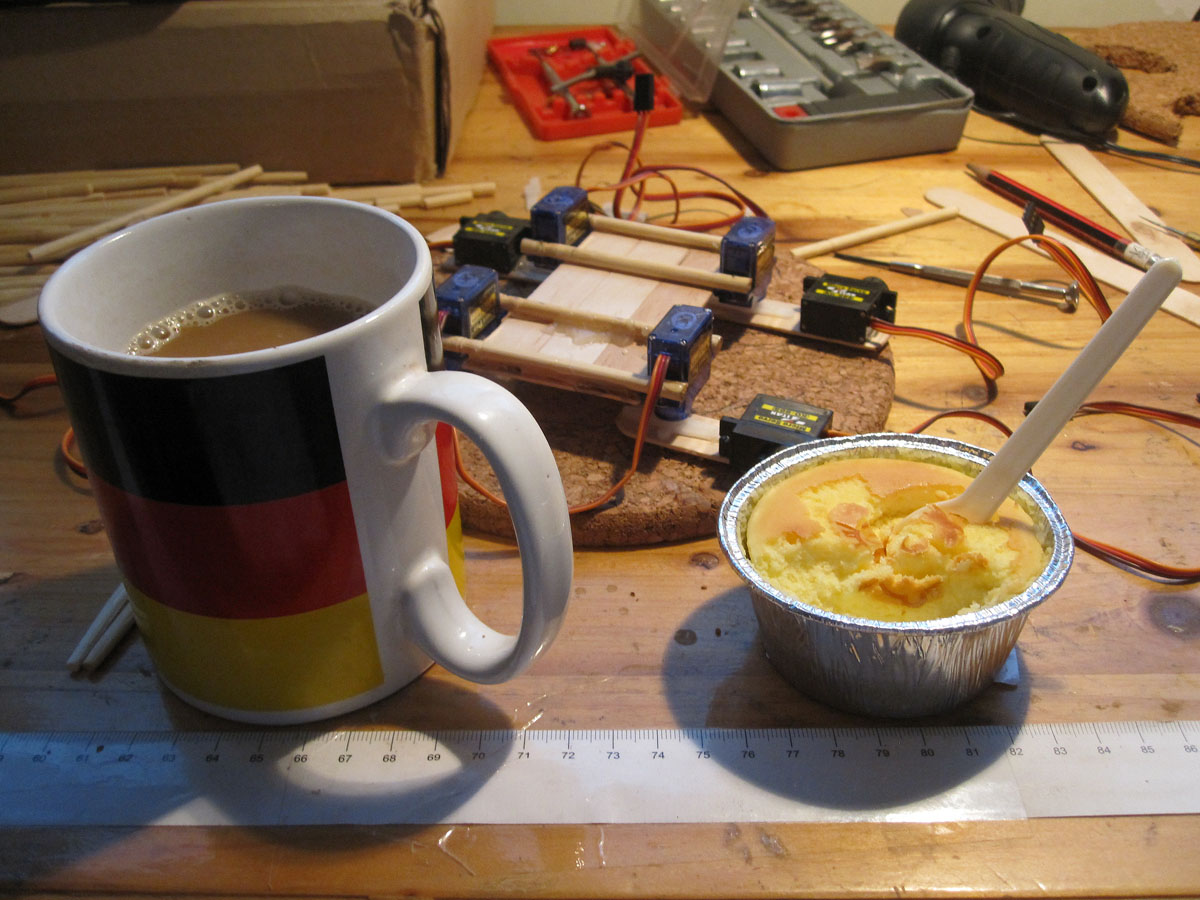
Well, now it was time to think...what better than a cup of coffee and a yummy cheese cake...i deserved it. (see this cup where the cheese cake is in? Could be used as a robot part as well...)
Now change of location....no pictures from there, the kitchen. Boiling water with some Polymorph inside to make the lower legs. After 20 minutes (yes i know, it could be done much faster and nicer looking...need to exercise this more ;-) )
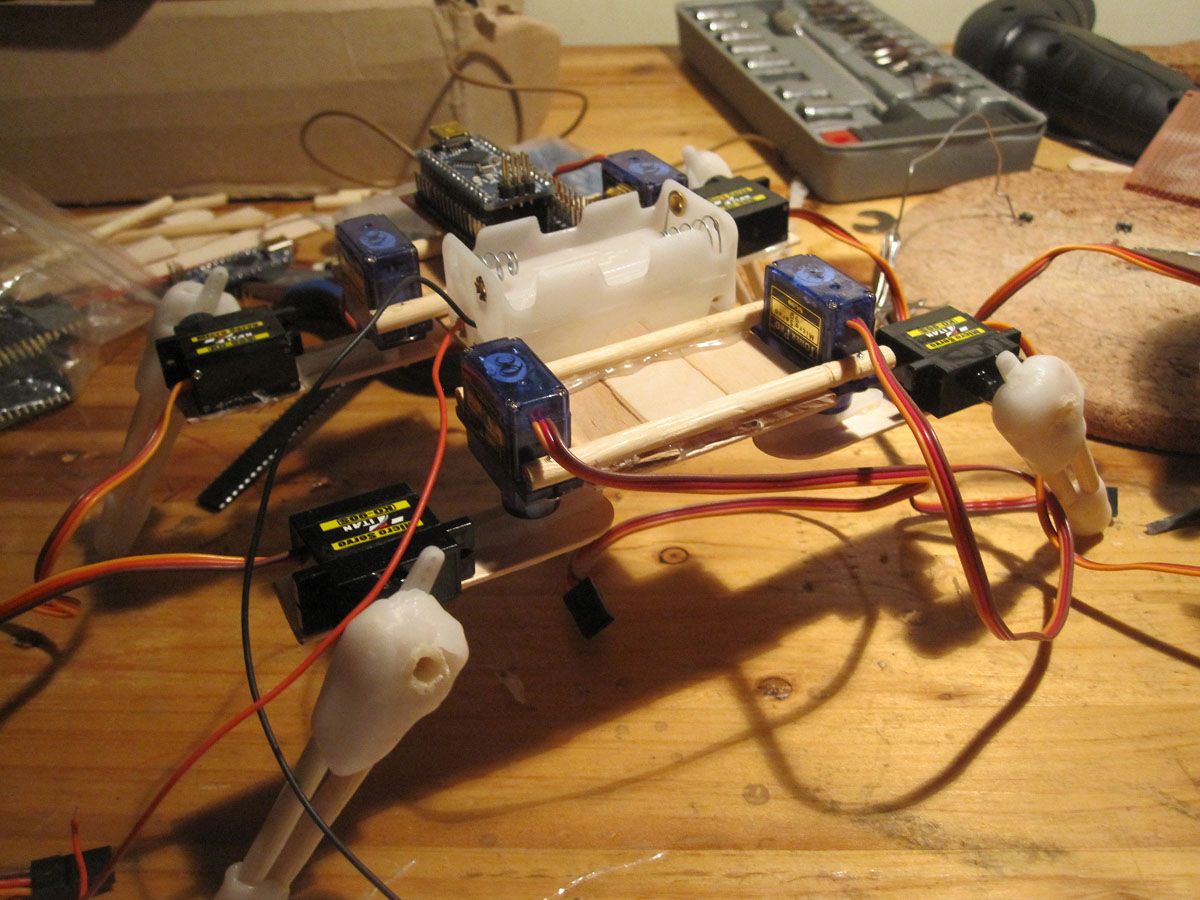
Now it's time to put the parts together. in the center of the base is the battery holder for 4x AA Eneloop, on the back the Arduino Nano (on a selfmade PCB for easy removing and servo connector attachment. This will be explained in a "Blog" post.) The cables are fixed with cable ties but the tangle is still present...later i need to fix this too...no i do not want to cut them...
Finally the lower legs are attached too. By drilling the holes into the upper part I had to discover that the Polymorph inside was still sticky after 30 minutes. So, if you're working with Polymorph, just give it the time needed to cooling down on the inside as well...
Right now I am upoloading the video but it failed 3 times after 90% :-( so please wait a bit.
UPDATE: Video is online....yeah...but the aspect ratio is wrong :-( damn...
The attached code is the first working attempt to get this guy walking and do some sample moves. It's weird written code without comments...i just atached it to complete the task ;-) Later when i make progress with the different walking pattern I will update the code continuously. After checking code from other LMR geeks I decided to write my own one because I want to understand how the things working. Later I will tweak the code to make nicer and better to read.
What to do next?
1. Program different walking pattern (turn left, right, go backwards, turn on the spot, sit down, stand up, run, walk slow, sleep)
2. Give it eyes (maybe infrared compound eyes) and other sensors like light sensor, sound sensor to achieve a independent behavior
3. Build a shell around to give it a peronal style
4. Special move
UPDATE November 12:
Programming the walking pattern done (so far). He is able to walk forward, turn left, turn right. Then he can standup from lying and lay down again...also doing a special move (see by yourself) I attached a new and more clean PDE file with some mor comments and a new video (also a video on Youku for my Chinese friends)
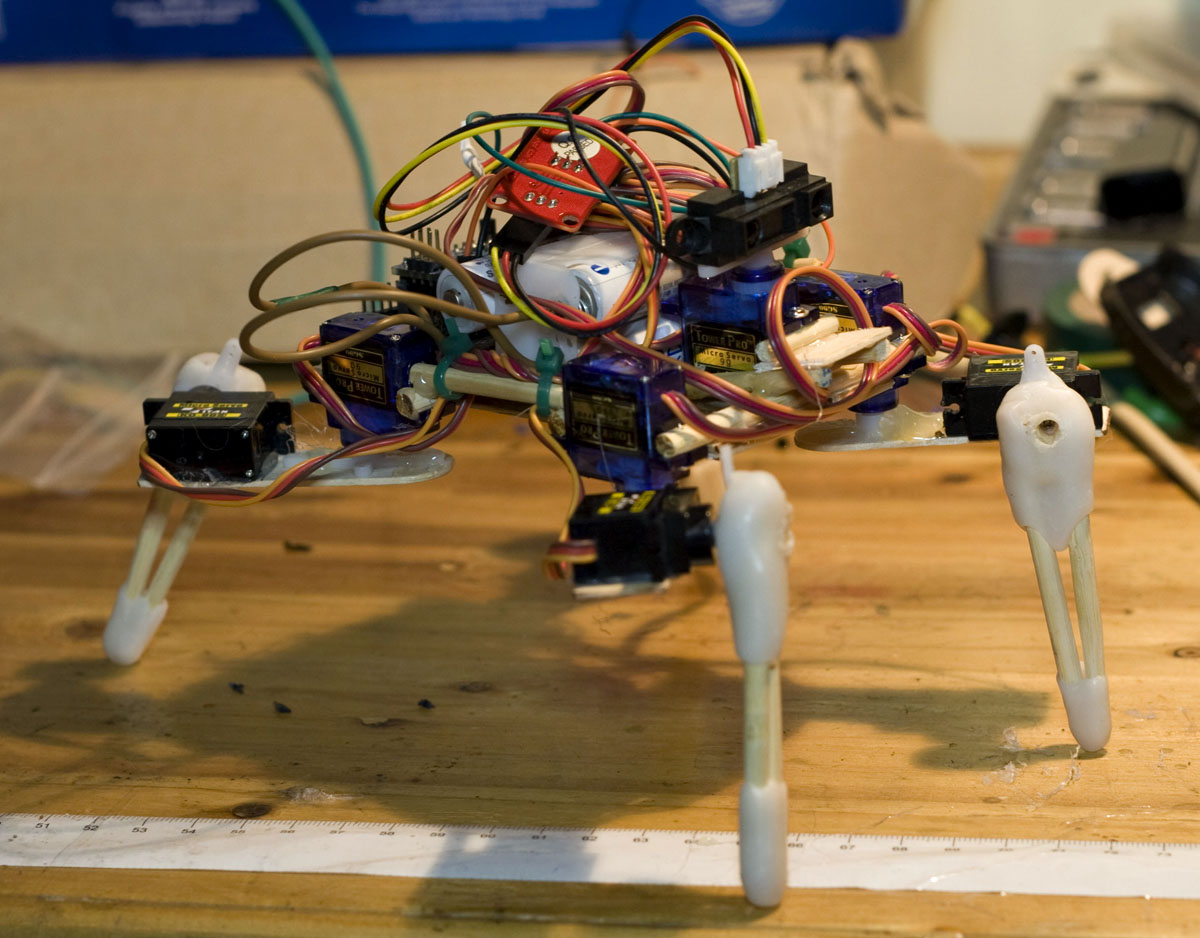
UPDATE November 16: Last night he got an infrered eye mounted on a servo. The programming was not finished since I also need to sleep ;-) As soon as there are results I will update the code, pictures and video.
UPDATE November 17:
After attaching the IR Sharp sensor I needed the code for the obstacle avoidance. I am not good in programming for the Sharp sensor but i do not want to put a ultrasound sensor on it. Anyway, he is seeing something now and not that helpless anymore ;-)
I also changed the walking pattern, now its lowering the opposite diagonal leg when lifting one leg. Not the walking sequence looks awesome funny....have t change this later again.
Summary:
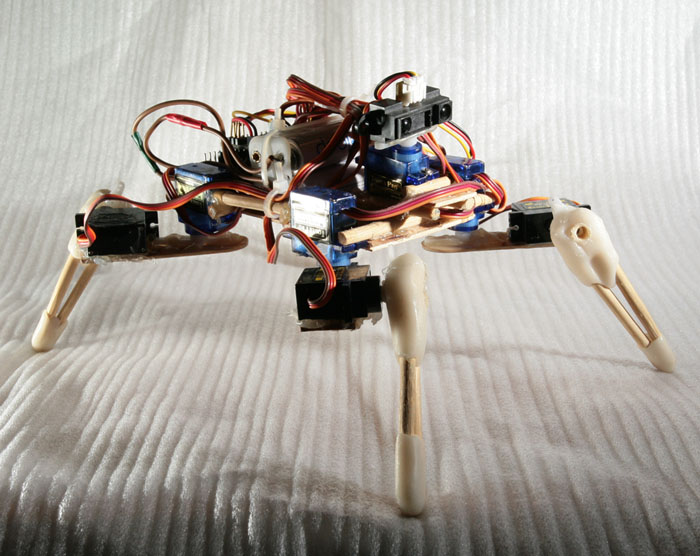
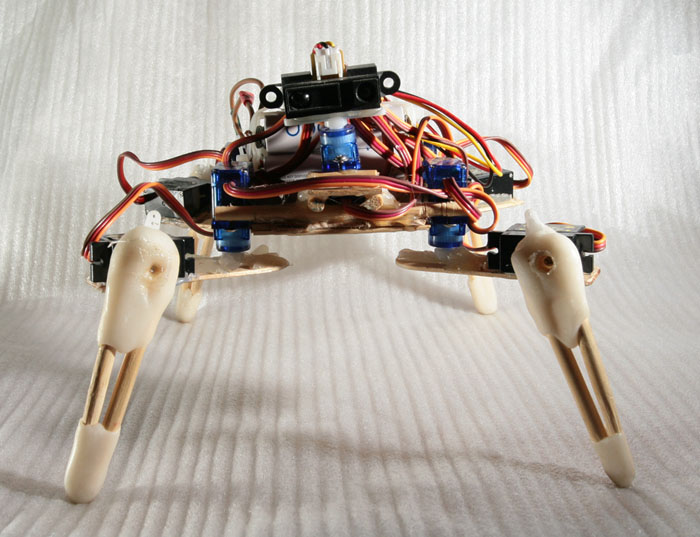
Cables, electronics, wooden bars and some plastic...this is Chopstick Junior
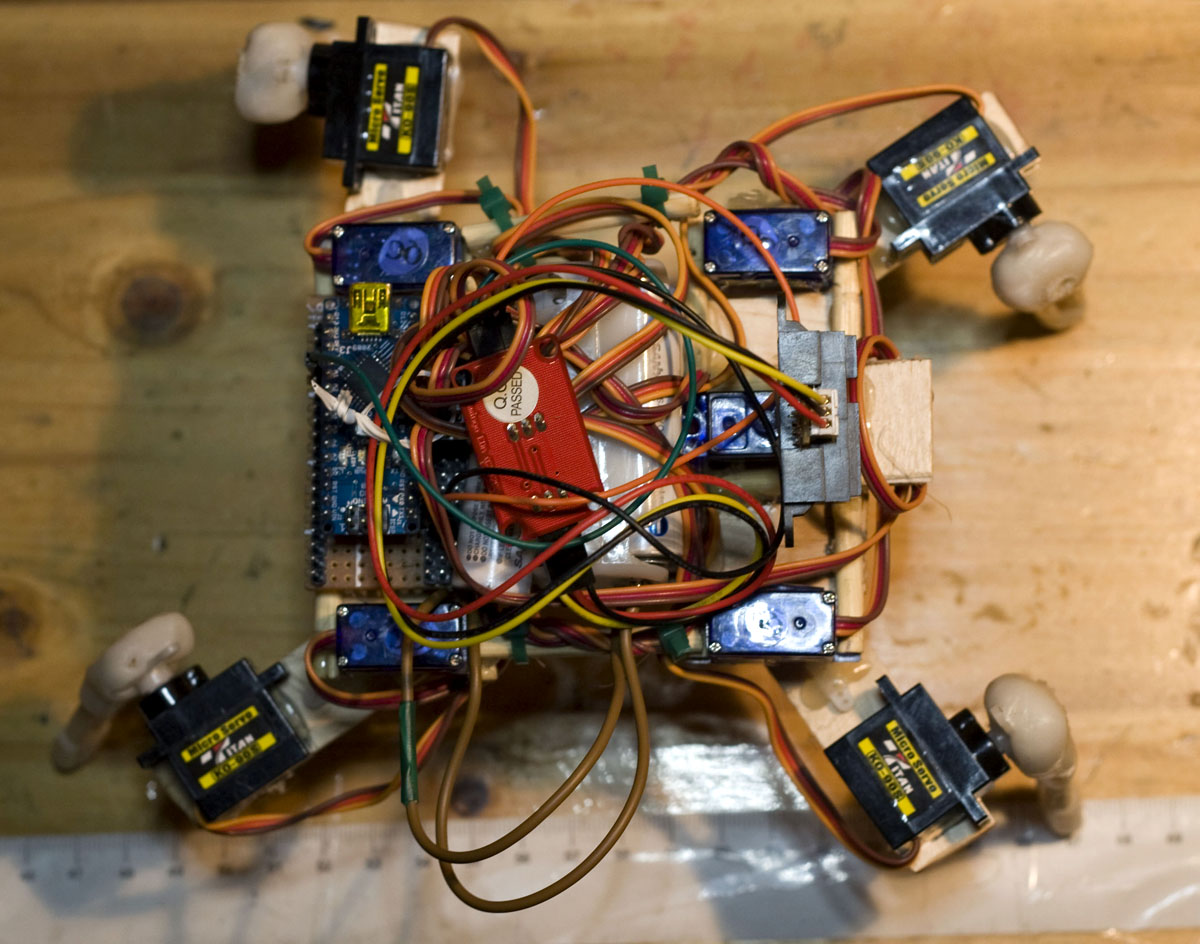
Top view. below you still can see the ruler sticked on my table...it's centimeter guys...NOT inch.
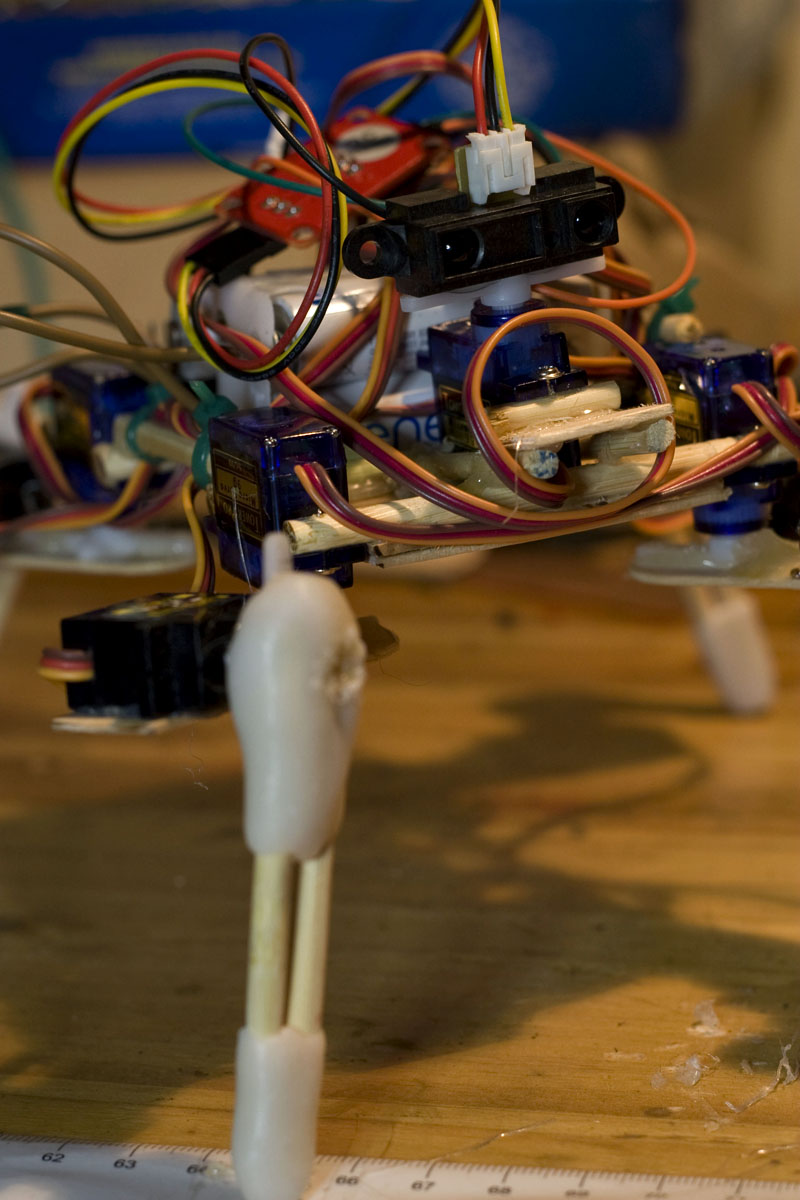
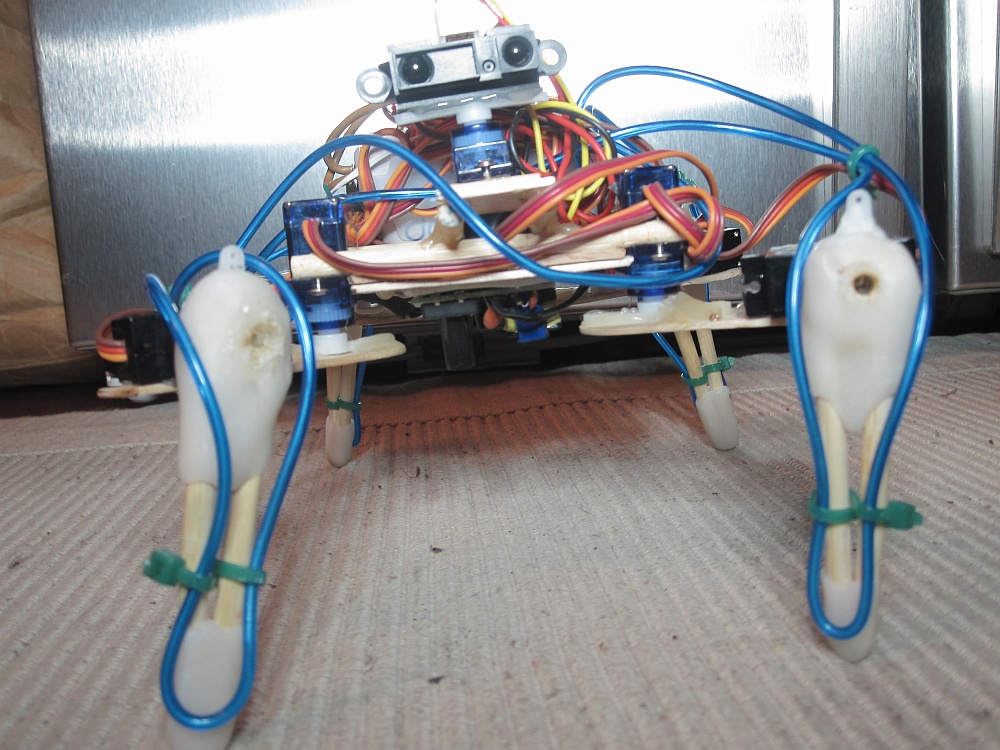
Details of the IR sensor. It's sitting on a servo but not intended to move it (yet)...
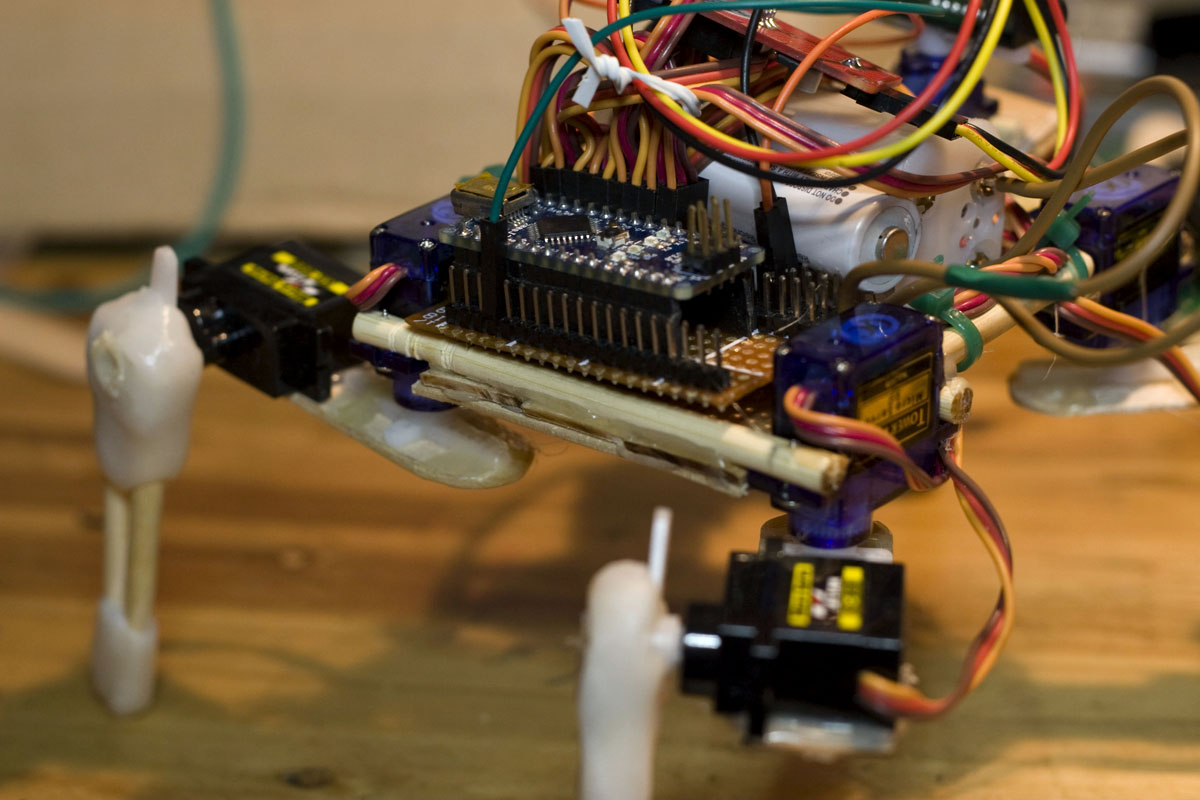
What a nice ass -) I had to move the MC to the rearside since the servo with the Sharp sensor is sitting in front now.
Todo next:
- Urgent -> install an ON/OFF switch... it's annoying always to pull the battery out of the holder :-( DONE
- improve the obstacle avoidance function inclusive the walking sequences
UPDATE November 18:
Soldered a switch on the board....much more convenient and captured a video. It' uploading now but freaking slow...
UPDATE 5.12.11:
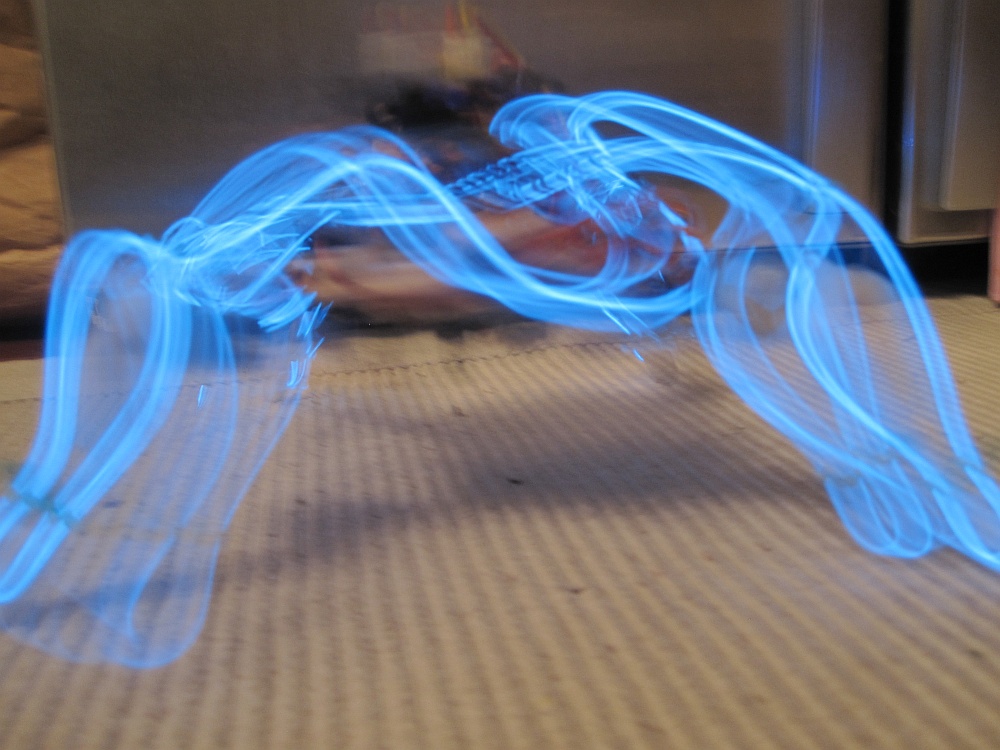
Uploaded 2 fun videos to Youku after i wired him up with a meter of blue EL wire. See him glowing in TRON style ;-)
UPDATE 6.12.11
Finally I got the upload to youtube done. after 4 failed attempts it's on air now. See what robots like this littel guy are capable of :-)
UPDATE 7.12.11
Chopstick is wired up and running with 130 Volts ;-) Haha, not really but the now attached EL wire needs 130 V power supply. Video is coming soon...
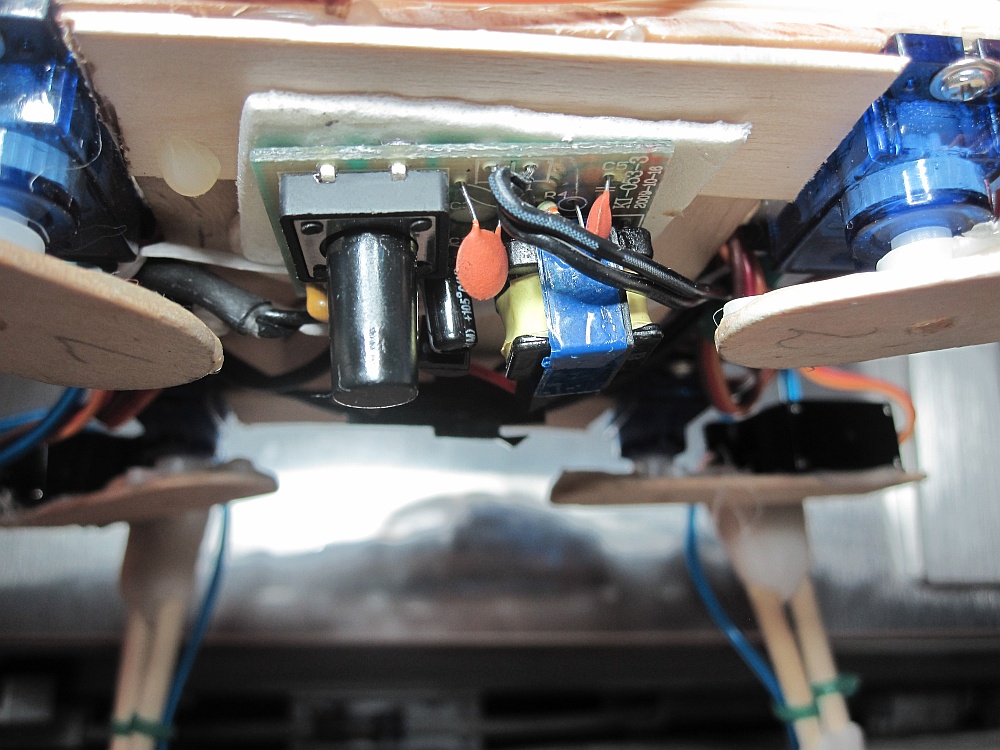
The power converter is sticked under the base...with double sided foam tape
And that is how it looks like when he is moving...ok, long exposure still picture....but looks cool ;-)
I consider Chopstick Junior as DONE now. It will still used as a test platform but there will be no news here anymore. If he gets a brother or even a sister then I will open another project page.
Thanks for watching this little guy...i am glad that he did perform so good....oh yeah, I will still improve te programming.
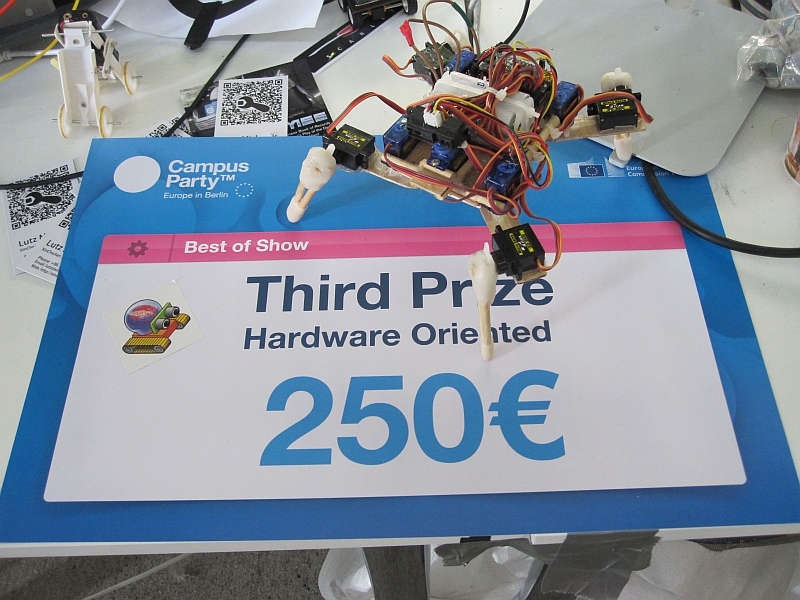
Finally Chopstick Junior will be retired now. After winning the 3rd price in the Campus Party Robot Competition it's time to step back for a while and just having some fun. Probably you will see Chopstick Junior as a model with models later.
Here some of the newest pictures of Chopsticks Junior before he go to the hall of fame :-)

Project DONE!!! (However, he might get a better programming when I find time to do that)
Model photo session with Chopstick Junior
walking straight forward, turn left & right, backwards. Avoiding obstacles with the Sharp IR sensor, beconing, laying down, getting up, glowing blue
- Actuators / output devices: 8 micro servos
- Control method: programmed gait, obstacle avoidance
- CPU: Atmega 168 (arduino nano)
- Operating system: Arduino IDE
- Power source: 4x AA Eneloop
- Programming language: Arduino ide
- Sensors / input devices: Sharp IR
- Target environment: indoors, Outdoors