


Chibot
Update 2/5/2014
Finished wiring (see attached schematic) and wrote test codes for the servo, ping and accelerometer.
I am still waiting for the 74LS04 and L293D chips to arrive. All express companies here do not work during Chinese New Year holiday.
The first video shows the stochastic learning automaton learning who the current U.S. president is. I also attached the code in case you want to play with it.
Initial post
Chibot - an acronym for child robot - is a little robotic platform I am just building for my upcoming weak AI experiments I have in mind. As a reminder: Weak AI is an artificial intelligence system which is not intended to match or exceed the capabilities of human beings.
I mainly want to extend my Variable Stochastic Learning algorithm as follows: if single actions do not lead to a success over a certain time, the robot is able to combine pre-defined actions randomly and apply them again to the environment. Let's say, two of the pre-defined actions are "Go back" and "Turn left", and none of them lead to a success over the time, a new randomly assembled action would be for instance "Go back-Turn left". With just a few pre-defined actions a very large number of possible permutations can be obtained, which leads to a very complex learning behavior of the robot.
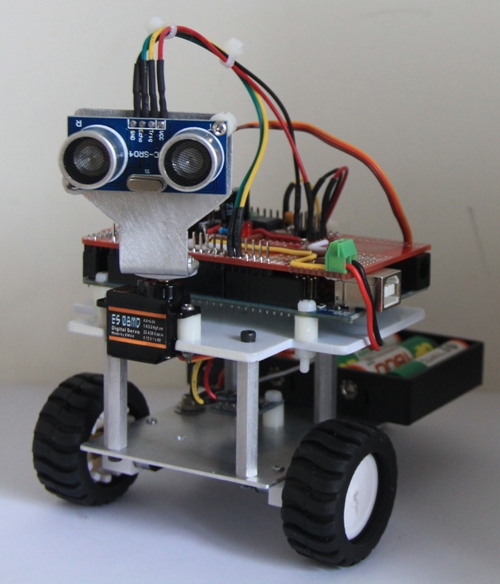
Chibot is currently equipped with two sensors. While the ultrasonic sensor just measuring the distance to objects, the ADXL335 accelerometer can be seen as a kind of pain receptor and responsible for the reward. If the robot bumps into objects or got stuck after an action was applied, a negative reward is given, else a positive reward will be send to the system.
I have mounted the Arduino Mega on top of the robot to be able to extend its functionality by adding different shields (like compass, SD card, RTC). This also has the advantage that the battery box is freely accessible and nothing needs to be disassembled before you can remove the batteries for re-charge.
The base plate is made from 2 mm aluminium sheet and the mounting plate for the board and servo from 3 mm ABS sheet:

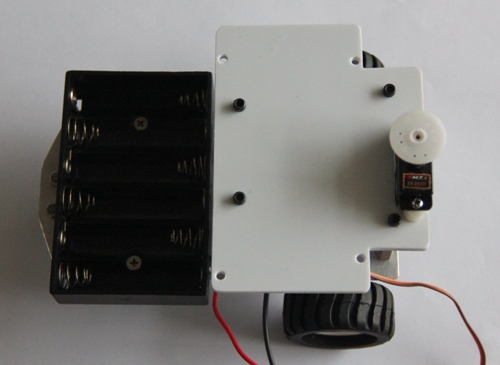
Base plate with assembled ball caster and mini gear motors:

Followed by battery box, on-off-switch, accelerometer and stand-offs for the deck:

Deck and servo mounted:
Home made sensor bracket with HC-SR04 and micro controller added:

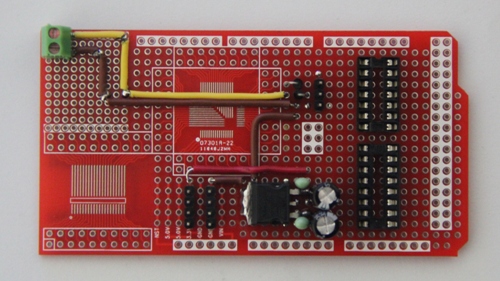
Basic shield (not finished), containing voltage regulator, voltage drop diodes for the servo, sockets for motor driver and inverter IC, pin headers for 5 V, GND and servo:
Little robotic platform for my AI experiments
- Actuators / output devices: 1 x micro servo (digital), 2 x mini gear motors 1:150
- Control method: Machine learning
- CPU: Ardunio Mega
- Operating system: Windows 7
- Power source: 6 x 1.2 V/1800 mAh NiMH cells
- Programming language: Arduino C
- Sensors / input devices: HC-SR04, accelerometer ADXL335
- Target environment: indoors