


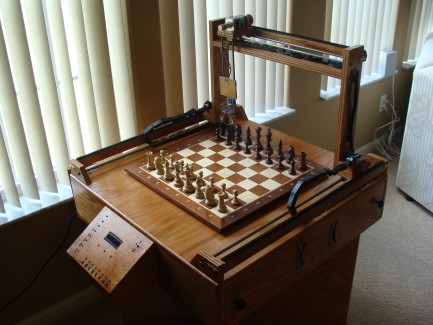
Chess Playing Robot V2
Here it is. Chess Robot V2. Version 1 had many problems that i tried to fix with V2. I also wanted this new one to be simpler than the other one. So then came the planning.
Well what was wrong with V1?
For starters V1 was a very low budget robot with regular motors and some encoders. It had a over complicated sensor array on the chess board to read your move. I never got this sensor array to work even with lots of help from others. So the first thing i knew i did not want on this robot was sensors on the board. Second thing wrong with the Version 1 was its cheap motors. I tried to use these motors in sync with the encoders, it actually was some what decent but at some times it was glitchy and inaccurate. So guess what, in V2 i scratched the encoders and i scratched using normal motors. When making version 2, i did salvage the PSU and Arduino Mega from version 1 to reuse on version 2.
How did this new design fix those problems?
The keypads on the new chess robot are used for moving pieces in 2 player mode and one player mode. I decided to have the robot move both players pieces. Not only is this cool, but it allows the robot to keep track of the pieces in one player mode so essentially by moving your piece, you are also letting the robot know where you are putting it. Well how does it know what piece it is? The pieces at the beginning of a chess game are always set up the same. So in the robot's code, there are multiple arrays that store where the pieces start off at. When you make a move, the robot converts that move into a pointer for the array and then finds what piece lies on that spot. It then can move that piece in the arrays based off of where you move your piece. It does the same for its own pieces. It has a different array for each kind of piece (ie., black rook array, white bishop array, black king array, etc.)
When it came to fixing the inaccuracies of the first version of the chess robot, i started to think about other ways of movement. The first that came to my mind was a CNC machine. CNC machines use stepper motors and a lead screw to move its multiple axis around. I kept the gantry crane design of chess robot V1 and used it on my new chess robot. This setup is much like a CNC machine. But instead of using a lead screw (i could not find any cheap lead screws anywhere), i decided to use a rack and pinion. This was purely because of price. I was able to find a cheap plastic rack and pinion, it was not easy though, it took me hours of searching google. But i was able to find them in the U.k. here, and shipping to the states was not all that bad either so i bought 8ft of the stuff.
With the original problems fixed, i had to figure out how to fix new ones.
The gantry has to have something to slide on. In my version 1 design, the gantry crane was mounted to common drawer slides. I did not want this for version 2 because i do not like the look of the drawer slide sticking out at one end of the robot. So what was i going to use. After multiple trips to the hardware store and multiple returns, i still did not have anything that was going to work. So again i went back to google. Well i found these things called linear bearings but they too were very expensive, about $20 a piece and i need at least 4. $80 for slides! That is ridiculous! Well talking to -Gary one night, he said he knew where to get cheap ones that would fit my budget. Thats when i was given this distributor. I was able to get those linear bearings that i needed for around $5.
Oh and what about the actual chess board?
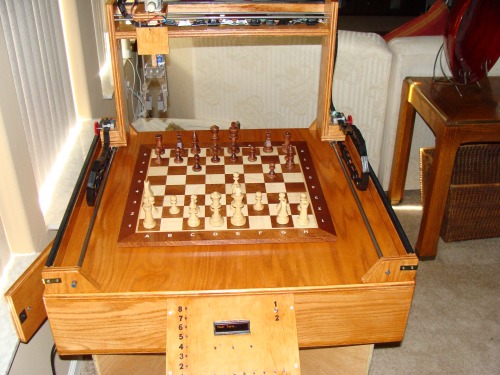
I did not have a good chess board laying around the house and i wanted one that would be as nice as the robot i had planned. The chess board needed to be larger than any one i had ever owned. It needed to be large so that the gripper did not have to have incredibly small fingers to pick up the pieces without knocking over the chess piece next to it. The chess board also needed to have the chess notation on it. The keypad has buttons that correspond to the chess notation on the side of the chess board. I wanted anyone to be able to read the chess notation on the board and simply push the button that had the corresponding letter or number for the piece they wanted to move. I choose to go with this chess board and these chess pieces.
Almost full part list:
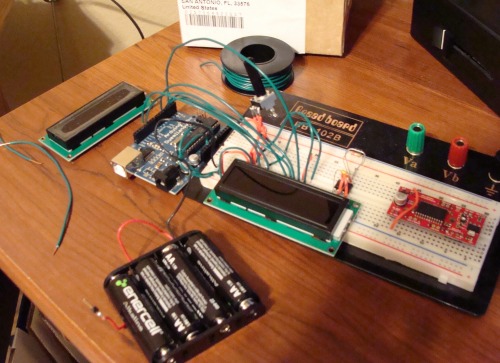
- Arduino mega
- PSU
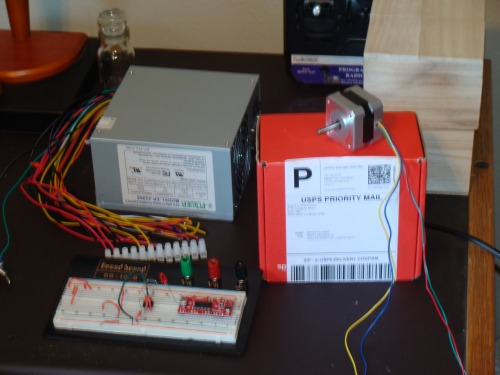
- 4 Stepper motors
- 4 Stepper motor drivers
- 2 Orange LCDs
- 38 Push buttons
- Standard MOD 1 Plastic Rack (part no: 4600-024) needed a lot of these
- 3 Standard MOD1 Plastic Gears (part no: 4600-112)
- Linear Bearings (4- 3/8" and 6- 1/4")
- Chess board and chess pieces above
- other misc. parts
How is one player mode programmed?
I did not know anything about chess programming when i started this project so this website was a big help. I am doing what they call lazy evaluation. My robot determines the best move based off of position look up tables. These position look up tables are used to give a value to a piece on a certain square of the chess board. These do things like give disadvantage to have knight on the edge of the board by making that spot worth a negative score. It also looks at piece value. If a possible move can kill a rook, then that move gets 500 points added to its score. Did he say "possible move"? Yes. None of this evaluating is done until the robot looks for all the possible moves a piece can make, it then evaluates what the move is worth. It will evaluate one move and then find whites highest scoring response to this move. It needs to find a move equal to or greater than whites highest response. One player code right now works but is by no means a challenge to beat. I will improve the code as time goes on. It will be something i can do when i am bored.
With most of it all figured out, it was time to build.
It is all made out of one sheet of interior grade plywood and all the pieces were stained and lacquered
This is the first picture of it that was taken. Of course all the pieces you see below were cut out of the plywood board, then glued and nailed and you are seeing it after 1 coat of stain and 2 coats of lacquer. I used this stain that was suppose to be a one step process, it had stain and lacquer in it. But that just ended up making some spots really bad and it was not even glossy like i wanted. So it ended up with some bad spots and i had to go over it with real lacquer. If i did this again, i would not buy all in one stain and lacquer. In the picture you will notice doors without the handles yet. There are 4 doors so i can easily access the inside to put all the electronics inside and fix anything if i have to. At this stage it looks like it might become a coffee table :).
I put a picture of the first stage of the chess robot v2 above but the real first thing that i ordered where stepper motors. There is a little story of how this robot actually gained funds to start. I entered my maze robot into the local science and engineering fair and would you believe i won a engineering award and $75. Not too long later, i am told that my plane made out of old computer parts won a $100 award in the recycled art show. I had $175 in my pocket so i did what any kid would do, and bought some stepper motors. After i acquired these, there was no turning back, i was going to make chess robot V2.
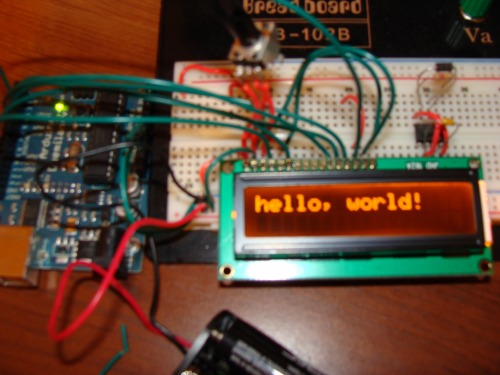
Next in my mailbox came the LCDs. I found these cheap ones on ebay and they had a funky orange back light so i bought them. I hooked them up and had the "hello, world!" code running in no time on my one of my Arduinos.
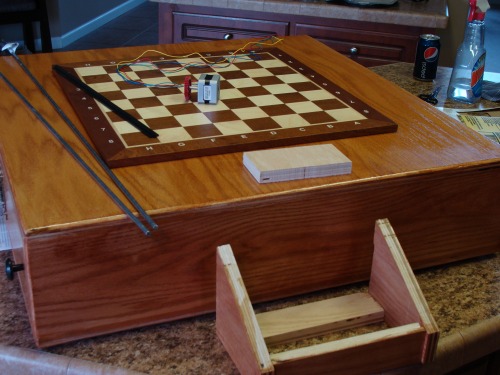
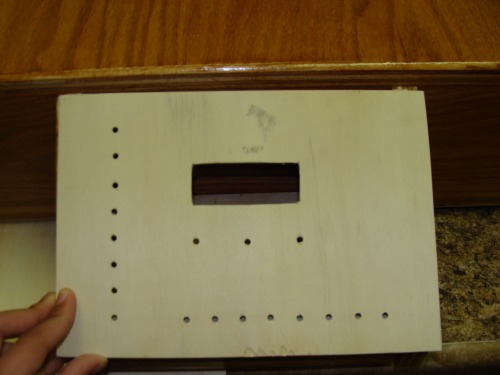
The chess board and pieces were next to come. Here you can see the chess board on the top of the robot. The robot's size was actually made around the chess board. Once i picked this board out, i just added a few inches on each side so i had room for the gantry's rail system to go. At the bottom of the picture is the makings of a keypad. Its just the angled piece that the keypad will be screwed on to, as you can see it is not mounted yet at this stage.
Later the keypads bases get mounted on with some brackets from the hardware store. Pieces to hole up the 3/8" rods are cut and drilled. You can see them mounted on the 4 corners of the robot. They are just angled for aesthetics. Also in this picture are the racks. They are lying on top of strips of wood that were cut to length. Later they will be glued and then mounted, but right now they are not.

You see those great linear bearings.
The last part to arrive was the buttons for the keypad. I didnt know they were so small when i ordered them. I ordered 40 of these buttons from ebay for like $4. But after a month they had not arrived. I emailed the seller asking them why they had not arrived yet and thier reply was something along the lines of "OMG really? I will send more right away." Well eventually i got them. The keypad was cut out of thinner plywood and then i had to mark were all the buttons went and the LCD so the holes could be drilled.

Didnt turn out too bad. With some sanding and wood putty it could work.
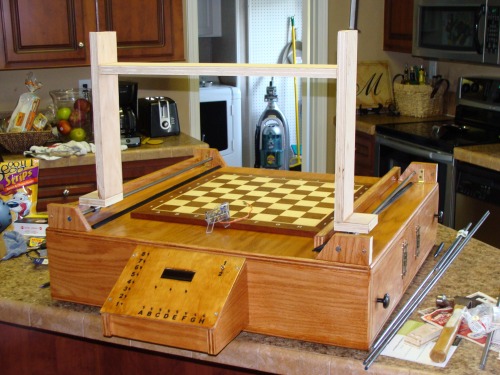
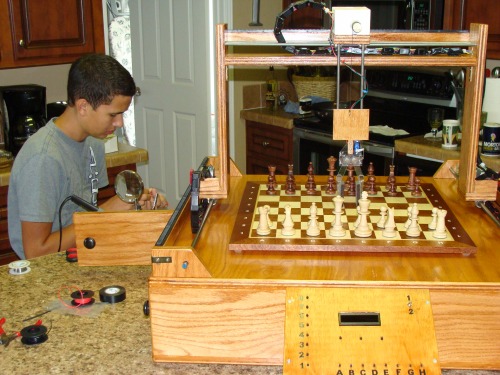
Finally it was time to start the gantry. It was cut out of the same wood as everything else. The verticals of the gantry were cut tall enough to leave room for holes to be drilled for the 1/4" rods that the top axis would slide on. You can now see the first images of the gripper. The gripper was donated to me by -Gary. Thanks again Gary.
Here is one of the finished keypads. Remember there are two keypads, one on each side. I went down to the craft store and bought stickers to put next to the buttons that correspond with the notation on the keypads. This is player one's keypad, the only difference between this one and player two's keypad is that this one has a switched i the top right for choosing between one and two player mode.
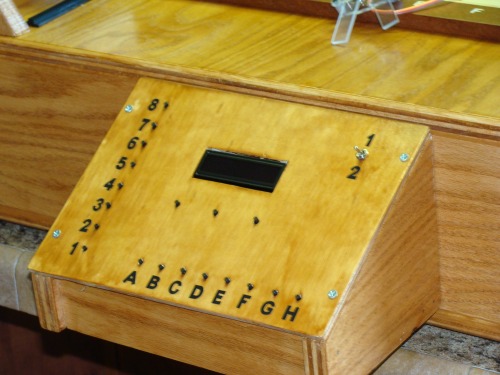
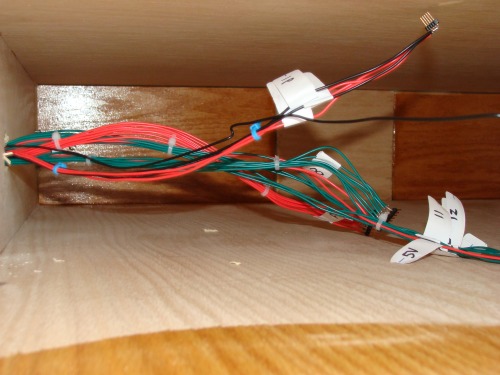
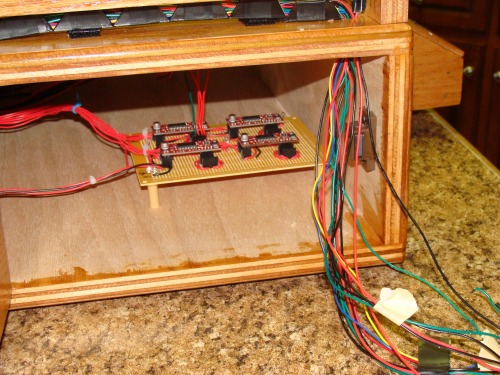
The wires for the keypad go inside the robot through a hole drilled behind the keypad. There are a group of wires for the row of buttons, for the column of buttons, and for the LCD. The two keypads buttons will be wired in parallel. So each keypad has the ability to control the robot and this cuts down on the number of needed inputs. I made a simple board where one keypad plugs into one side and the other plugs into the other side. The connectors are wired together and out of the board comes one bundle of cables and then the cables are plugged into the arduino as inputs. There are no pull up resistors, i just used the arduino's internal ones.
I went back to testing the rest of the stepper motors.

Below was the first test of the stepper motors moving the chess robot's gantry. The motors were not mounted yet so i just taped them on while testing. The test went well and everything worked as planned.
Finally that rack i talked about early is now glued onto the strip of wood and is mounted to the robot with some more brackets from the hardware store.

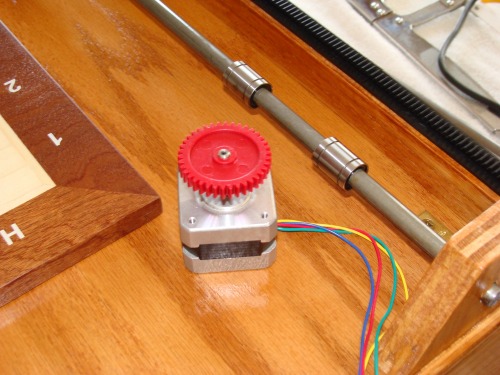
The stepper motors on each side were mounted with a strap going over them which was screwed onto 2 pieces of wood that sandwiched the motor.
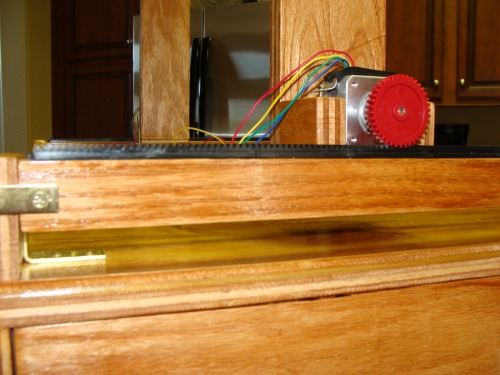
Now this is a big leap in progress below. The top axis is own. Basically the top is a block of wood with 4 linear bearings on it, i probably could have just used 2 linear bearings on top and it would have worked just as well. There are 2 Motors on top, one for move the axis back and forth and one for lowering the gripper. The gripper is raised an lowered with a string (this was another idea taken from my first chess robot) on a spool. I used 40yr old braided fishing string. The gripper is guided by 2- 1/4" rods and it slides on them with 2- 1/4" linear bearings. Also i made my own cable carrier because they were expensive to buy. I found this site where many different CNC builders explain how to make your own. I used some plastic channel i found at the hardware store for $1 and tape to make mine. Below is a picture of me soldering connectors onto the end of the motor wires so that they can plug into my motor driver board.
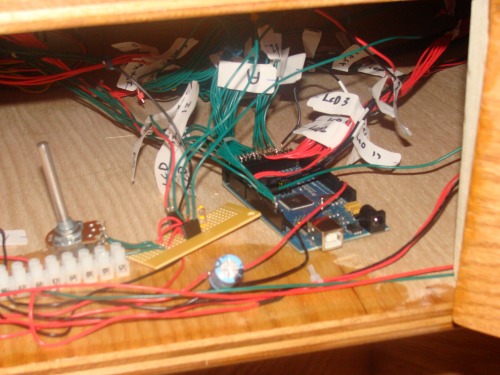
My motor driver board was just a board from radio shack that i used to solder connectors and distribute power to all the boards. I wanted the motor drivers i bought to be removable so if one went bad, i could easily replace it. So i used female headers and male headers to make plugs. I also put 3 blue LEDs on the board to make the inside light up.
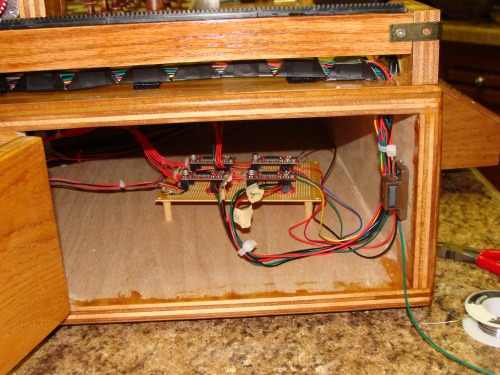
Here is the arduino mega and to the side of it is a little board that adjusts the contrast of the LCDs. It kind of looks like a mess but all the wires are labeled so it is well managed.
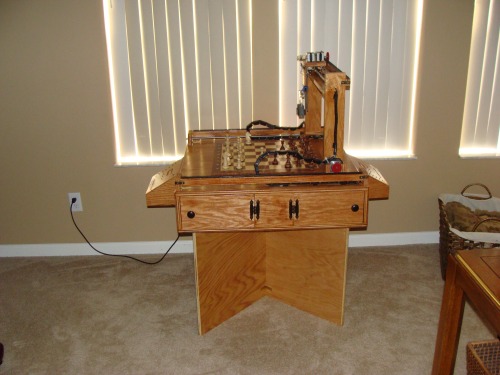
I even had enough wood left over to make a stand for it
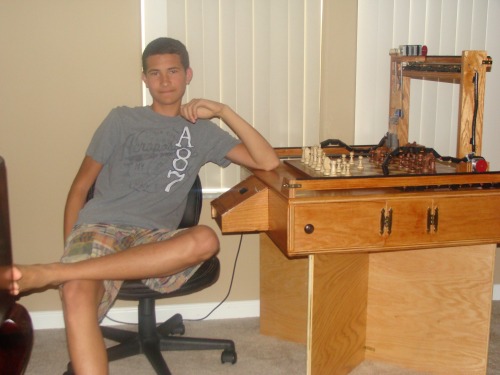
There you have it folks. Watch the video if you want to see it in action.
UPDATE 9.19.10
As you may know, the chess robot now as the capability to be controlled via Ustream. I have a post on the how it is controlled here. That blog will keep track of any updates on the way the robot is controlled via ustream or any new features for internet control. You can also see that blog for a video on my setup. Thanks to rik for giving me some lessons in Perl programming and providing his code for his Darwin Bot, i was able to also make my own code in Perl. The Perl script reads the ustream IRC channel which allows me to be able to break apart users names and messages. Once a message is received, the code will look to see if it has the word "move" at the end of that message, if it does, then it checks to see if that is a verified player (there can only be upto 5 verified players at once right now). Lastly if this person is verified, it checks to see if there move is going to put a piece on top of another, if this is about to happen then it simply ignores the move. Inorder to do that, it has to keep track of where the pieces are in a array and update that array with every move.
Once a move is good and verified, the perl script sends it out a usb port which i have a FTDI cable and Xbee connected to. The message is sent wirelessly over the Xbee to the chess robot which also contains a xbee. The message is then stored and decode by the chess robot which will then make the appropriate move.
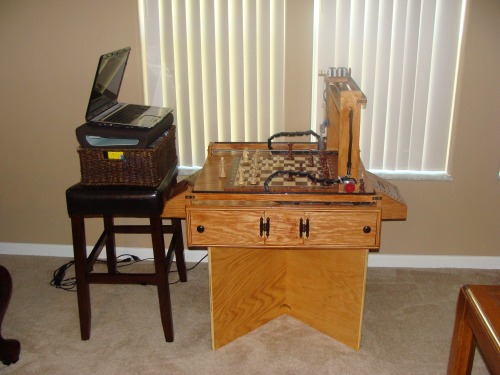
Im doing this wirelessly because i wrote this perl script on my nice computer and do not want to have it by the chess robot inorder for people to play. So instead my Mac runs the perl script while my laptop, which is infront of the chess robot, broadcasts the video over ustream.
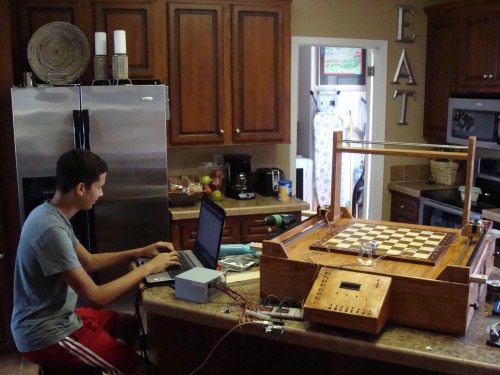
For a Few days this was the setup when programming and testing the new "internet mode"
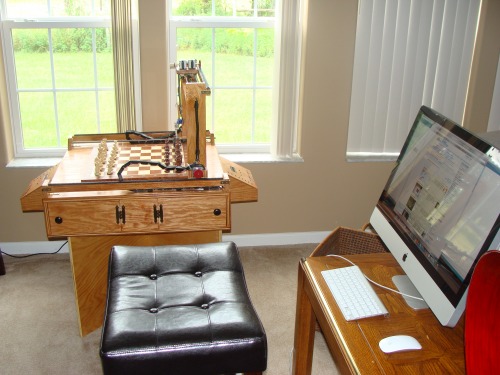
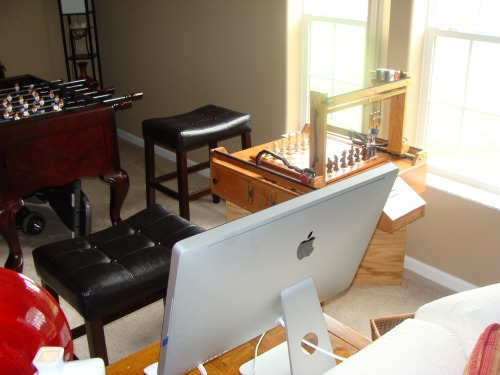
When its live, this is how the setup near the chess robot is:
Thats all the news on the new "internet mode". The chess robot now has 3 modes all in the same code, it just matters which switch is which way or what button you push to determine what mode to play in. I have had more progress on 1 player mode, the latest code update was fixing the piece removing routine in 1 player mode, so now the robot can perfectly remove pieces when playing against a human in 1 player mode. There are a few more glitches to work out but over all, 1 player mode clearly demonstrates the rules and basic strategy of chess.
Update 02.20.11
There is some new internet control stuff over in my blog https://www.robotshop.com/letsmakerobots/node/22561 Check out the second video over there to see what I added. The code for the internet control is updated also, but is on this page you are on right now. I went and took lots of pictures of the chess robot because I realized i never took that many pictures of it when i finished making it, that or they were taken badly. So this is mainly a picture update. Here they are:
2 player and 1 player chess playing
- CPU: Arduino Mega
- Power source: PSU
- Sensors / input devices: keypad with buttons